118
To set the wipe pattern for a key wipe pattern key
Press the [Pattern Select] button and open the Home >
M/E-1 > Key1 > Transition > Wipe menu (11101.52).
Select a pattern and set modifiers.
For details, see “Setting an Independent Key Transition
Wipe” (page 158).
The direction and soft edge cannot be set in a key wipe
p
attern key.
Setting clean mode
In the following situations, clean mode cannot be
enabled.
• When the key type is a chroma key or key wipe pattern
key
• When key invert is enabled
• When key position is enabled
• When key fill is a color matte
• When key edge is an outline
• When key edge is normal and soft edge is enabled
• When fine key is enabled
1
Open the Home > M/E-1 > Key1 > Type > Type
Select menu (11101.11).
2
Enable/disable using the [Clean Mode] button.
On: Enabl
e clean mode.
Off:
Disable clean mode.
Inverting the key signal
1
Open the Home > M/E-1 > Key1 > Type > Type
Select menu (11101.11).
2
Set key inversion using the [Key Invert] button.
On: Inv
ert the key signal.
Off:
Do not invert the key signal.
Setting the key position
1
Open the Home > M/E-1 > Key1 > Type > Type
Select menu (11101.11).
2
Set the [Key Position] button to the on state and set
the following parameters.
To keep the position of the key signal unchanged, set
the
[Key Position] button to the off state.
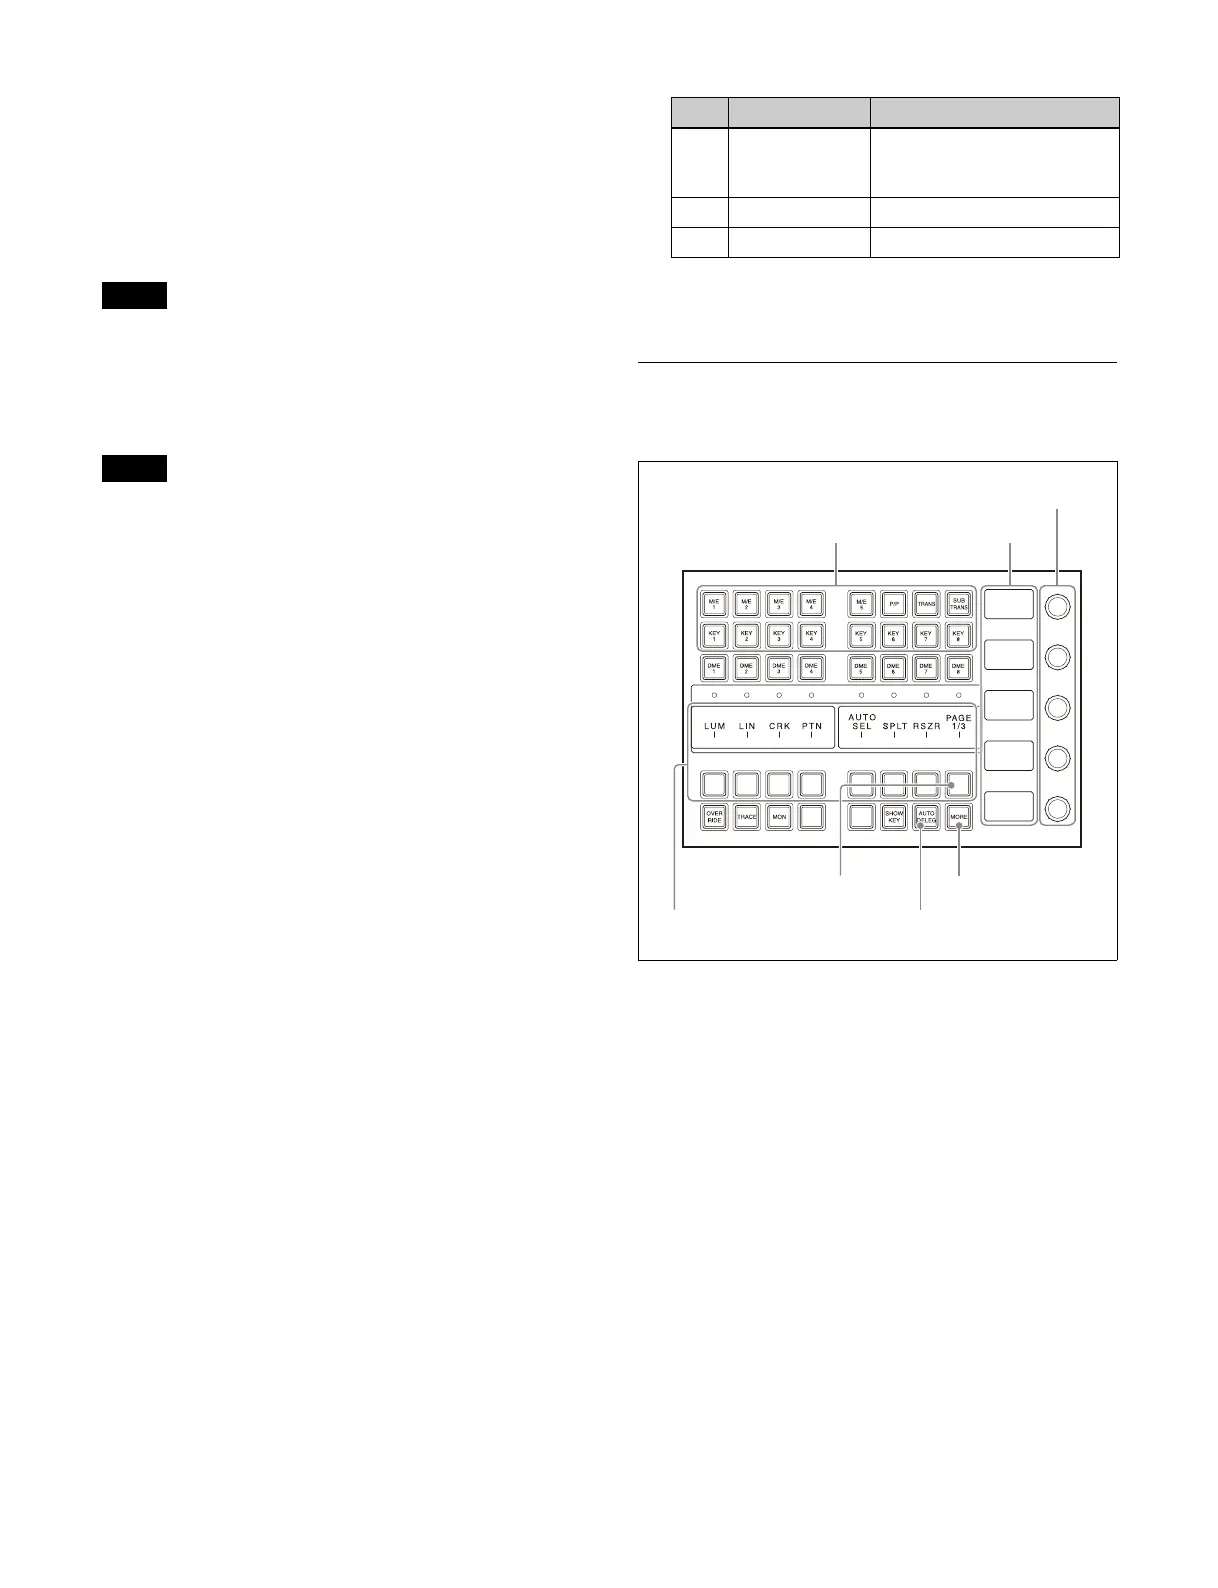
Setting the Key Type (Key Control
Block)
To set a key in the key control block, select the target
switcher bank and key to operate using the delegation
buttons.
The key type selection buttons, key fill/key source
selection
buttons, key modifier setting buttons, and
chroma key setting buttons used for operation are
assigned to the setting buttons. You can check which
functions are configured for the buttons in the setting
button display area.
Setting buttons for different fu
nctions are assigned to
three pages (1/3, 2/3, 3/3), where you can switch the page
by pressing the page selection button.
Setting parameters
If a selected function has setu
p parameters, the name and
value of the items appear on the display.
The parameter settings are configured using five
adjustment
knobs (numbered 1 to 5 from the top). If there
are six or more parameters, the [MORE] button is lit
amber. When the [MORE] button is pressed, turning it on
Note
Note
No. Parameter Adjustment
1 H Phase Simultaneous adjustment of
po
sition of key left and right
edges
2 Left Position of key left edge
3 Right Position of key right edge
Delegation buttons
MORE button
Adjustment knobs
Display
Setting buttons AUTO DELEG button
Page selection button
 Loading...


