175
Setting a Clip Transition
1
Open the Home > M/E-1 > Bus/Transition >
Transition > Clip Transition menu (11109.22).
2
Press the [FM1/FM2 Recall] button.
The Home > Frame Memory > FM1/FM2 > Clip/Still
>
Recall menu (13101.11) appears.
Select content for use in a clip transition and recall it
on
a frame memory output channel.
For details, see “Recalling Video” (page 184).
3
Return to the Home > M/E-1 > Bus/Transition >
Transition > Clip Transition menu (11109.22).
4
Press the [Linear Key Adjust] button and set a clip
transition key using the following parameters.
5
Press the [Background Transition] button and select a
background transition type from the pull-down list.
Mix: Mi
x
NAM: No
n-additive mix
Super Mix: Super mix
Preset Color Mix:
Preset color mix
Wipe: Wipe
DME Wipe: DM
E wipe
When [Super Mix] is selected,
press the [Super Mix]
button and set the parameters.
For details, see “Setting Super Mix” (page 99).
When [Preset Color Mi
x] is selected, press the [Preset
Color Mix] button and set the parameters.
For details, see “Setting a Preset Color Mix”
(page 99).
When [Wipe] is selected,
press the [Wipe>Main
Pattern] button to open the Home > M/E-1 > Bus/
Transition > Wipe > Main Pattern menu (11109.31)
and select a wipe pattern.
For details, see “Setting a Wipe” (page 149).
When [DME Wipe] is selec
ted, press the [DME
Wipe>1ch Pattern] button to open the Home >
M/E-1 > Bus/Transition > DME Wipe > 1ch Pattern
me
nu (11109.41) and select a DME wipe pattern.
To use a DME wipe pattern in 2-channel mode, open
th
e Home > M/E-1 > Bus/Transition > DME Wipe >
2ch Pattern menu (11109.42) and select a DME wipe
pattern. To use a DME wipe pattern in 3-channel
mode, open the Home > M/E-1 > Bus/Transition >
DME Wipe > 3ch Pattern menu (11109.43) and select
a DME wipe pattern.
For details, see “Setting a DME Wipe” (page 166).
6
In the [Background Transition Timing] group, set the
start position and stop position of the background
transition.
To set the start position
Set using any of the following methods.
• Move the fader lever to the start position and press
the [Set Start] button.
• Press the button on the right side of the [Set Start]
bu
tton and enter a start position in the numeric
keypad window (number of frames).
To set the stop position
Set using any of the following methods.
• Move the fader lever to the stop position and press
th
e [Set Stop] button.
• Press the button on the right side of the [Set Stop]
bu
tton and enter a stop position in the numeric
keypad window (number of frames).
To reset the start position and stop position
Press the [Reset Timing] button.
7
In the [Background Transition Direction] group, set
the transition direction of the background transition.
Normal: Normal
Normal/Reverse: No
rmal/reverse
Reverse: Re
verse
This can be configured only when a wipe or DME
wi
pe is selected as the background transition type.
8
In the [FM Timing] group, set the start position and
stop position of the frame memory video.
To set the start position
Set using any of the following methods.
• Move the fader lever to the start position and press
the [Set
Start] button.
• Press the button on the right side of the [Set Start]
bu
tton and enter a start position in the numeric
keypad window (number of frames).
To set the stop position
Set using any of the following methods.
• Move the fader lever to the stop position and press
the [Set Stop] button.
• Press the button on the right side of the [Set Stop]
bu
tton and enter a stop position in the numeric
keypad window (number of frames).
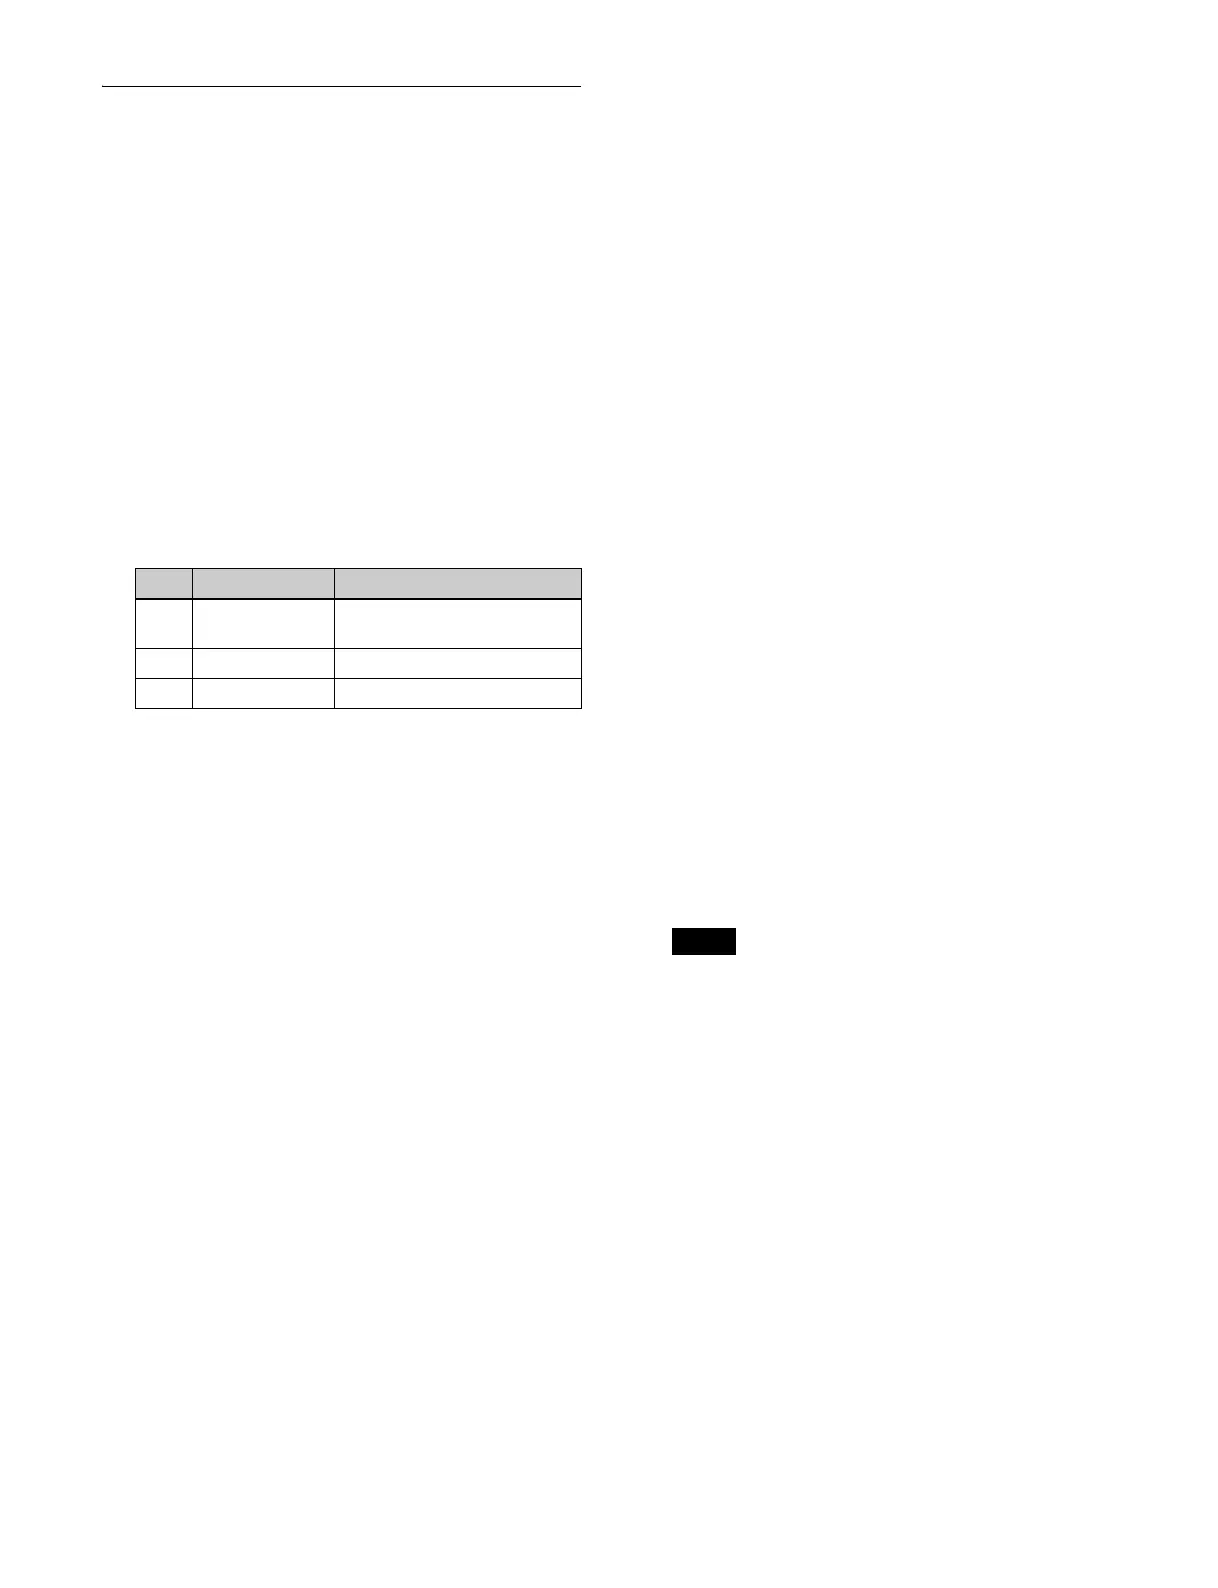
No. Parameter Adjustment
1 Clip Reference level for key signal
g
eneration
2 Gain Key gain
3 Density Key density
Note