Live View Introduction
DVR User Manual
25
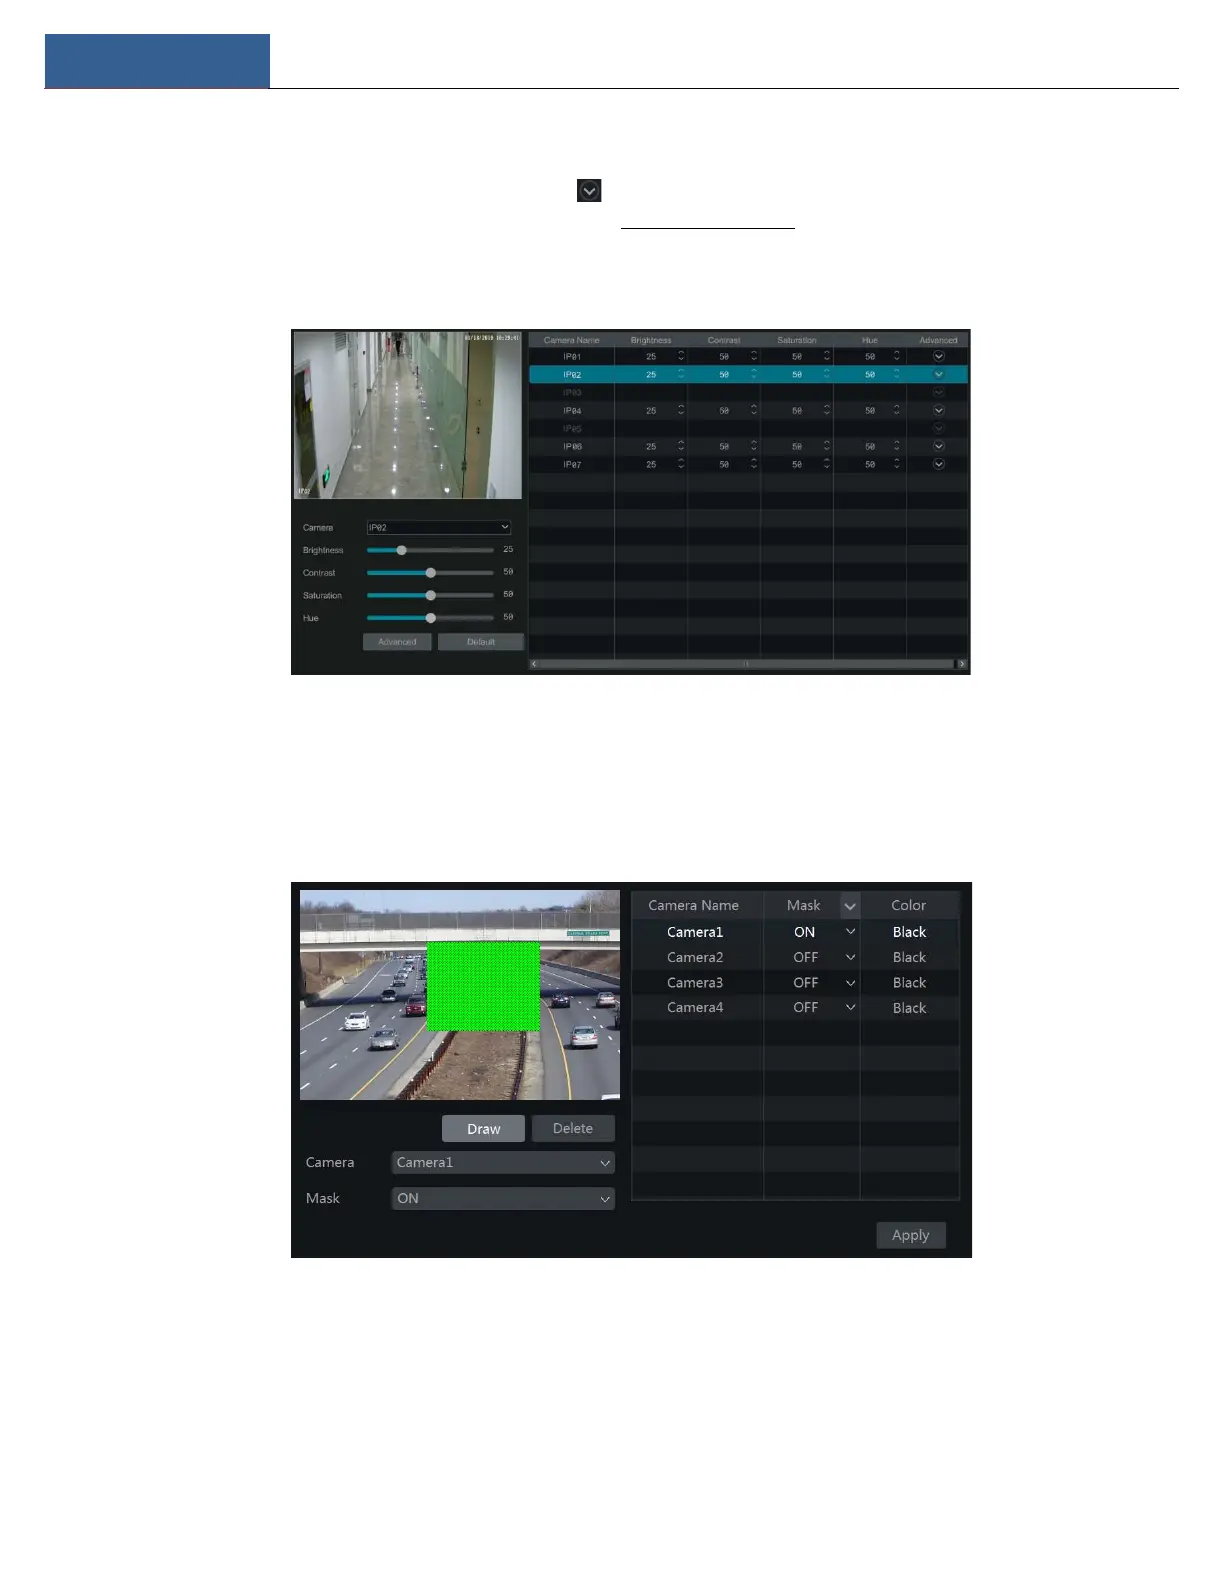
5.3.2 Image Settings
Click StartSettingsCameraImageImage Settings to go to the following interface. Select the camera and then set the brightness, contrast,
saturation, and hue of the camera. Click “Advanced” button or in the camera list on the right side of the interface to pop up the “Image
Adjust” interface and then set the relevant setting items. Please refer to 5.4.5 Image Adjustment for detailed introductions of these items.
You can click “Default” to restore the image settings to the default factory settings.
5.3.3 Mask Settings
Some areas of the image can be masked for privacy. Up to four mask areas can be set for each camera. Click
StartSettingsCameraImageMask Settings to go to the interface as shown below. Select the camera and enable the mask. Click “Draw”
button and then drag the mouse on the image area to set the mask area; click “Delete” button to delete the mask areas; click “Apply” to save the
settings.
5.3.4 Water Mark Settings
Click StartSettingsCameraImageWater Mark Settings to go to the interface as shown below. Select the camera and enable water mark and
then enter the water mark information. Click “Apply” to save the settings.