EZ Setup & Main Interface
DVR User Manual
12
camera. You can click “Test” to test the effectiveness of the inputted information. Click “OK” to save the settings. You can change the IP camera
name only when the added camera is online. Click “Next” to continue.
⑤ Disk Settings. You can view the disk number, disk capacity of the DVR and serial number, R&W status of the disk. Click “Formatting” to format
the disk. Click “Next” to continue.
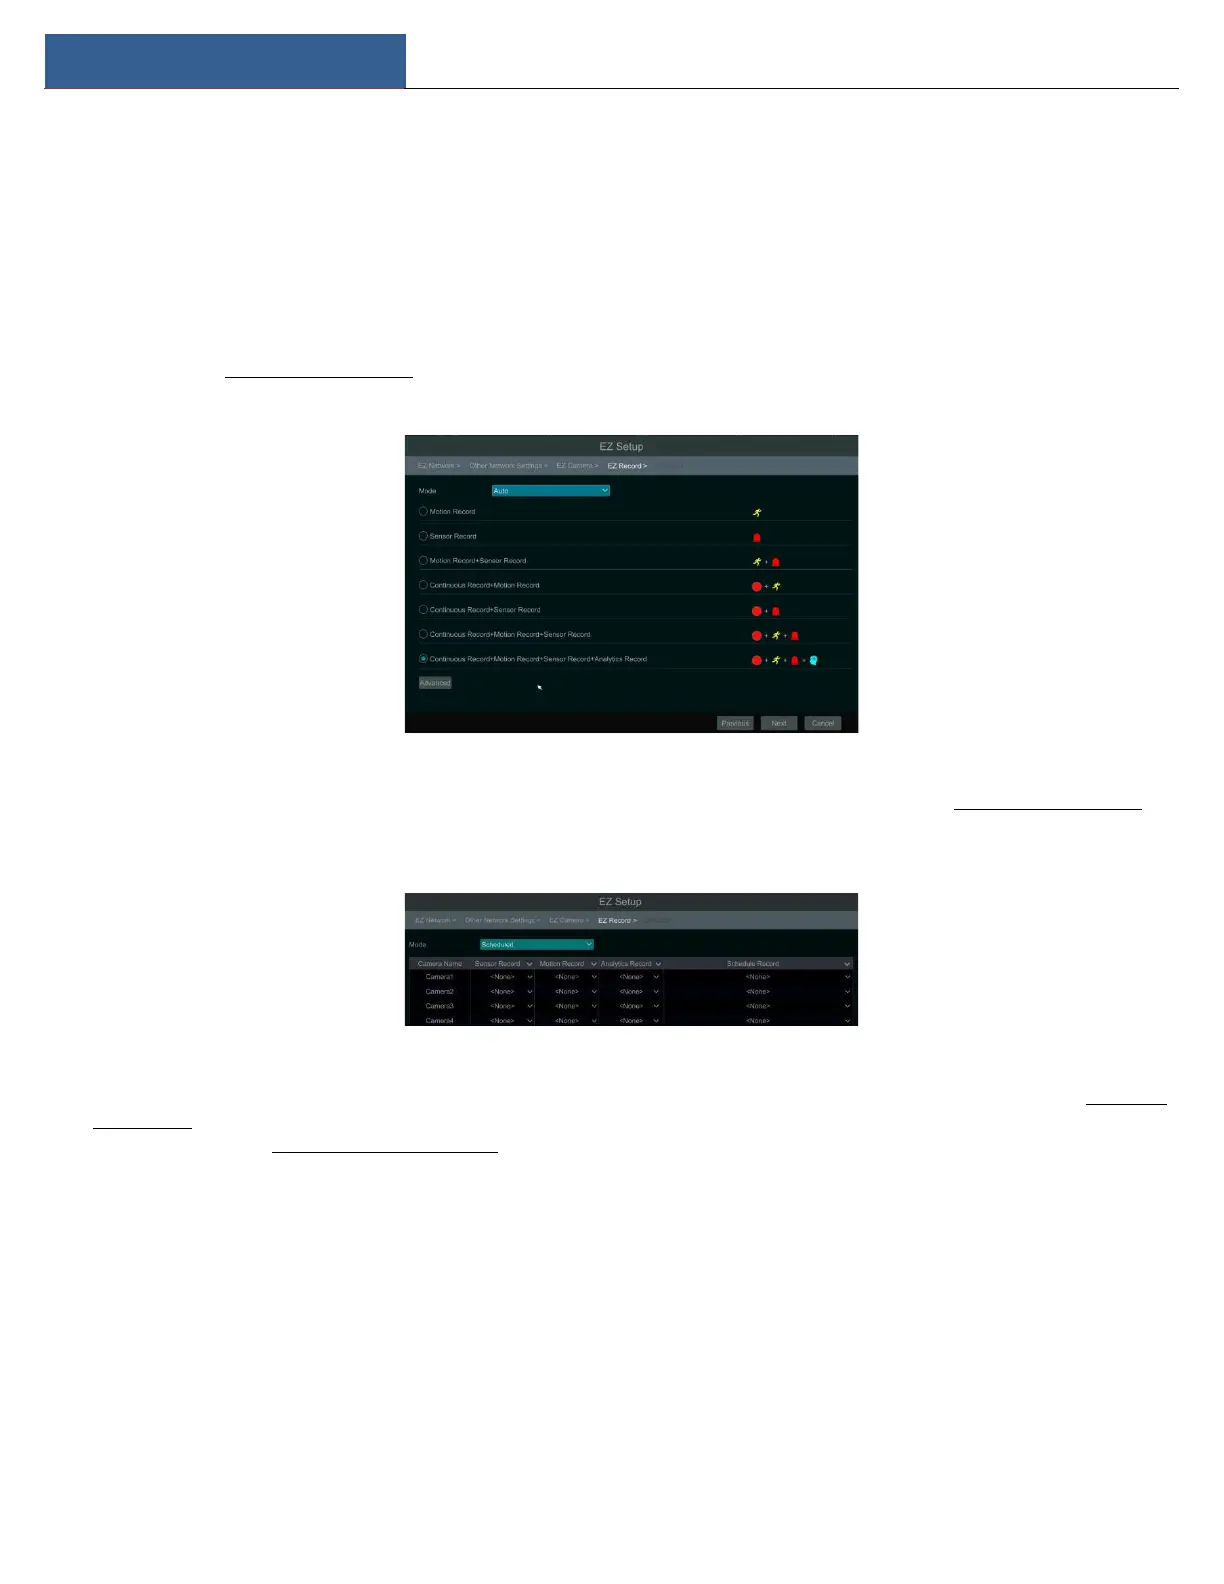
⑥ Record Settings. Two record modes are available: auto and scheduled.
Auto: Select one auto mode in the interface as shown below and then click “Next” button to save the settings. Click “Advanced” to self-define
record mode. See 7.1.1 Mode Configuration for details.
Scheduled: Set the “Sensor Record”, “Motion Record” and “Schedule Record” of each camera. Click “OK” to save. See 7.1.1 Mode Configuration for
details.
⑦ QRCode. Enable the NAT function in the interface or set it in the network configuration after exiting the wizard (please refer to 11.1.8 NAT
Configuration for details). You can scan the QRCode through the Speco Blue App available for iOS and Android to easily and securely view your
cameras. Please refer to 12.1 Mobile Client Surveillance for details. Click “OK” to save the settings.
3.2 Main Interface
3.2.1 Main Interface Introduction