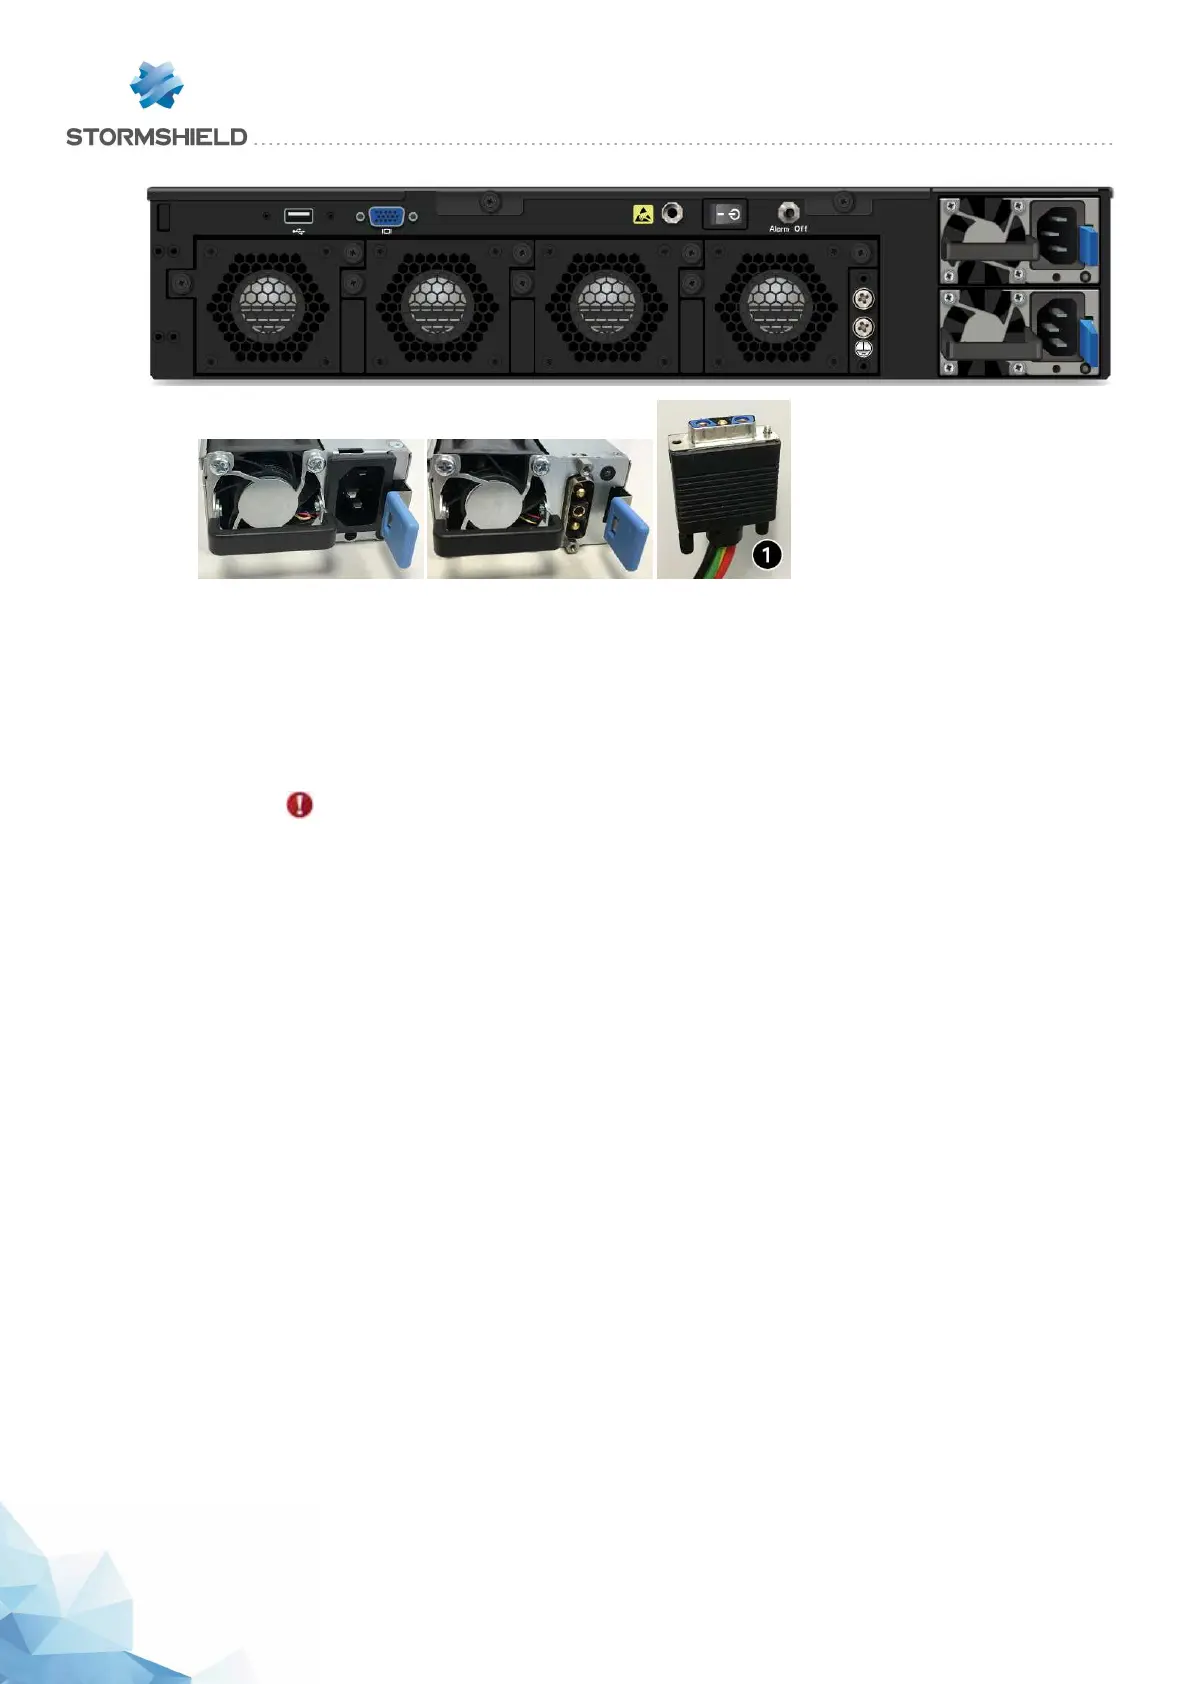
1. Disconnect the module from the electrical supply:
l AC mains supply: disconnect the mains cable.
l 48VDC supply: unscrew the knurled screw, then unplug the power cord on the module
side.
2. Remove the module: push the release lever sideways toward the extraction handle, and pull
the handle. Take hold of the case of the module and remove it completely.
CAUTION: the module's metal case serves as a heat sink and its temperature can reach
+60°C at full power. It is therefore advisable to use a glove to hold the case.
3. Insert the new module with the product label facing upwards. When the module is fully
inserted, push until you hear a “click” that indicates that the module is locked in place. Verify
that the module is locked in place by pulling gently on the extraction handle: the module
must not move.
4. Attach the new module to the electrical supply:
l AC mains supply: plug in the mains cable.
l 48VDC supply: plug in the power cord's connector 1 Screw in the knurled screw.
Each PSU module is equipped with a light showing its state (two colors: green/red):
• Module working correctly
l module connected to a power source but not installed in a firewall: green, blinking.
- SN6100 (halted):
l module installed but not connected to a power source, and the other module is installed
and connected: red, not blinking.
l module installed and connected to a power source: green, blinking.
- SN6100 (running):
l module installed and connected to a power source: green, not blinking.
l module installed and not connected to a power source: red, not blinking (+ buzzer).
• Module not functioning correctly
l module connected to a power source: red, not blinking.
SNS - PRODUCT PRESENTATION AND INSTALLATION 2019
APPENDIX D: CHANGING A POWER SUPPLY MODULE (SN2100, SN3100 AND SN6100)
Page 63/66 sns-en-SNrange_installation_guide-2019 - 09/2019