Electrical Troubleshooting
Section 4 Charger Troubleshooting Page 6
• Disconnect the charger from the AC source.
• Disconnect the batteries.
• Disconnect the charger from the vehicle’s harness.
• Remove the charger from the vehicle.
Remove the charger cover and perform the following tests:
1. Inspect the internal wiring of the charger and repair as required.
2. Check the continuity of both fuse links and replace if bad.
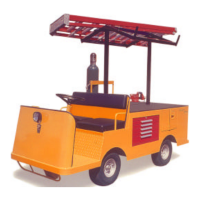
3. Disconnect one transformer lead from the capacitor. Test the capacitor using the
capacitor test function of the meter. It is a 6 microfarad capacitor. If the capacitor
is bad, it must be replaced.
Stop here and repair the problem.
HIGH VOLTAGE may be stored in the capacitor. Discharge the capacitor
before continuing. Connect a 2k ohm resistor across the capacitor
terminals for 10 seconds. Do not touch the capacitor terminals with
your hands. The resistor should be held with a pair of insulated pliers.
Failure to do so may cause serious bodily injury
High Voltage inside the charger. Do not touch any internal components
while the charger is plugged in. Failure to do so may result in serious
bodily injury.
Fuse Links
Capacitor
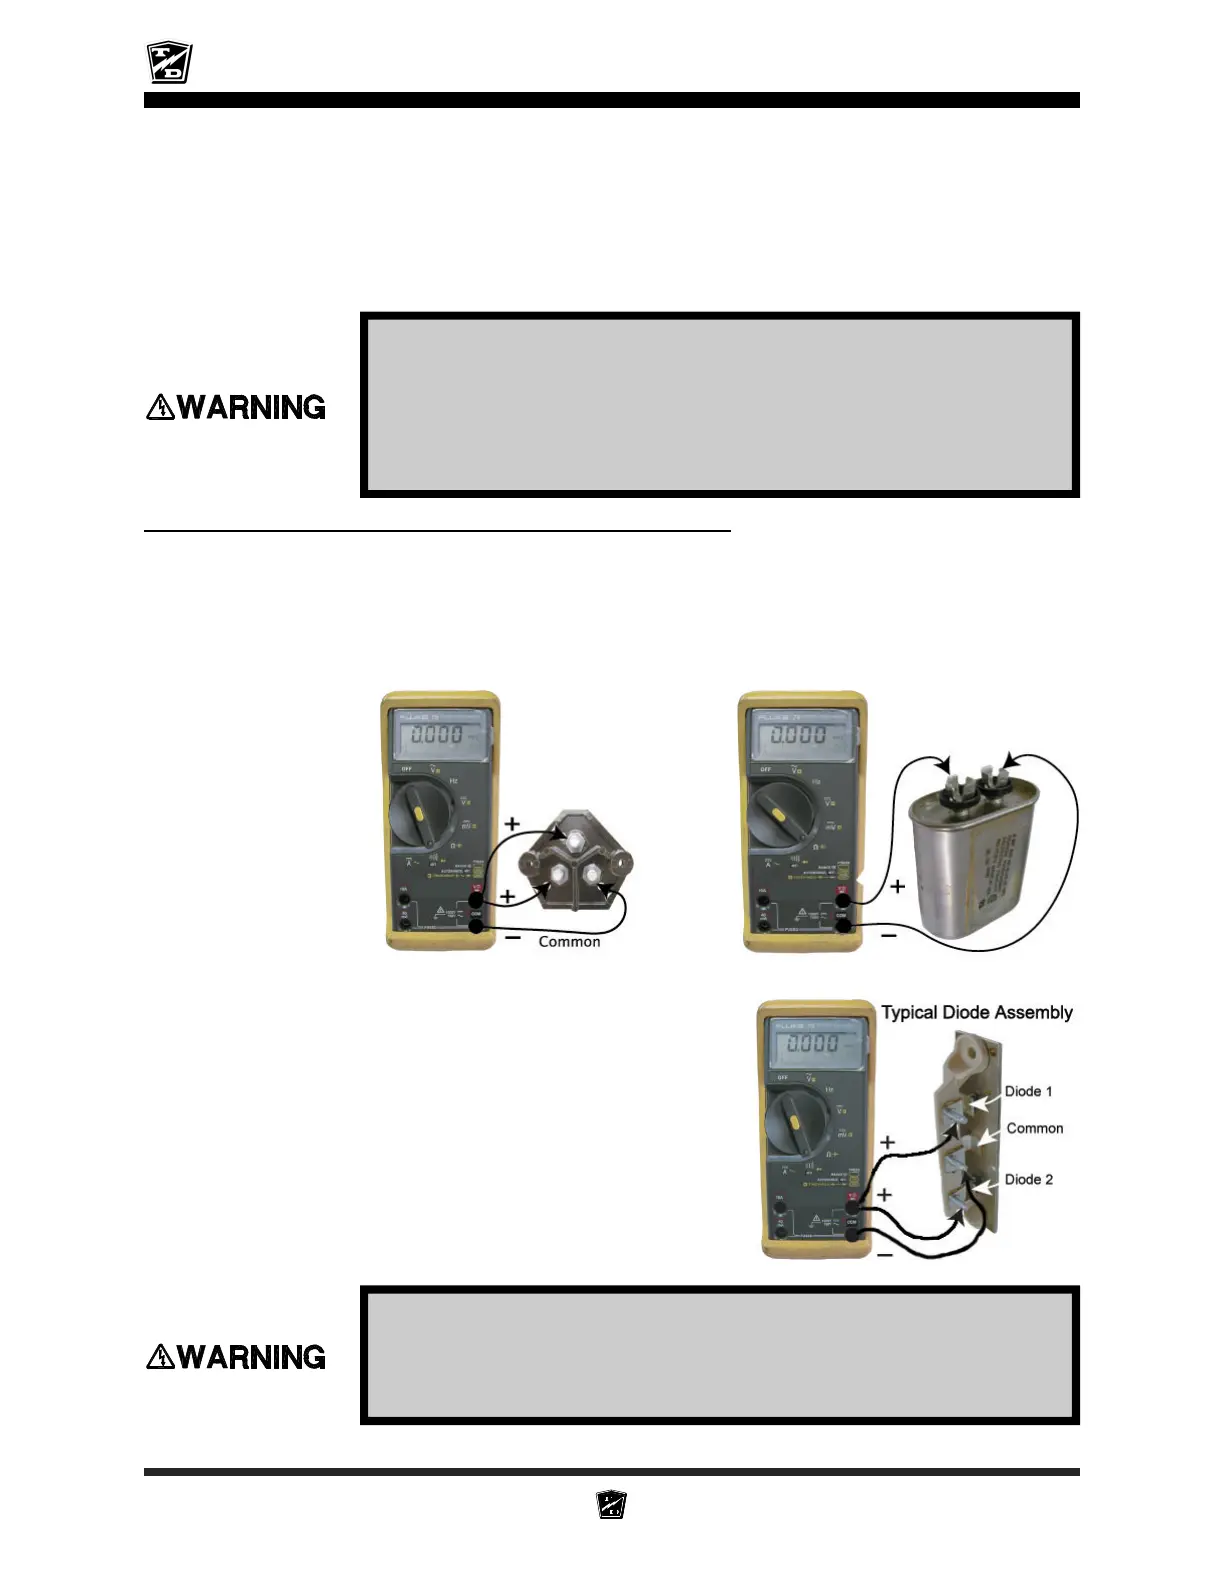
4. Reconnect the transformer lead to the capacitor
and disconnect one transformer lead from one
of the diodes. Test each of the diodes using
the diode test function of your meter. If either
one of the diodes are bad, replace the diode
assembly.
Stop here and repair the problem.
5. Reconnect the lead to the diode.
6. Reconnect the charger to the vehicle’s harness
and slide the wiring insulators back into place.
Connect the charger to the AC source and
perform the following tests: