Chapter 2
DLPU011E–July 2013–Revised September 2015
Quick Start
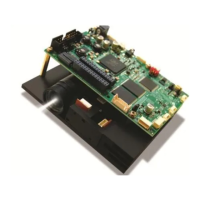
This chapter details the steps to power up the DLP LightCrafter 4500 and connect to a PC.
2.1 Power-up the DLP LightCrafter 4500
The DLP LightCrafter 4500 is ready to use, out of the box. Steps 1 through 5 show how to power, display
an image, and connect the device to a PC.
1. Connect a 12-V DC power supply to the power supply connector (connector 2 in Figure 1-8).
2. An LED on the bottom of the LightCrafter 4500 board, next to the flex cable lights up green. The fan
starts, stops, and then restarts while the DLPC350 is booting. After 5 to 10 seconds, the DLPC350
bootloads and displays a screen with the DLP and LightCrafter 4500 logo. The D4 LED on top of the
LightCrafter 4500 board flashes on and off green. If the board shuts down after briefly turning on the
display, the power supply current rating might be too low.
3. To display video, connect a DVI source to the mini-HDMI connector (connector 20 in Figure 1-8).
4. Control the DLP LightCrafter 4500 with the free GUI software (available to download from
http://www.ti.com/dlplightcrafter4500).
5. After installing the software on the computer, connect the PC to the DLP LightCrafter 4500 using a
USB to mini-USB cable (connector 4 in Figure 1-8). The first time the cable is connected on a PC, the
DLP LightCrafter 4500 emulates a USB composite device with human-interface device (HID) class. No
drivers are required because these drivers are natively handled by all operating systems.
22
Quick Start DLPU011E–July 2013–Revised September 2015
Submit Documentation Feedback
Copyright © 2013–2015, Texas Instruments Incorporated
 Loading...