Refrigeration Service Operations 11-5
Installation
1. Prepare the suction hose and tube fittings for soldering by cleaning thoroughly.
2. Solder the vibrasorber to the suction service valve.
CAUTION: Use a heat sink or wrap vibrasorber with wet rags to prevent damaging the vibrasorber.
3. Solder the suction hose connection to the accumulator.
4. Pressurise the low side and check for leaks. If no leaks are found, evacuate the system.
5. Open refrigeration valves and place unit in operation.
Condenser Inlet Check Valve, Condenser Outlet Check Valve or Receiver Tank Outlet
Check Valve
Disassembly and Inspection
1.
• Condenser Inlet or Condenser Outlet Check Valve:
Remove the refrigerant charge.
2. Remove the bonnet nut (or cap) from the check valve.
NOTE: An in-line check valve
(see Parts Catalogue for P/N) does not have a bonnet nut and is not repairable. An in-line check
valve must be replaced if it fails.
3. Inspect the seat in the check valve for damage or foreign particles which might adhere to the seat and would damage the new
seat. If damaged, replace the entire check valve assembly
Replacement
1. If the seat in the check valve is damaged, unsolder the inlet and outlet line connections. Remove the check valve.
2. Clean the tubes for soldering.
3. Place a new disassembled check valve in position. Arrow on the valve body indicates the direction of refrigerant flow through
the valve.
NOTE: Place a heat sink on an in-line check valve
(see Parts Catalogue for P/N) or wrap valve with wet rags before soldering the inlet and outlet connections to prevent damage to
the neoprene seal. Then go to step 3 under Repair/Assembly.
4. Solder the inlet and outlet connections. After the valve cools, reassemble the valve.
Repair/Assembly
1. Install the new seat and spring.
2. Place a new gasket on the cap and torque to 61 N•m.
3. Replace drier
4. Pressurise the refrigeration system and test for leaks.
5.
• Condenser Inlet or Condenser Outlet Check Valve: If no leaks are found, evacuate the system. Charge unit with correct
refrigerant and check the compressor oil level.
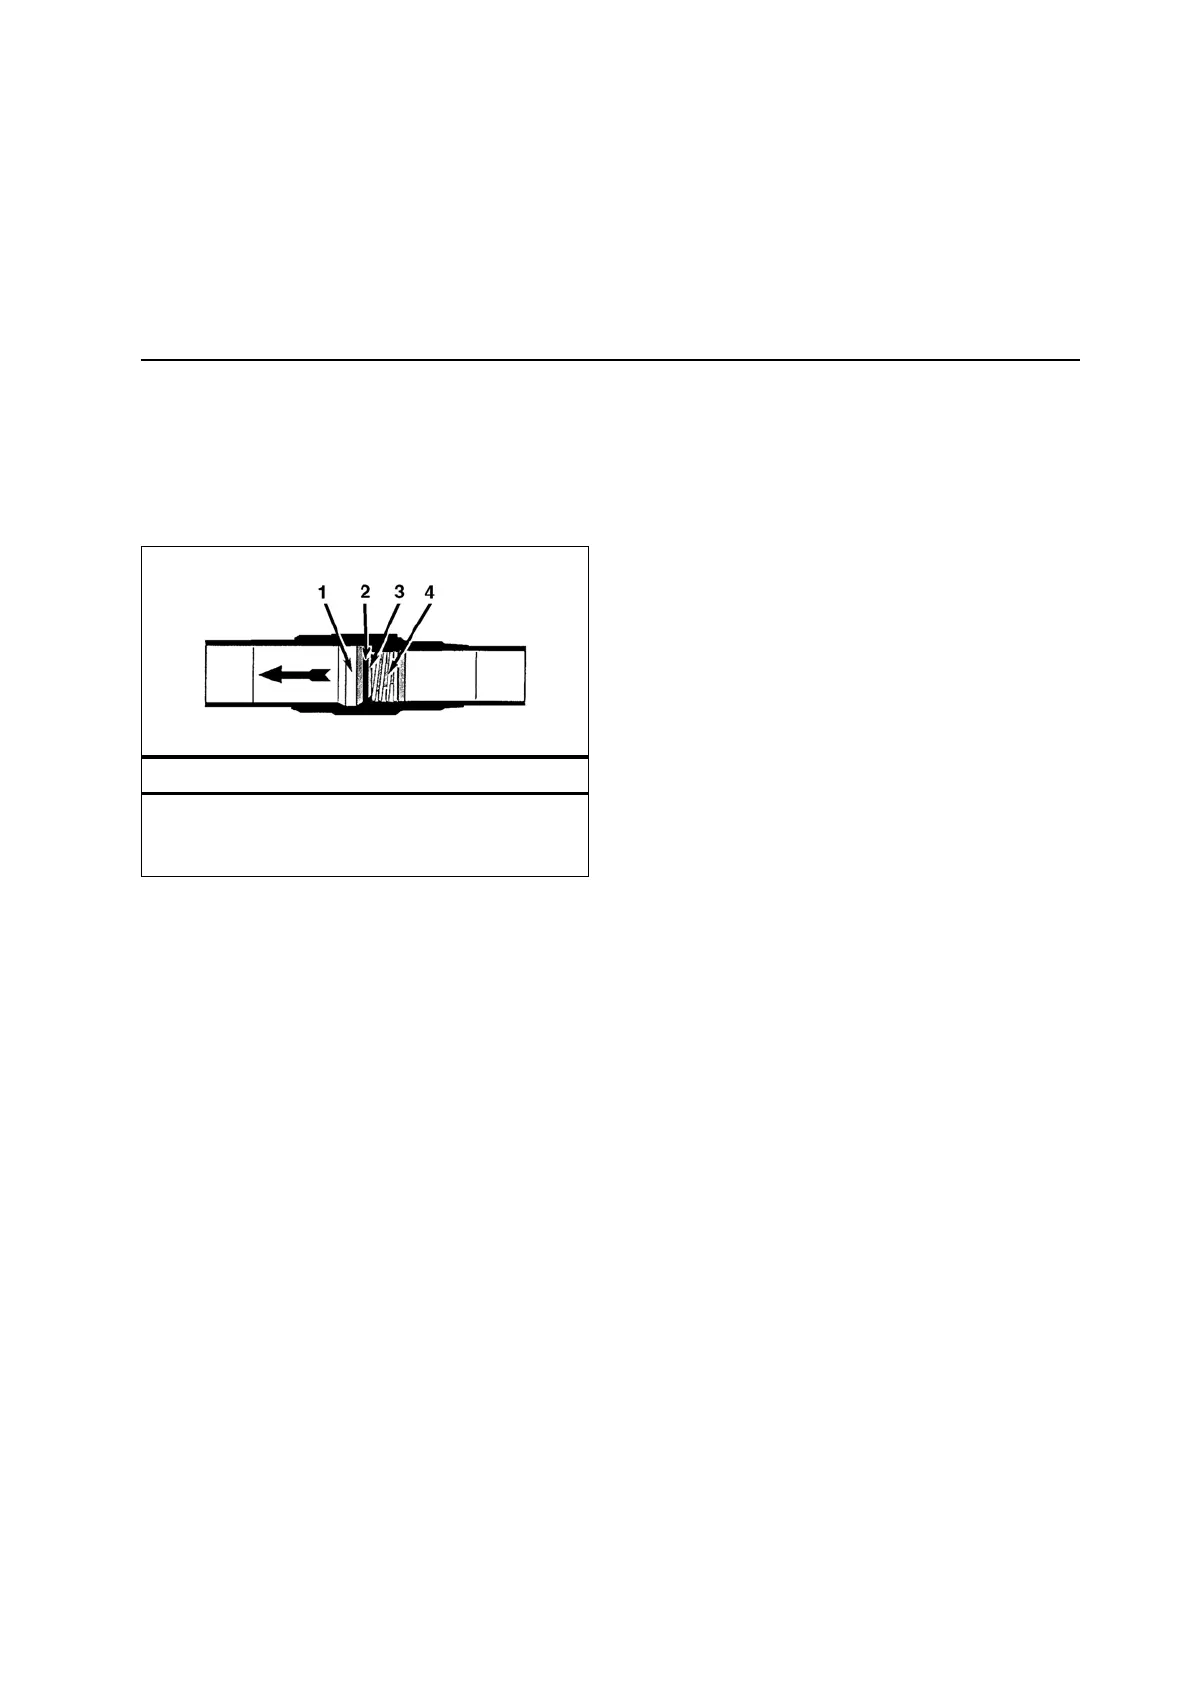
Typical In-line Check Valve Cross-section
1. Valve
2. Neoprene Seal
3. Valve Seal
4. Spring
 Loading...