3-33
Chapter 3
INSTALLATION AND SETTING PROCEDURES (HARDWARE)
Step 3. Replace the RM-300X's upper case.
Note
Note the types of screws when replacing the upper case (See Step 1.)
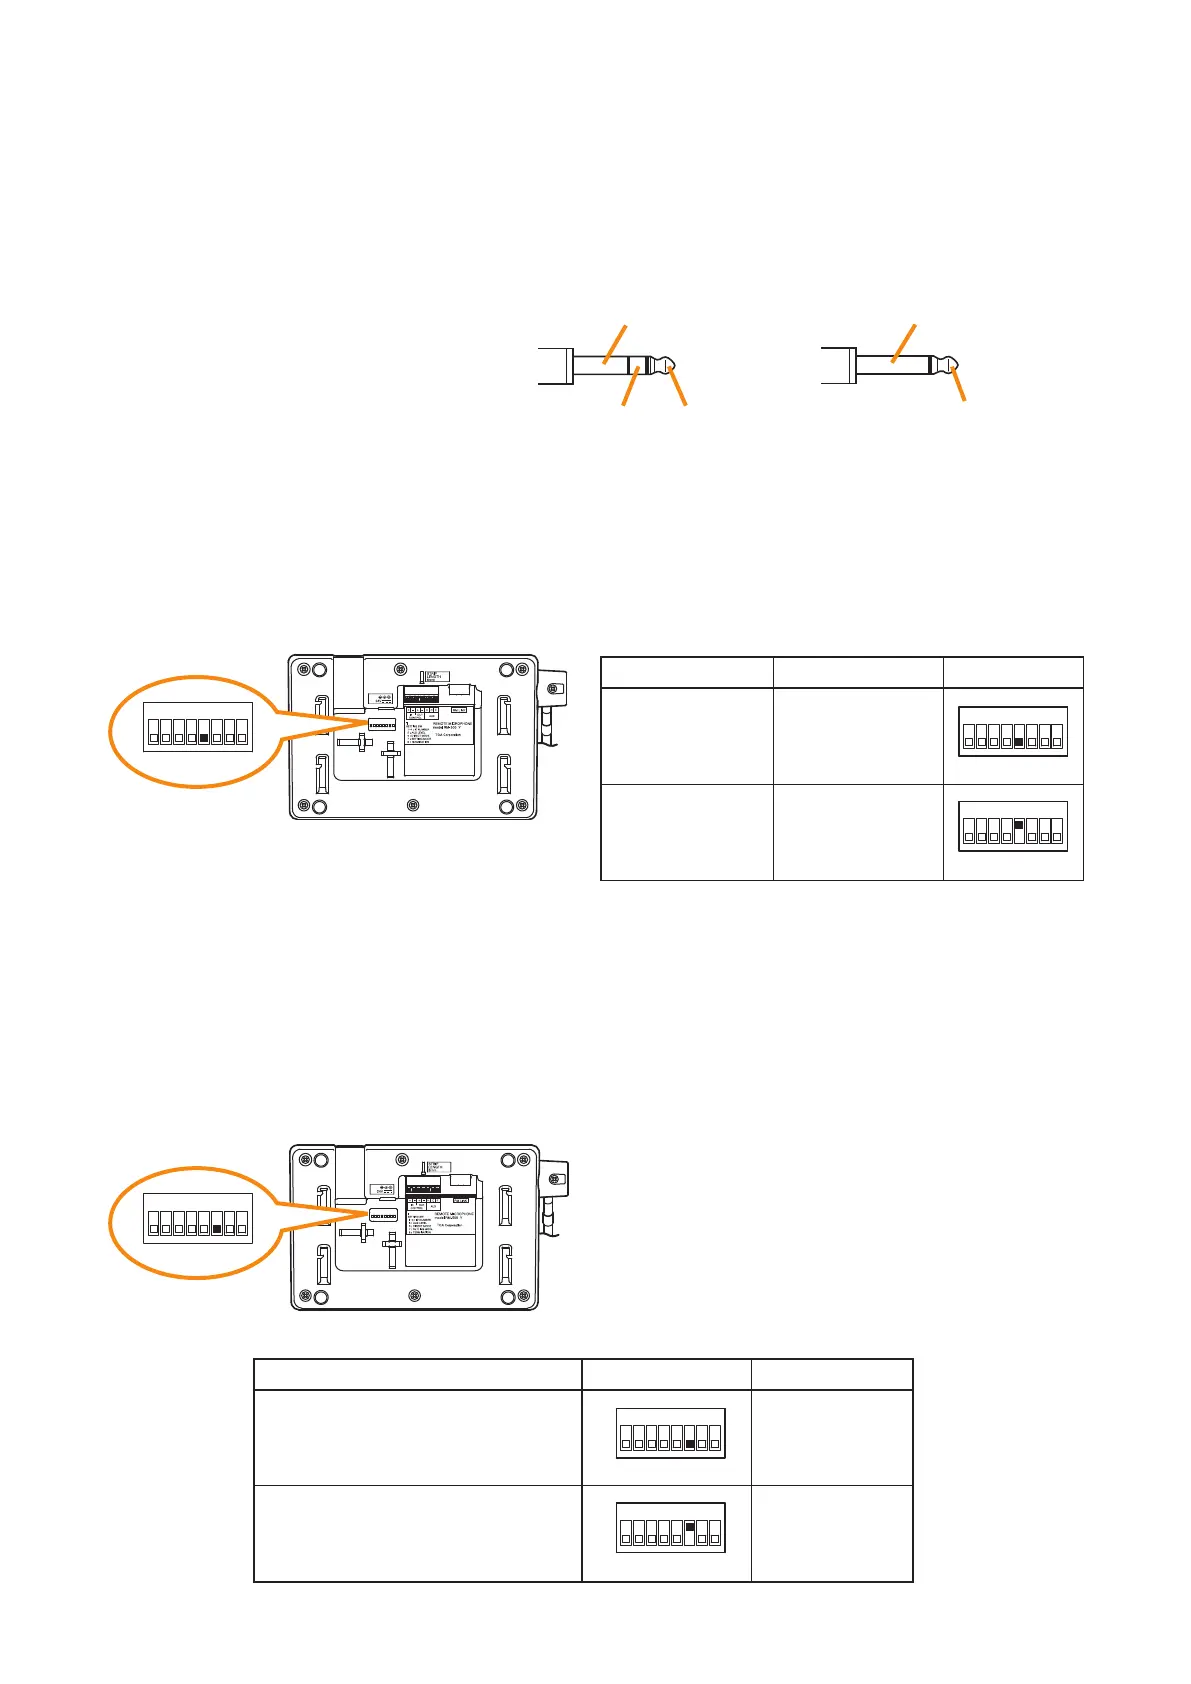
[Plug for connection to the RM-300X's external input terminal]
Connect the microphone's signal line to the
tip and its shield line to the sleeve of the
stereo mini plug or monaural mini plug.
Tip
The WH-4000A, YP-M101, or YP-M301
can be used for the external microphone.
Sleeve: Ground
Tip: Signal lineRing
Sleeve: Ground
Tip: Signal line
[Monaural mini plug]
[Stereo mini plug]
6.7. Setting the Level of the AUX Input Terminal (RM-500 Only)
When using the RM-500’s AUX input terminal, set the input level with Switch 5 of the setting switch depending
on the connected device.
Shift Switch 5 to Line level (OFF position) when connecting the external sound source device or to MIC level
(ON position) when connecting the external microphone.
RM-500 bottom
1
ON
2 3 4 5 6 7 8
RM-500 bottom
1
ON
2 3 4 5 6 7 8
Line level
–20 dB*
10 kΩ
Unballanced
Microphone level
–60 dB*
2.2 kΩ
Unballanced
OFF
(Default position)
ON
SwitchInput sensitivity RM-500
* 0 dB = 1V
1
ON
2 3 4 5 6 7 8
1
ON
2 3 4 5 6 7 8
6.8. Setting for using the direct selection mode (RM-500 Only)
The RM-500 has a direct selection function that allows you to specify the line number by directly entering it
when selecting the broadcast zone.
To use the direct selection mode, you need to change the setting of the switch 6 of the setting switch.
For the operation using the direct selection mode, refer to the separate Operating Instructions, "Making
Microphone Announcements in Direct Selection Mode."
Not use
Use
OFF
(Default position)
ON
SwitchDirect selection function RM-500
(The normal screen is displayed on
the RM-500's LCD screen.)
(The line number registration screen
is displayed on the RM-500's LCD
screen.)
1
ON
2 3 4 5 6 7 8
1
ON
2 3 4 5 6 7 8
Note
Do not touch the setting switch while broadcast is in
progress using this unit.
The screen will not be switched even if you operate the
setting switch during broadcast.