4-2
Chapter 4
APPENDIX
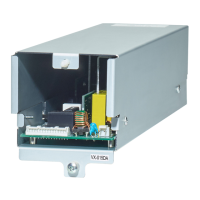
Step 1. Detach the front panel.
Remove 4 xing screws for front panel and detach
the front panel.
Step 2. Set the switch 7 of the DIP switch to ON.
Step 3. Replace the front panel.
Secure it using 4 xing screws for front panel.
Step 4. Conrm the rmware version by checking the
indicators on the front panel.(See p. 4-3.)
Step 5. Detach the front panel again, and return the
switch 7 of the DIP switch to OFF, restoring the
unit to the original state.
VX-3000F front
Fixing screws for front panel
1
2
VX-3000F front
(Front panel detached)
Switch 7
There is a high voltage section inside the power
amplifier's filter. Never insert your finger or
metallic objects inside the unit.
ON
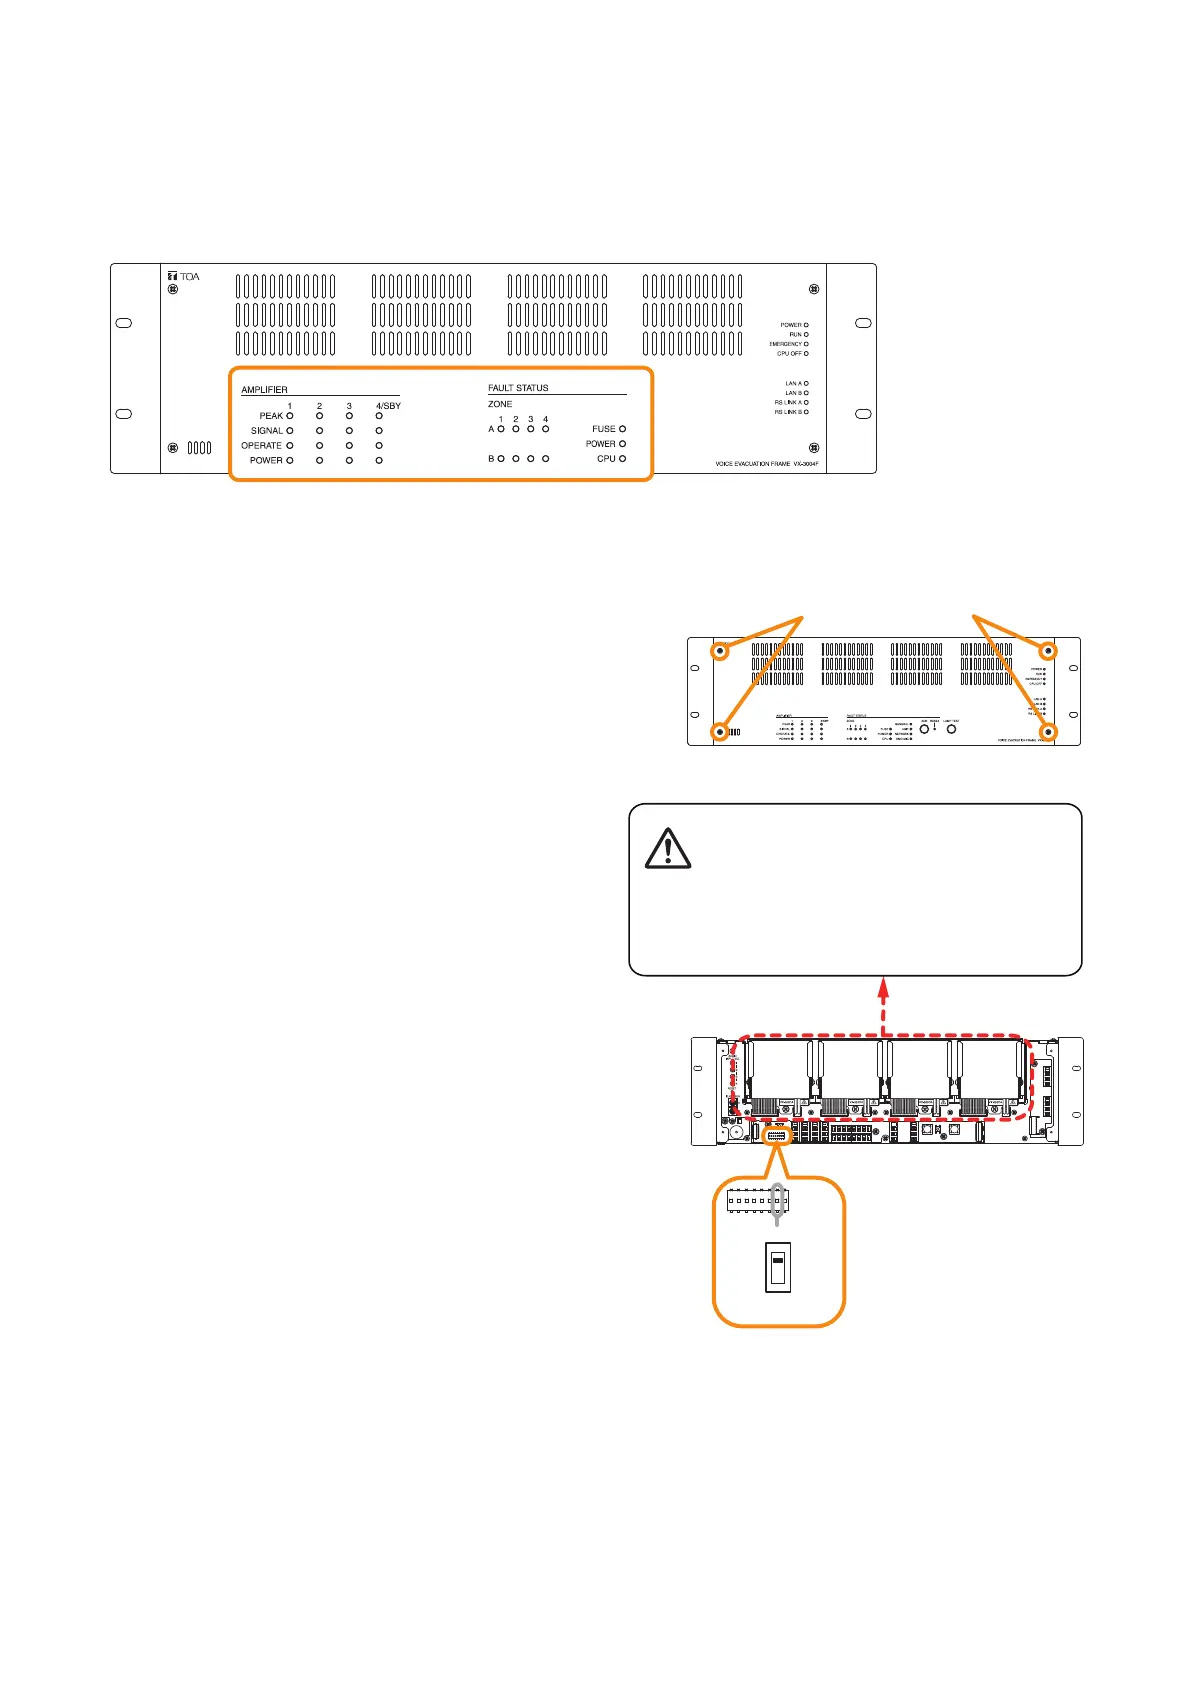
1. THE FIRMWARE VERSION CONFIRMATION
You can conrm the rmware version with the front-mounted indicators by setting the DIP switch inside the
VX-3000F's front panel.
[Front-mounted indicators]
This gure shows VX-3004F.