29
BASIC OPERATIONS
BASIC OPERATIONS
MEASUREMENT IN AUTO SHOOT MODE
DISPLAYING MEASUREMENT VALUES
Data of the latest measurement are displayed on the control panel screen.
Figures only: Measurement was done correctly.
ERROR: Measurement was not done correctly.
MEASUREMENT IN AUTO SHOOT MODE
In Auto shoot mode the process to fine alignment is performed manually, and the measurement
starts automatically if reaching the measurable range.
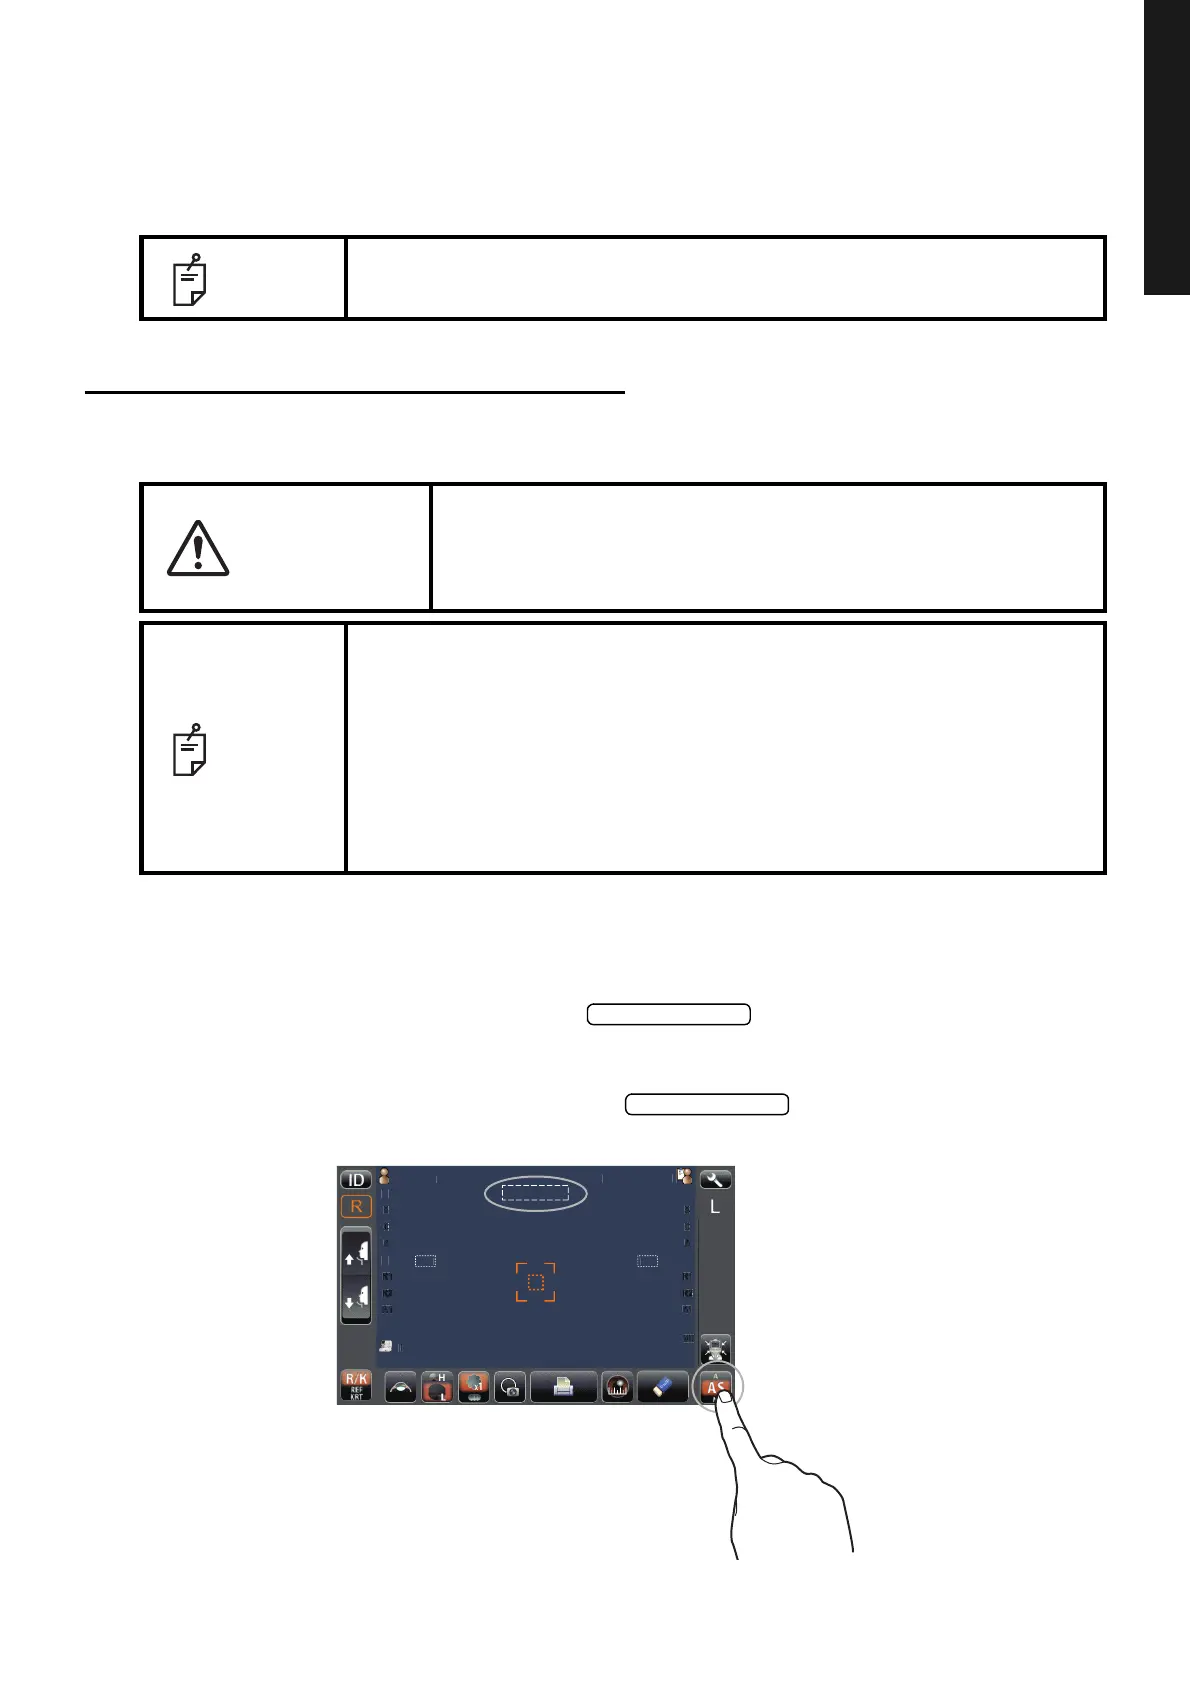
SETTING THE AUTO SHOOT MODE
1 If the large sign "AS" is displayed in the button with orange background, it is
in Auto shoot mode.
2 If the large sign "AS" is not displayed in the button with orange background,
it is in other mode. Tap the button to change to Auto shoot mode.
NOTE
For explanation of the messages on the control panel screen, refer to
"MESSAGE LIST" on page 58.
CAUTION
When operating the instrument (for measurement and control panel
operation), be careful that the instrument does not touch the
patient's lip or nose. If touched, clean the instrument as specified in
"CLEANING THE MEASURING WINDOW" on page 56.
NOTE
• Auto Shoot mode measurement may not be possible, in case the eyelid
and the eyelashes cover the pupil.
If this occurs, the operator should tell the patient to open their eyes as
wide as possible, or lift the eyelid to allow for measurement.
• Auto Shoot mode measurement may not be possible due to frequent
blinks or existing abnormalities in the corneal surface caused corneal dis-
ease etc. In this case, select manual mode.
• Under Auto shoot mode, it is possible to switch to Manual mode by push-
ing the Measurement button.
tientI
PatientID
0/3
0/3
0/3
0/3
12.
12.
0/3
0/3
0/3
0/3
TOPCONTAROU