4
© 2015 TOSHIBA TEC CORPORATION All rights reserved e-STUDIO2008A/2508A/3008A/3508A/4508A/5008A
DISASSEMBLY AND REPLACEMENT
4 - 149
4.12 Automatic Duplexing Unit (ADU)
4.12.1 Automatic duplexing unit (ADU)
(1) Remove the right front cover.
P. 4-4 "4.1.9 Right front cover"
(2) Remove the right rear cover.
P. 4-4 "4.1.10 Right rear cover"
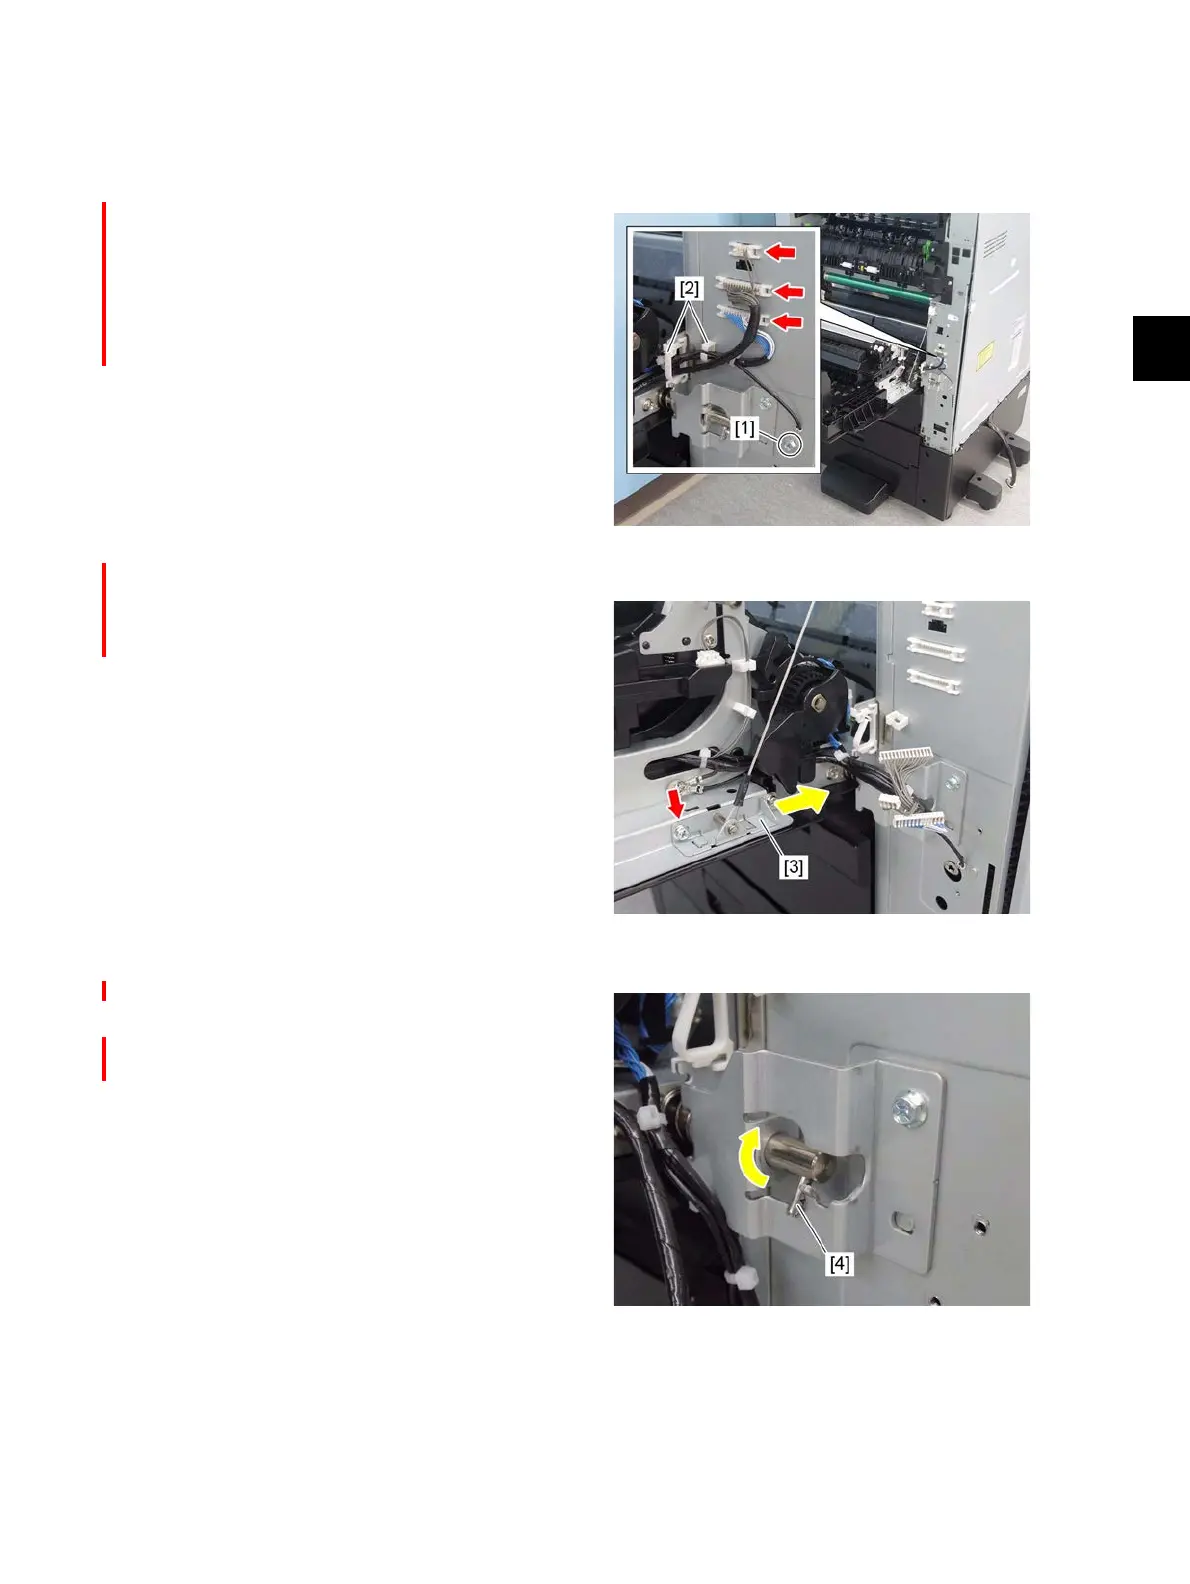
(3) Disconnect 3 connectors and take off 1
ground cable fixing screw [1]. Release the
harnesses from the harness clamps [2].
Fig. 4-399
(4) Remove 1 screw. And then take off the wire
end bracket [3] by sliding it toward the
direction of the arrow shown in the figure.
Fig. 4-400
(5) Raise the rear hinge [4].
Notes:
When installing, turn the rear hinge [4]
downward.
Fig. 4-401
 Loading...


