e-STUDIO2008A/2508A/3008A/3508A/4508A/5008A © 2015 TOSHIBA TEC CORPORATION All rights reserved
SETTING / ADJUSTMENT
6 - 50
6.9 Scanner
6.9.1 Adjustment carriages-1 positions
(1) Take off the RADF/DSDF.
P. 4-171 "4.13.2 MR-3031 (Reversing
Automatic Document Feeder)"
(2) Take off the right top cover.
P. 4-4 "4.1.8 Right top cover"
(3) Take off the original glass.
P. 4-18 "4.3.1 Original glass"
(4) Take off the left top cover.
P. 4-3 "4.1.5 Left top cover"
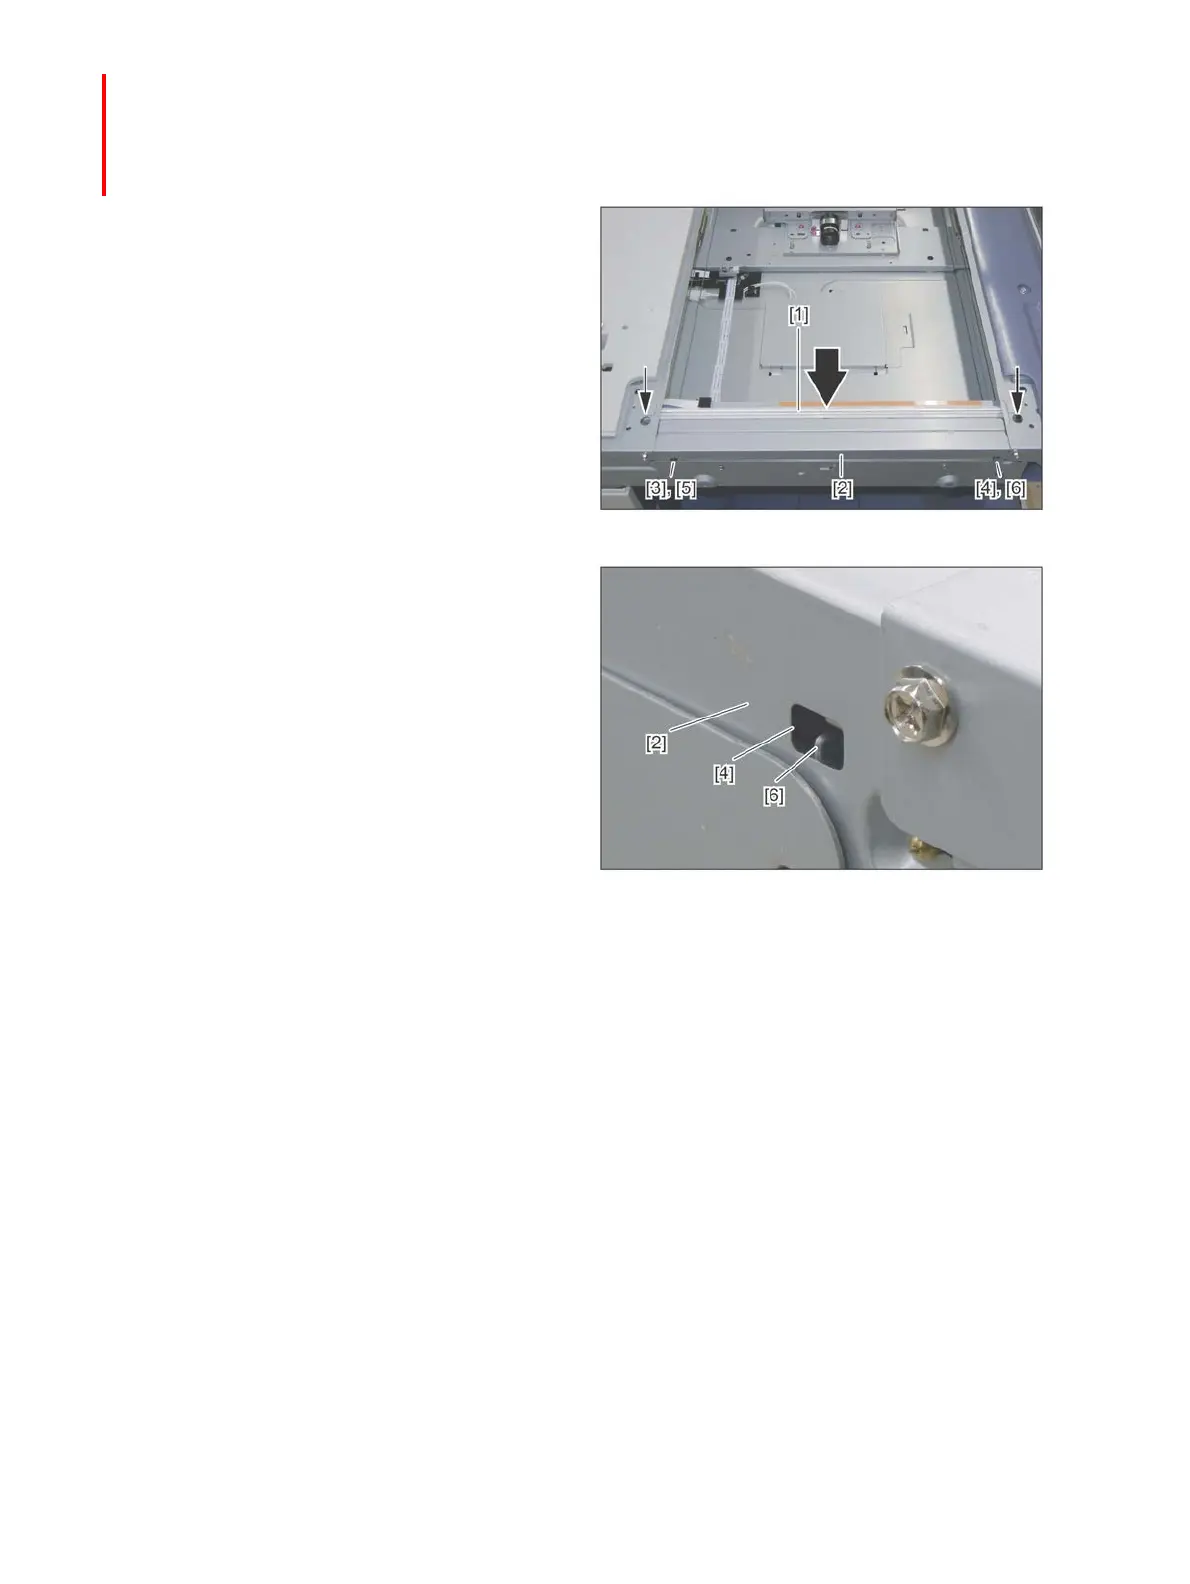
(5) Move the carriage-1[1] toward the exit side.
Notes:
Rotate the drive pulley to move the carriage.
(6) Loosen the 2 fixing screws of the wire.
Tighten the screws by aligning the sections
[5] and [6] of the carriage-1 with the inside of
the exit side frame [2].
Notes:
Confirm that they are aligned properly
through the windows [3] and [4] of the exit
side frame [2].
Fig.6-29
Fig.6-30
 Loading...


