80505"Rqtv"Gpcdng"
On this page, you can enable the port for the Protocol VLAN feature. Only the port is enabled, can
the configured Protocol VLAN take effect.
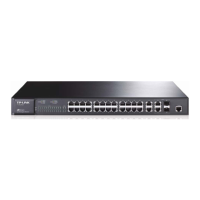
Choose the menu XNCP→Rtqvqeqn"XNCP→Rqtv"Gpcdng to load the following page.
Figure 6-11 Enable Protocol VLAN for Port
Select your desired port for VLAN Mapping function. All the ports are disabled for VLAN Mapping
function by default.
Configuration Procedure:
Uvgr" Qrgtcvkqp" Fguetkrvkqp"
1 Set the link type for port. Required. On the XNCP→:2403S"XNCP→Rqtv"Eqphki page,
set the link type for the port basing on its connected device.
2 Create VLAN. Required. On the XNCP→:2403S" XNCP→XNCP" Eqphki
page, click the Etgcvg button to create a VLAN. Enter the
VLAN ID and the description for the VLAN. Meanwhile,
specify its member ports.
3 Create Protocol Template. Required. On the XNCP→Rtqvqeqn" XNCP→Rtqvqeqn"
Vgorncvg page, create the Protocol Template before
configuring Protocol VLAN.
4 Select your desired ports for
Protocol VLAN feature.
Required. On the XNCP→Rtqvqeqn" XNCP→Rqtv" Gpcdng
page, select and enable the desired ports for Protocol
VLAN feature.
5 Create Protocol VLAN. Required. On the XNCP→Rtqvqeqn" X NCP→Rtqvqeqn"
XNCP"page, select the protocol type and enter the VLAN ID
to create a Protocol VLAN.
6 Modify/View VLAN. Optional. On the XNCP→Rtqvqeqn"XNCP→Rtqvqeqn"XNCP"
page, click the Gfkv button to modify/view the information of
the corresponding VLAN.
7 Delete VLAN. Optional. On the XNCP→Rtqvqeqn"XNCP→Rtqvqeqn"XNCP"
page, select the desired entry to delete the corresponding
VLAN by clicking the Fgngvg button.
806" Crrnkecvkqp"Gzcorng"hqt":2403S"XNCP"
Pgvyqtm"Tgswktgogpvu"
Switch A is connecting to PC A and Server B;
70