EN
Connection units – direct connection
Note that direct connection hardware configurations require the
Connection type
field in the service tool’s Admin/IP Settings/Setup window
to be set to ‘Direct’
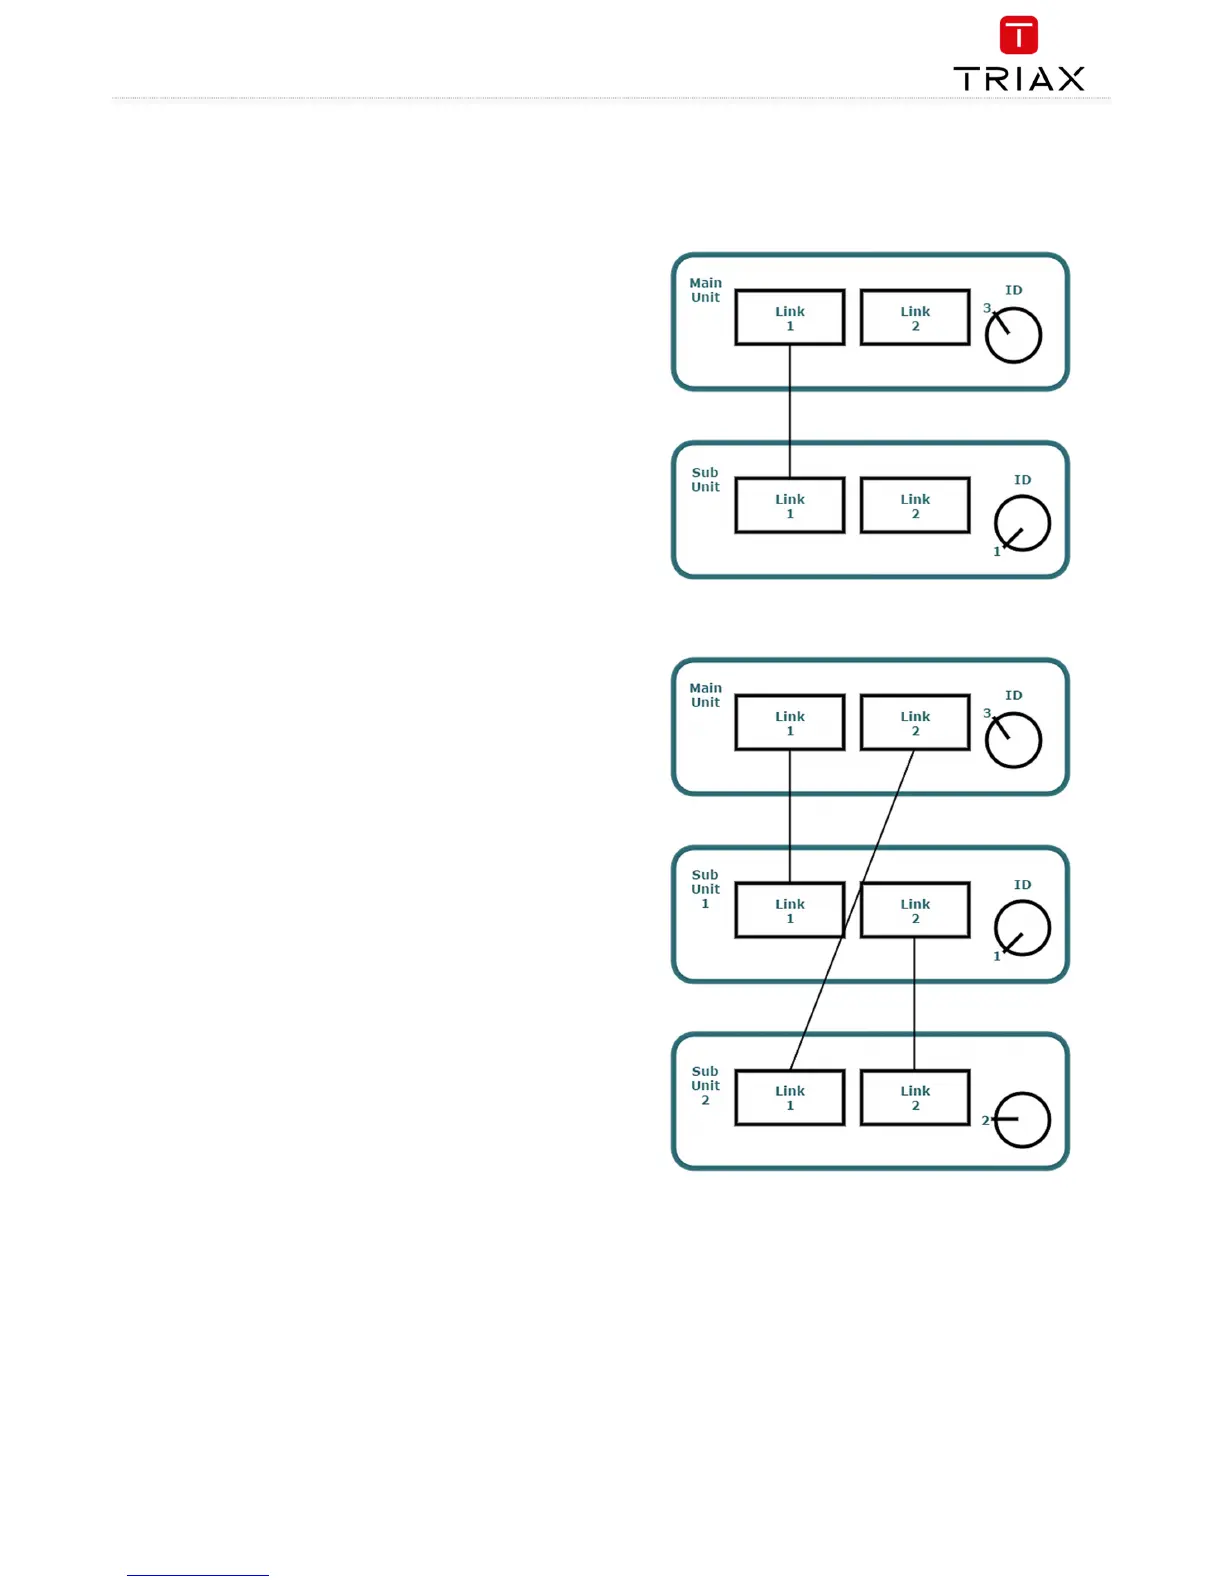
1. 1x Main – 1x sub
1. Insert SFP copper transceivers into the “Link 1“sockets
on the main headend and subunit headend.
2. Route a RJ45 Cat5e or better cable from the "Link 1"
socket on the main unit to the "Link 1" socket on subunit
1.
3. Set the "ID switch" on the main headend and subunit
headend to the following:
Main unit = "3"
Subunit = "1"
a.
2. 1x Main – 2x sub
1. Insert SFP copper transceivers into the “Link 1“ and
“Link 2” sockets on the main headend and subunit
headends.
2. Route a RJ45 Cat5e or better cable from the "Link 1"
socket on the main unit to the "Link 1" socket on subunit
1.
3. Route a RJ45 Cat5e or better cable from the "Link 2"
socket on the main unit to the "Link 1" socket on subunit
2.
4. Route a RJ45 Cat5e or better cable between the “Link 2”
sockets on both subunits.
5. Set the "ID switch" on the main headend and subunit
headends to the following:
Main unit = "3"
Subunit 1 = "1"
Subunit 2 = "2"
 Loading...