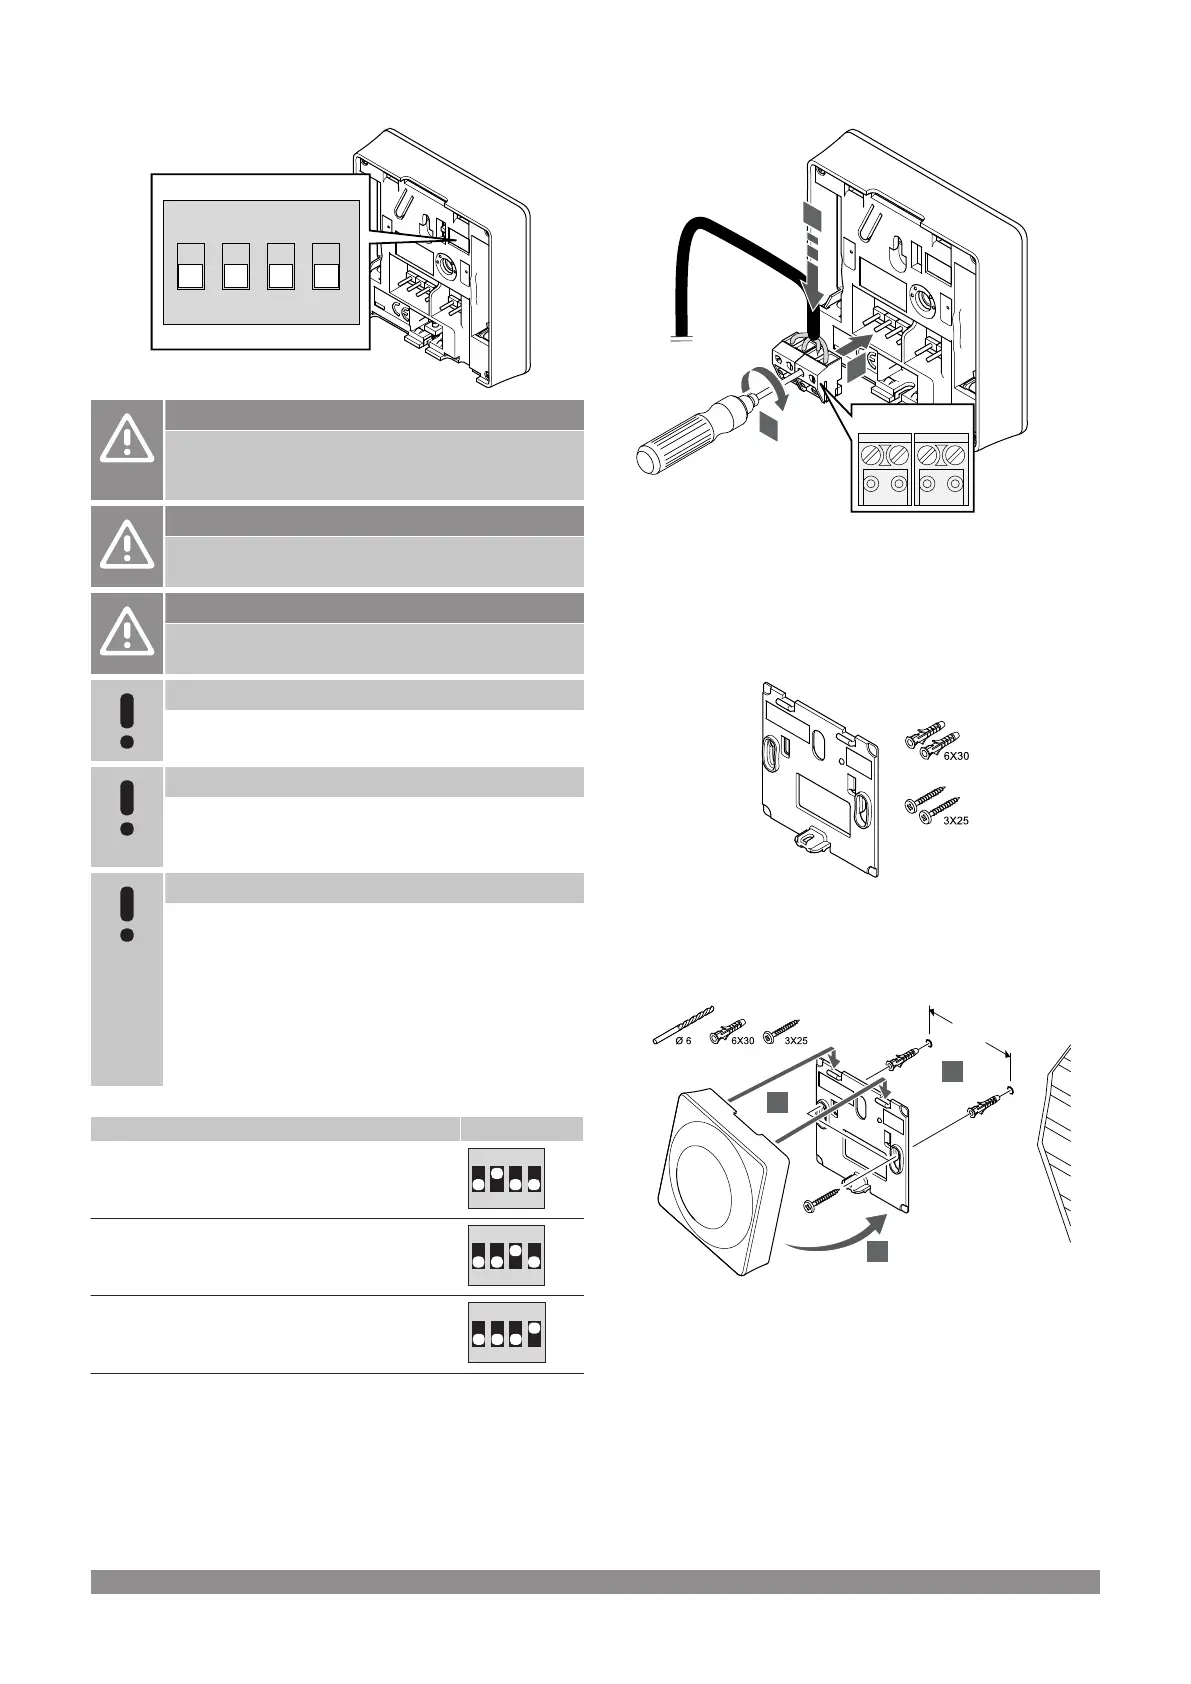
DIP switch
Caution!
If more than one room controller is available in the
system, register the thermostat as a system device to the
master room controller.
Caution!
The DIP switch in the thermostat must be set before it is
registered.
Caution!
The switches must be set to one of the available
functions, otherwise the thermostat cannot be registered.
Note
When registering the thermostat as a system device, it
will no longer work as a standard room thermostat.
Note
The external signal can be connected to up to four room
controllers, working in parallel. Reducing the number of
heating/cooling switches needed in the system.
Note
Use only one Comfort/ECO switch in the system.
• Connecting external Comfort/ECO switch to the
system (public thermostat system device, or GPI),
disables Forced ECO in the Uponor Smatrix PULSE
app.
• Connecting the external Comfort/ECO switch via the
public thermostat system device, disables the
Comfort/ECO option in the GPI.
Set the DIP switch according to the function of the thermostat.
Thermostat function Switch
Outdoor temperature sensor
Supply temperature sensor for heating/cooling switch-
over function (requires communication module)
Sensor input for Comfort/ECO switch-over function
(input closed = ECO mode)
Connect communication cable to thermostat
1. Insert the four wires into the removable connectors marked (A,B,
+ and -) on the thermostat.
2. Tighten the screws fixing the wires in the connector.
3. Insert the connectors on the input pegs on the thermostat.
Attach thermostat to the wall
The thermostat is delivered in a kit with screws, wall plugs, and a wall
bracket, presenting several options of attaching the thermostat to the
wall.
Wall bracket (recommended)
Attach the thermostat to the wall using the wall bracket, screws and
wall plugs.
54
|
Uponor Smatrix Base PULSE
|
Installation and operation manual