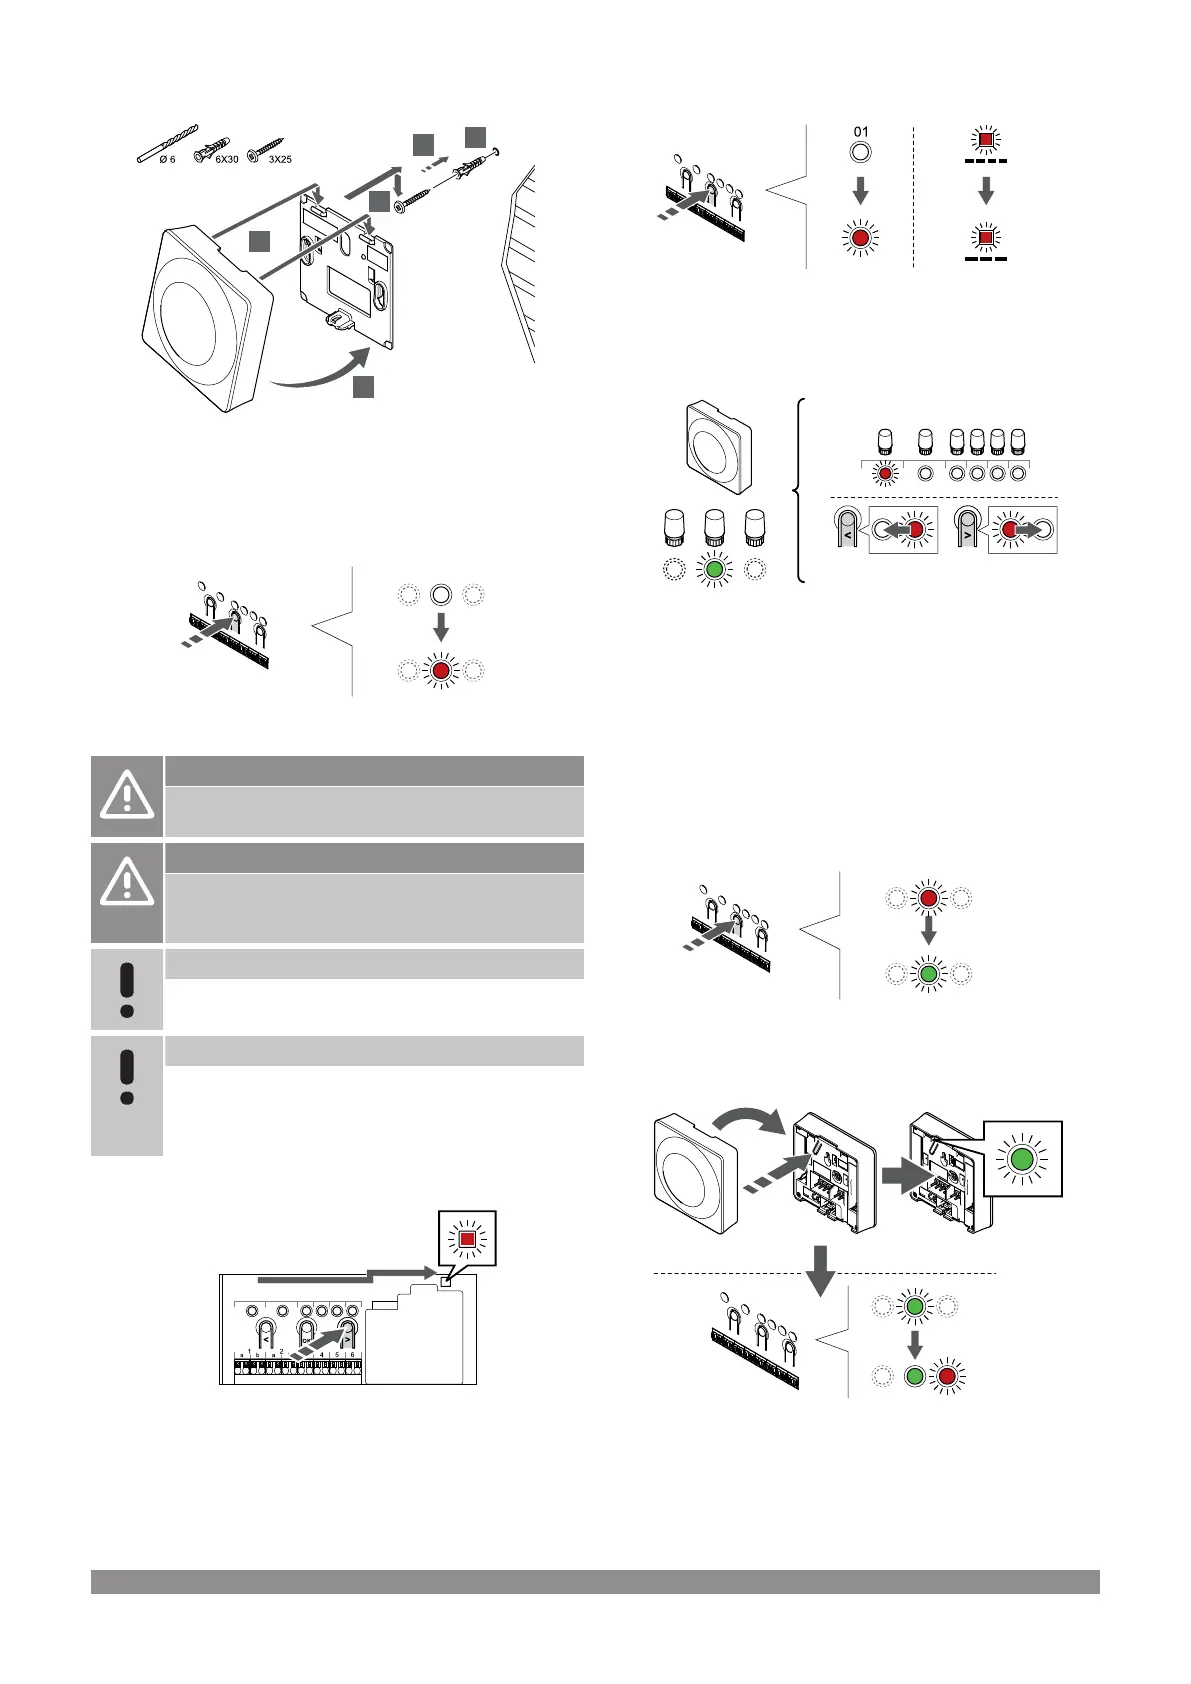
Screw and wall plug
Attach the thermostat to the wall using the screw and wall plug.
Register thermostat to room controller
1. Enter registration mode
Press and hold the OK button on the room controller until the LED for
channel 1 (or the first unregistered channel) flashes red.
Caution!
The DIP switch in the thermostat must be set before it is
registered.
Caution!
If more than one room controller is available in the
system, register the thermostat as a system device to the
master room controller.
Note
It is recommended to register at least one room
thermostat before registering a system device.
Note
If registering a public thermostat as a system device with
various functions, the thermostat only acts as a remote
unit. It does not control the room temperature in the room
where it is placed.
2. Move the channel pointer to the power LED
Use buttons < or > to move the pointer to the power LED (LED
flashes red).
3. Enter system device registration mode
Press the OK button to enter system device registration mode (power
LED). The power LED starts flashing according to the pattern long
blink, short pause, long blink. Channel 1 starts flashing red.
4. Select a channel
Use buttons < or > to move the pointer (LED flashes red) to a
preferred channel.
Channel
3 Public thermostat with outdoor sensor.
4 Public thermostat with heating/cooling switch from sensor input
(requires communication module).
5 Public thermostat with Comfort/ECO switch from contact.This
option disables the Comfort/ECO option in the GPI.
5. Lock selected channel
Press the OK button to select the channel for registration. The LED
for the selected channel starts flashing green.
6. Register thermostat
Gently press and hold the registration button on the thermostat,
release when the LED starts flashing green (located in the hole
above the registration button).
The selected channel LED in the room controller turns fixed green
and the registration is complete.
Uponor Smatrix Base PULSE
|
Installation and operation manual
|
55