Chapter 3 ________________________________________________________________ Installation
VAISALA ________________________________________________________________________ 47
The following numbers refer to Figure 24 on page 46:
T5A AC Heater line fuse for PWD32
T5A AC Heater line fuse for LM21
M10A AC Heater line fuse for FSM102
Power switch and circuit breaker
AC (mains) surge supressor
Communication Cable
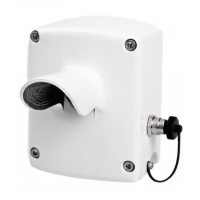
The enclosure of the interface unit FSI102 has a data cable outlet for
cable diameters of 8 to 11 mm. This is reserved for signal or modem
cables. The optional AC (mains)/data cable outlet can also be used for
data cables. The cable should be led out from the unit inside the lower
mast section. Grounding must be done within the cable gland in order to
keep the EMI levels within specifications.
NOTE
If there is a junction box installed, the cable shield should be grounded
at both the input and output cable
glands.
Detailed instructions for a proper RF grounding of any jacketed cables
are given in the following:
1. Lead the signal cable through the cable inlet. See Figure 25 on page
48.
2. Strip 50 cm of the cable sheath leaving approximately 2 cm of
shield.
3. Remove the cap of the cable gland, including the plastic cylinder.
Slide the cap with the plastic cylinder onto the cable.
4. Add shrinkable tubes to increase the cable diameter of thin cables
(diameters less than 5mm).
5. Slide the plastic cylinder to the edge of the cable sheath. Turn the
cable shield over the cylinder, see Figure 25 below.
6. Tighten the cable with the cable gland and proceed with the wiring.