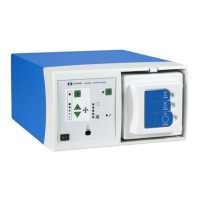
Front Panel and Display Board
8-20 LigaSure Vessel Sealing Generator Service Manual
Install the Display Board
1. Move the flex ribbon cable out of the way, then position the display board on
the front panel.
2. Replace the five screws that secure the display board to the front panel:
Replace the lower corner and center screws first.
Position the display board ground clips, then replace the screws that secure
the ground clip and display board on each upper corner.
3. Reconnect three cables:
Install the Front Panel
1. Reconnect the wires to the power switch by pushing the terminals onto the
pins. Connect the bottom pins, AC switch 1, first.
2. Position the panel:
The lip on the bottom of the chassis fits into the groove on the bottom of the
front panel.
Tabs on the front panel upper corners fit outside the corresponding chassis
mounting tabs.
3. Replace the four screws that secure the front panel to the chassis:
Two screws, with washers – one each on the left and right upper corners
formed at the front and sides of the unit.
Two screws on the underside of the front panel, one under each handset
receptacle.
Name Ref Location Wires Colors
Flex ribbon
cable
J3 on
display
board
Near right edge of
display board
Translucent, with
metal traces
Smart I/O
cables (2)
RF board Red, gray
Name Location Pin No. Wires Color From
AC
switch 1
Bottom of
switch module
1A
2A
1
1
brown
blue
HV power
supply board
AC
switch 2
Top of switch
module
1
2
1
1
brown
blue
Input power
module
Artisan Technology Group - Quality Instrumentation ... Guaranteed | (888) 88-SOURCE | www.artisantg.com