Check the measurement and confirm that the mains voltage and
frequency are correct, and confirm that the mains connection cable is
connected correctly and there is no short circuit.
Check the battery (if selected) installation and wiring connections are
correct, and the battery positive and negative polarities are correct.
Check against the wiring diagram, and check and confirm that the line
order of all communication cables is correct according to the cable label.
Warning
1. Prior to powering on the SmartCabinet2-E, ensure that the maintenance bypass on the PMU is open and disconnected and
protected by the sheet metal protection cover.
2. Make sure the lightning protection module is green before turning on the power.
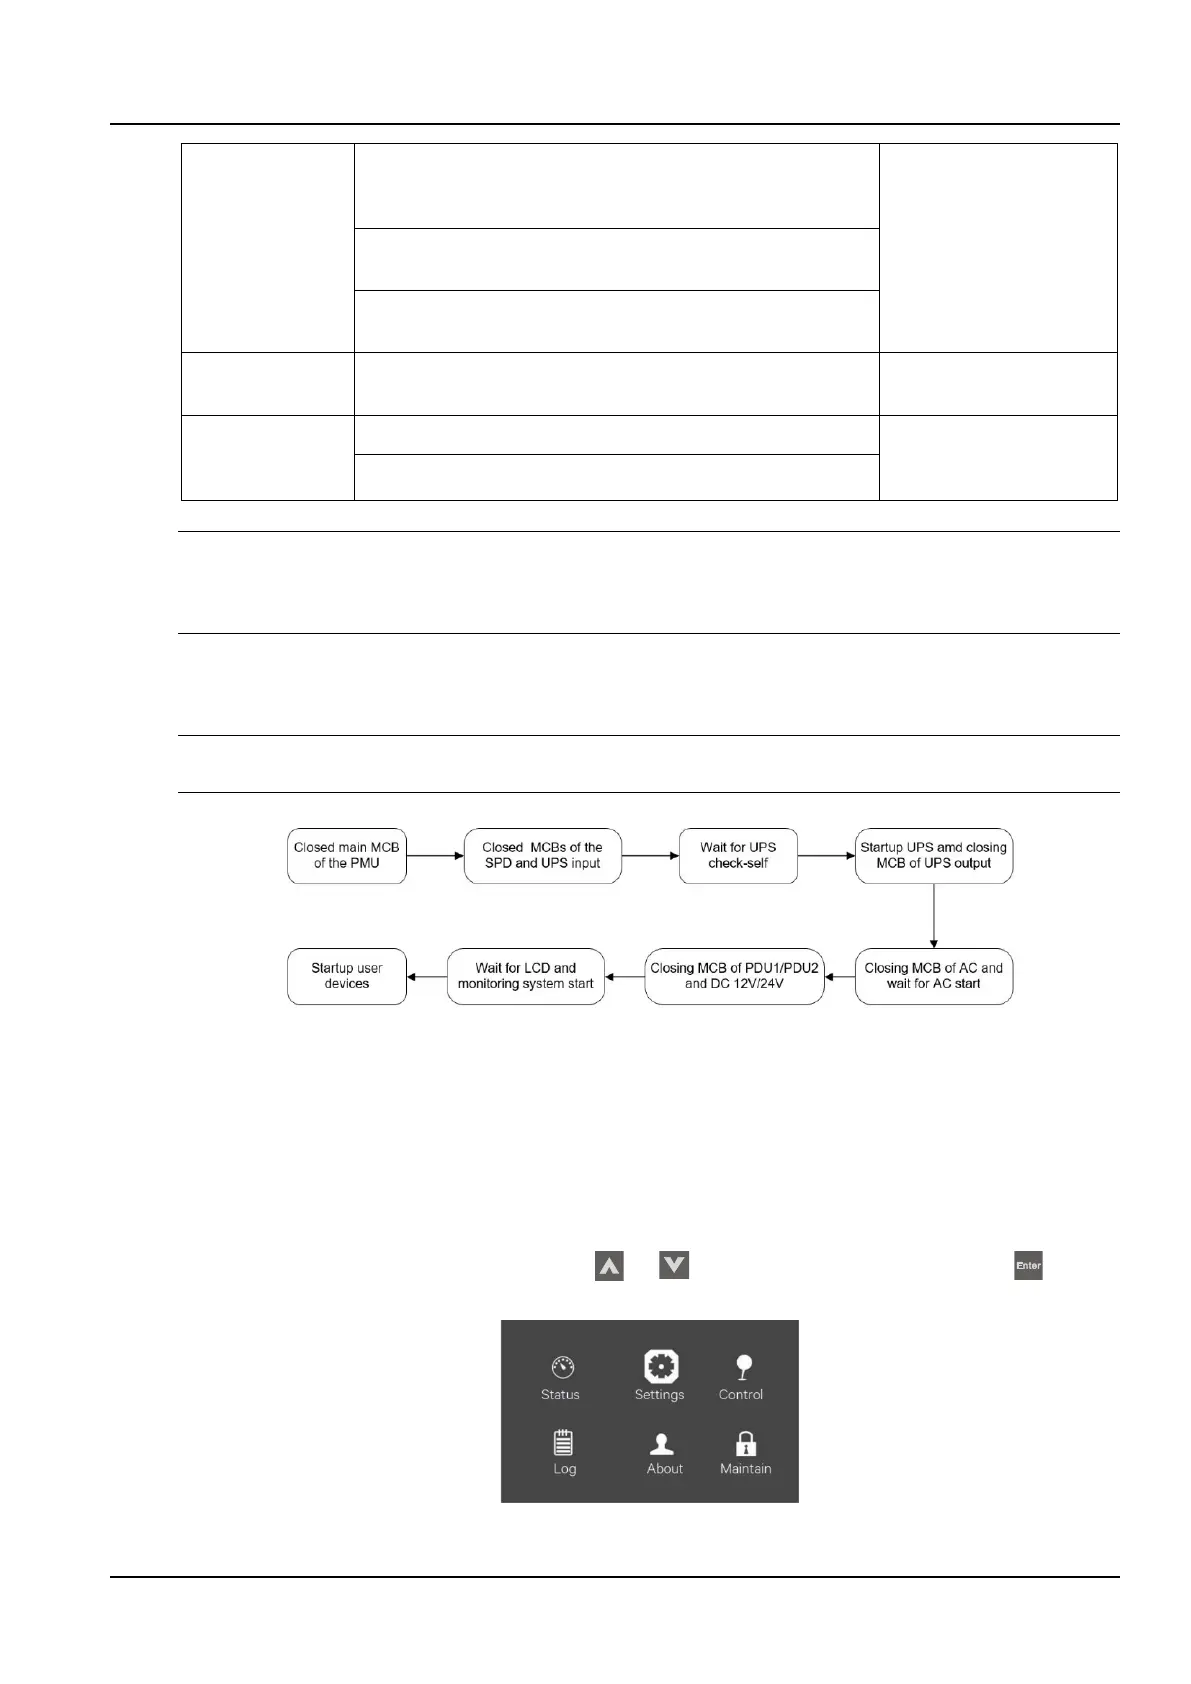
2.3.4 Startup commissioning
The startup flowchart of the SmartCabinet2-E product is shown in the Figure 2-31.
Notices
Prior to powering on the UPS, please open the UPS output MCB.
Figure 2-30 Startup flowchart
The startup procedure is as follows:
1. Close the user's external input power switch and close the PMU general input MCB.
2. Close the UPS rear-end input MCB and open the SPD and wait for the UPS to start up.
3. The UPS's LCD screen displays the self-test interface. The fault indicator (red light) and the inverter indicator
(green light) are on for about 5 seconds.
4. After the rectifier enters the normal running state for about 30 seconds, the rectifier is started, complete and check
the single-unit parameter setting.
1) On the main menu screen, press the arrow keys or select the “Setup” menu and press the key to
enter the corresponding page. See the Figure2-32.
Figure 2-31 Main menu screen