7
List of Figures
Chapter 1: System Overview—12
Figure 1.1 — CLS200 Rear Views 16
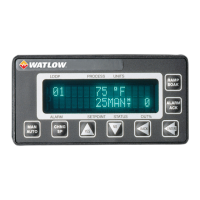
Figure 1.2 — CLS200 Front Panel 17
Figure 1.3 — TB50 17
Chapter 2: Installation—19
Figure 2.1 — CLS200 System Components 20
Figure 2.2 —Clearance with TB18 Option 21
Figure 2.3 —Clearance with Standard SCSI Cable 21
Figure 2.3a — Clearance with Right-Angle SCSI Cable 22
Figure 2.4 —Mounting Bracket Clearance 22
Figure 2.5 —Panel Thickness and Cutout Size 22
Figure 2.6 — Mounting the TB50 23
Figure 2.7 — TB50 Mounted on a DIN Rail (Front) 24
Figure 2.8 — TB50 Mounted on DIN Rail (Side) 24
Figure 2.9 — Mounting a TB50 with Standoffs 25
Figure 2.10 — CLS200 Series Controller with TB18 29
Figure 2.11 — CLS200 Series Controller with TB50 29
Figure 2.12 — Power Connections 30
Figure 2.13 — Thermocouple Connections 33
Figure 2.14 — R TD Connections 34
Figure 2.15 — Linear Voltage Signal Connections 35
Figure 2.16 — Linear Current Signal Connections 35
Figure 2.17 — Encoder with 5VDC TTL Signa 36
Figure 2.18 — Encoder Input with Voltage Divider 36
Figure 2.19 — Digital Output Wiring 38
Figure 2.20 — S ample Heat, Cool and Alarm Output Connections 39
Figure 2.21 — Output Connections Using External Power Supply 39
Figure 2.22 — TB50 Watchdog Timer Output 39
Figure 2.23 — TB18 Watchdog Timer Output 40
Figure 2.24 — Wiring Digital Inputs 41
Figure 2.25 — Connecting One CLS200 to a Computer Using EIA/TIA-232 45
Figure 2.26 — EIA/TIA-485 W iring 46
Figure 2.27 — Recommended System Connections 47
Chapter 3: Using CLS200—48
Figure 3.1 — Operator Displays 48
Figure 3.2 — CLS200 Front Panel 49
Figure 3.3 — Bar Graph Display 51
Figure 3.4 — Single Loop Display 52
Figure 3.5 — Single Loop Display, Heat and Cool Outputs Enabled 53
Figure 3.6 — Single Loop Display with a Process Alarm 53

 Loading...