3-2
Chapter 3: Maintenance
Aug 2012
Installing New
Solid State Drive
Complete the following steps in this section to install a new Solid State Drive (6902-026345-00-01)
in CPU-NXT 3.2:
CAUTION: The CPU-NXT 3.2 Solid State Drive is extremely fragile and can be damaged if dropped
or impacted against another object. Please follow the guidelines below:
Wear ESD protection at all times.
Handle only one drive at a time.
Handle the drive by the sides only and avoid grasping the PCB.
Pad ALL work, transport, and holding areas (WMS recommends 1-inch foam under 1/4-inch
ESD pad).
Clear work area of metal.
Remove/install the drives from packaging separately.
Separate and report any drive that is dropped or mishandled—no exceptions.
Do NOT:
stack solid state drives
contact drive or card with tooling
rush installation
seat a drive into place with tooling
allow drives to contact each other
Remove the old Solid State Drive
Complete the following steps to remove the Solid State Drive from CPU-NXT 3.2:
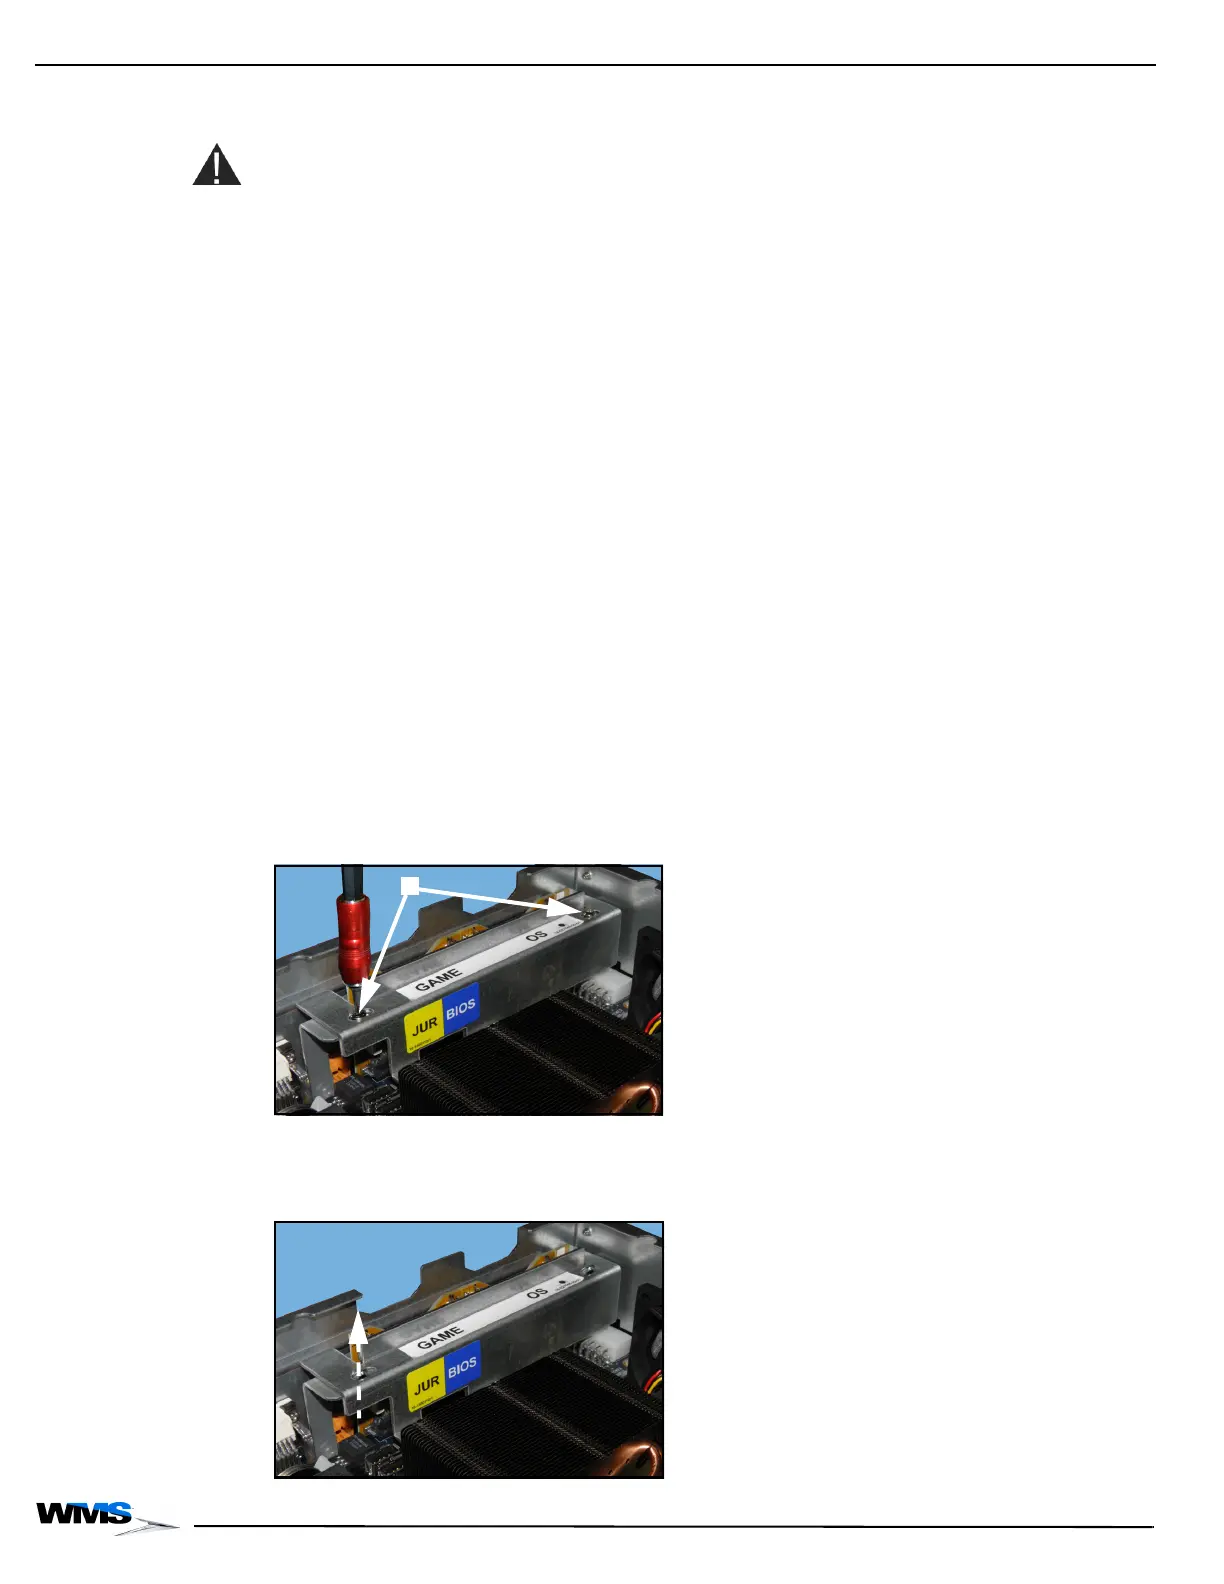
1 Using a T10 Security Torx screwdriver, loosen and remove the two security screws,
Figure 3-1 (A), securing the CPU-NXT 3.2 SSD Bracket (A-1101365) to the CompactFlash
Bracket and set aside. The screws will be reused.
Figure 3-1 Loosening and removing security screws.
2 Lift the CPU-NXT 3.2 SSD Bracket away from the CompactFlash Bracket, Figure 3-2, and set
aside.
Figure 3-2 Lifting the CPU-NXT 3.2 SSD Bracket off the CF Bracket.
 Loading...