2-28
Chapter 2: Installation and Setup
Aug 2012
Troubleshooting
RAM Clear
Problems
Complete the following procedure to troubleshoot RAM Clear problems.
1 Observe all appropriate safety and ESD precautions; Preventing Injury and Damage on
page 1-3.
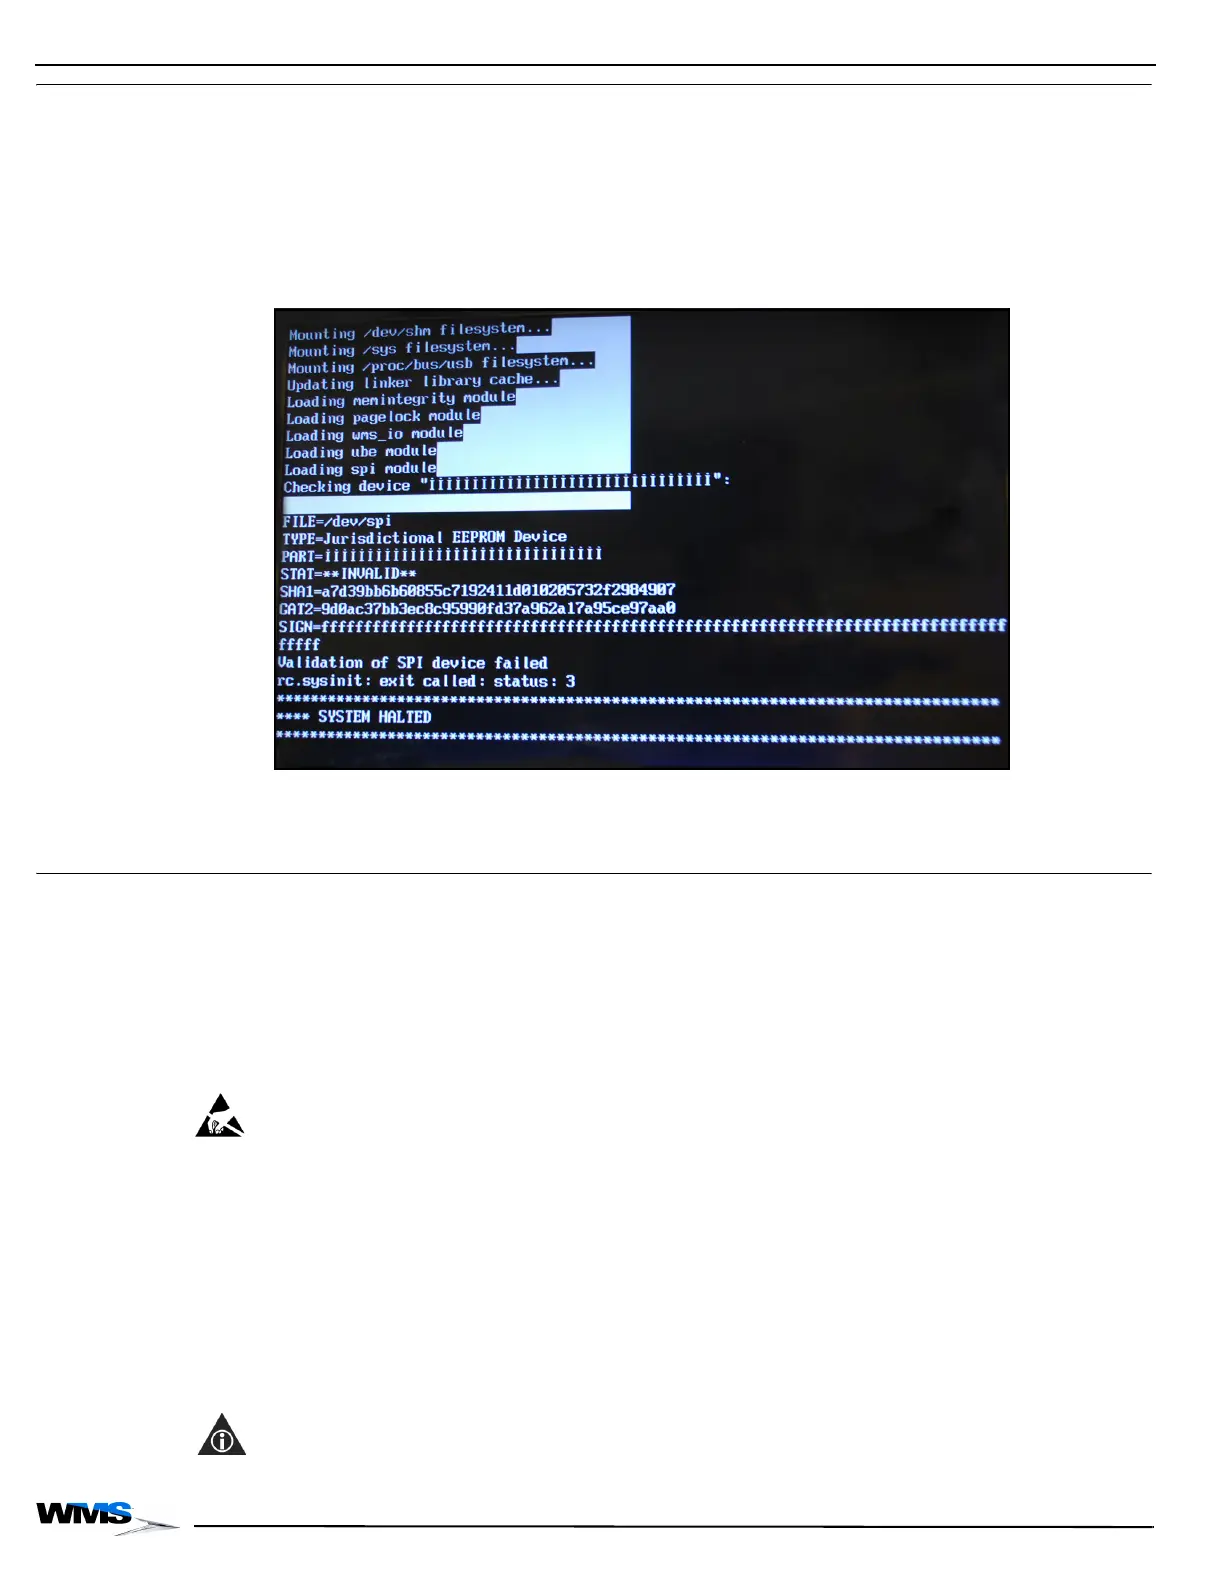
2 If the following System Halted screen, Figure 2-64 displays during the RAM Clear procedure,
verify that the correct Bios Firmware and SPI are installed, and not damaged.
Also verify that the Bulkhead Lever is properly secured.
Figure 2-64 System Halted Screen.
3 If the game does not boot up, and the System Halted screen displays, contact Customer
Product Support.
RAM Dump To diagnose a problem with a game, a RAM dump may be performed so that the data can be
gathered for analysis. In some cases, this procedure eliminates the need to return the entire CPU
Enclosure as part of the Incident Response (IR) process. This section describes the steps
necessary to perform a RAM dump on CPU-NXT 3.2 boards.
Complete the following steps to perform a RAM Dump on CPU-NXT 3.2 boards.
Special Instructions
for PCBs
Whenever accessing any printed circuit boards (PCBs) or components in direct contact with
PCBs, including EPROMs, CompactFlash Cards, and PCB connectors, use the following
procedure to prevent ESD damage to sensitive components.
ESD: Opening the game and unplugging the Power Supply Cord defeats the grounding system on
the game, as the grounding pin on the Power Supply Cord ultimately connects the game to ground.
1 Verify that the game power switch is set to OFF.
2 Verify that the ESD wrist strap is firmly secured to a game ground braid.
3 Complete all necessary PCB or component handling steps.
4 Disconnect the game Power Supply Cord before proceeding.
Before performing the RAM dump, ensure that one of the following devices is available:
CompactFlash Card with Card Reader
Portable USB drive (minimum recommended capacity: 4 GB)
NOTE: The device used must be formatted for the FAT16 or FAT32 file system.
 Loading...