4 Parts Replacement RJ-901C/RJ-900C Maintenance Manual
4-40
NOTE
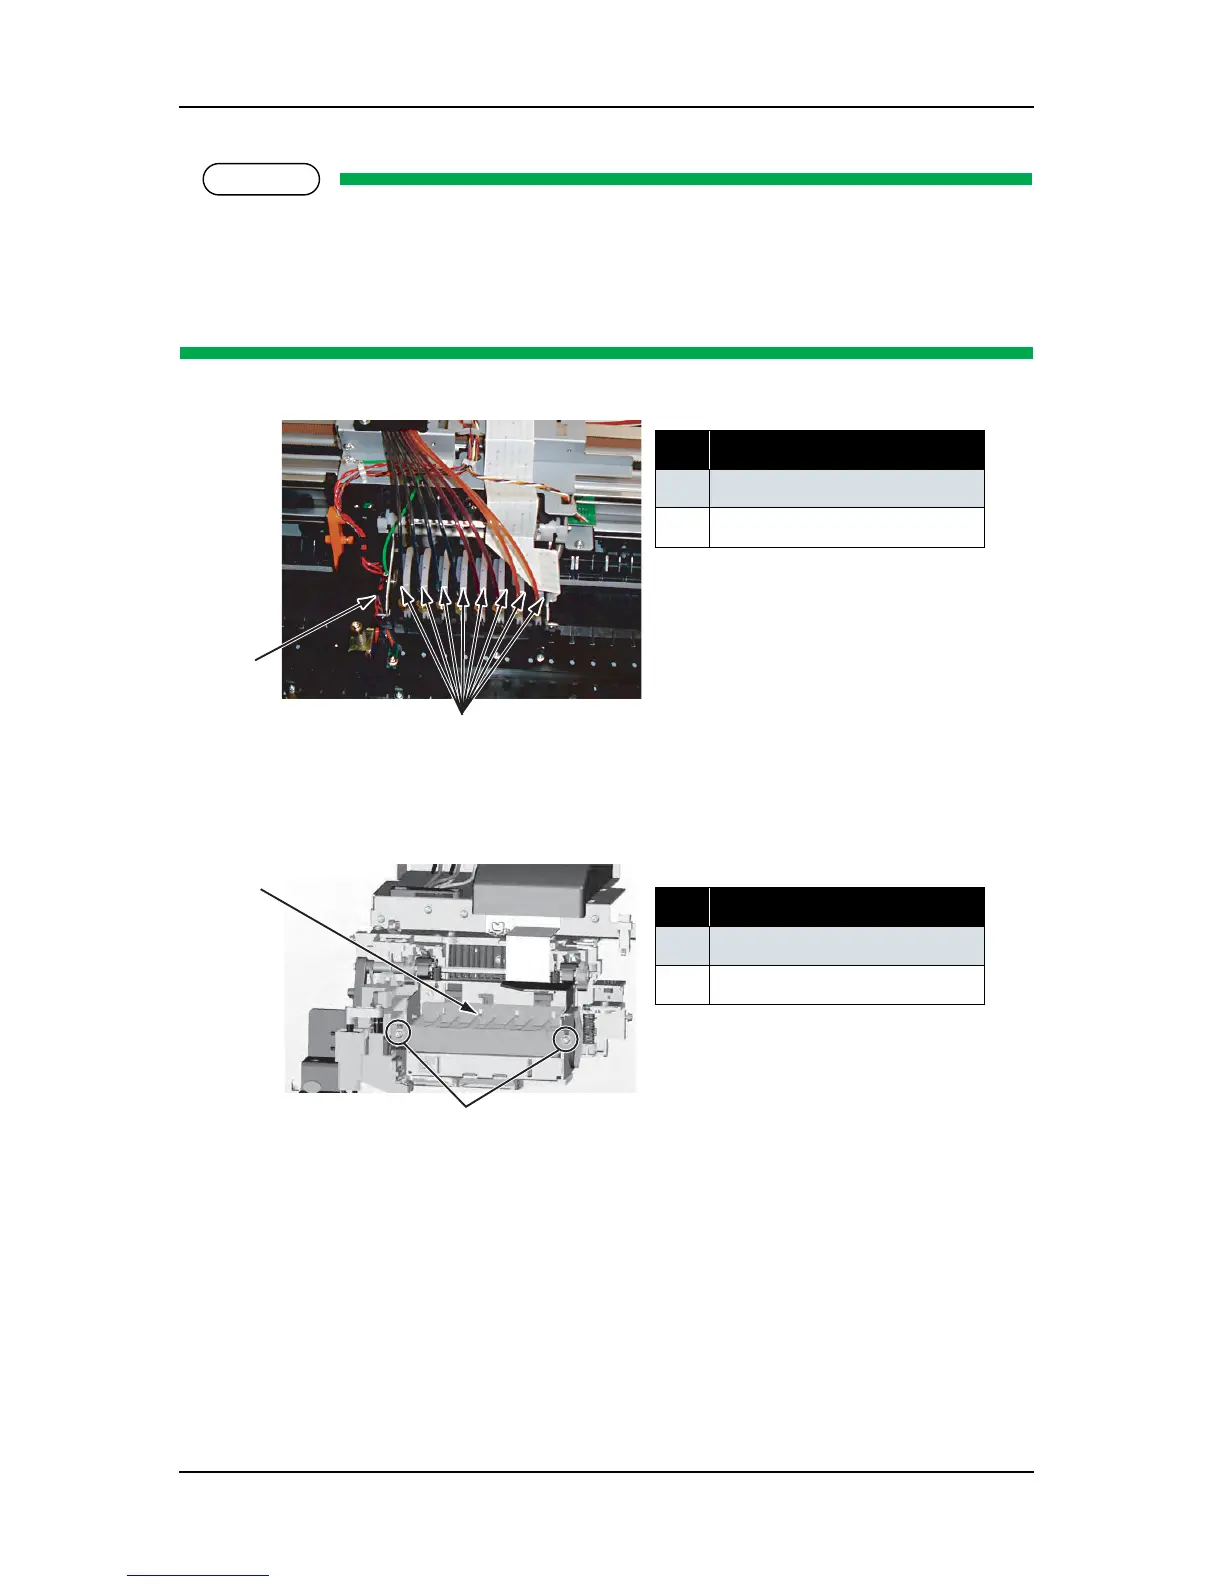
When removing the damper assembly, note the following.
• To easily remove the damper assembly, insert a flat-head driver between the carriage and the
damper assembly left protruding part, then pry out the damper assembly.
• To avoid residual ink leakage, place the removed damper on a rag.
11. Remove the damper locating material-retaining screw (pan-head screw with spring washer and flat
washer M3
× 6 W sems: 2pce).
12. Remove the damper locating material.
No. Part name
1 Flat-head driver insertion point
2
Damper assembly
No. Part name
1 Damper locating material
2
Damper locating material screw
1
2
1
2