4-39
Phaser 3635MFP
REP 14.2
Repairs and Adjustments
Draft 4
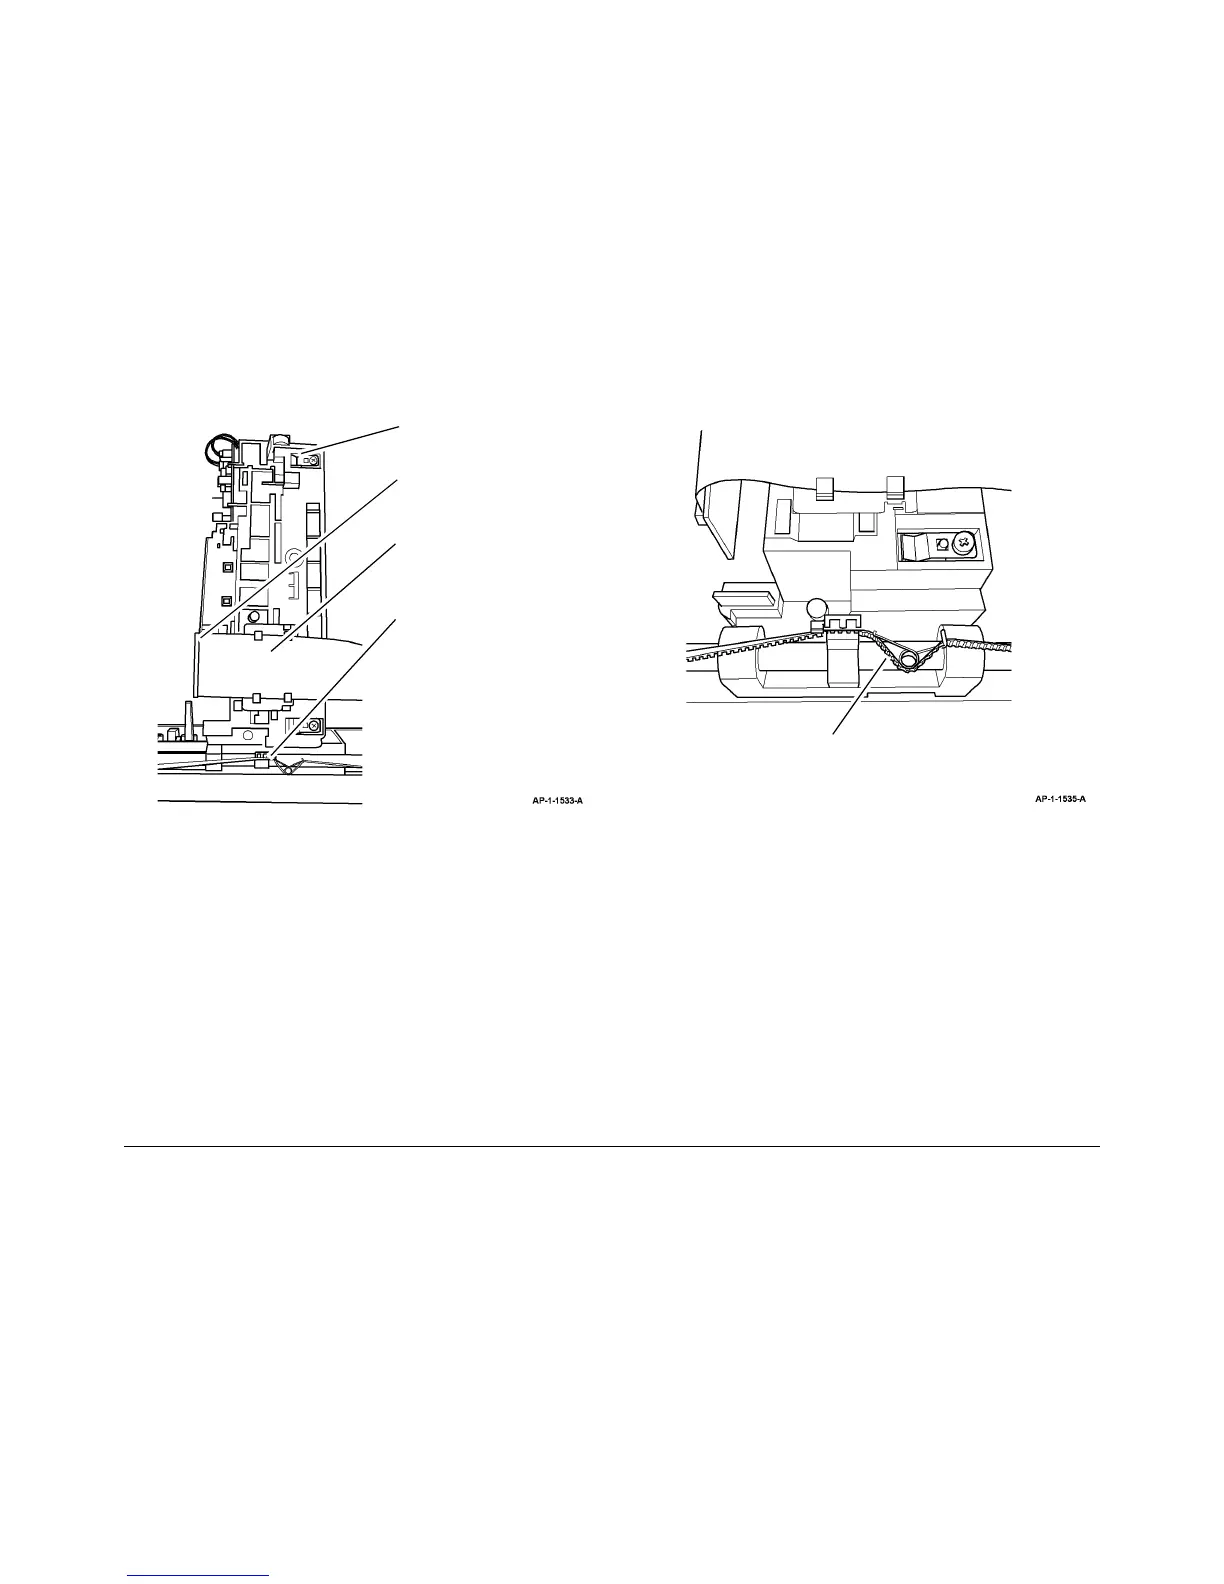
Figure 3 CCD module removal
6. If necessary, remove the scan motor drive assembly, PL 14.10 Item 6. Remove the scan
motor, PL 14.10 Item 10 from the drive assembly.
7. If necessary, remove the CCD module belt, PL 14.10 Item 17.
Replacement
1. Replacement is the reverse of the removal procedure.
2. When reconnecting the ribbon cable to the CCD module the blue flash should face the
CCD module.
3. When reinstalling the CCD module, make sure the spring on the CCD module belt is posi-
tioned correctly, Figure 4.
Figure 4 CCD module installation
2
Disconnect the ribbon cable from
the CCD module.
3
Release the ribbon cable from
below the CCD module.
1
Lift up the CCD module.
4
Release the CCD module belt.
5
Lift the left end of the CCD module
guide rail, then remove the CDD
module.
1
Position the belt spring as shown.

 Loading...


