Xerox
®
Apps
104 Xerox
®
VersaLink
®
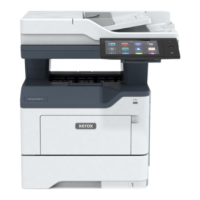
B405 Multifunction Printer
User Guide
Fax Workflows
This section includes:
• Sending a Delayed Fax ................................................................................................................................................ 104
• Sending a Cover Sheet with a Fax ........................................................................................................................... 105
• Forwarding a Fax to an Email Address .................................................................................................................. 105
• Printing a Secure Fax .................................................................................................................................................... 106
• Sending a Fax Manually .............................................................................................................................................. 106
• Polling a Remote Fax Machine ................................................................................................................................. 107
• Sending a Fax From Your Computer ....................................................................................................................... 108
Sending a Delayed Fax
You can set a time in the future for the printer to send your fax job. You can delay the send of your fax
job for up to 24 hours.
Note: Before you use this feature, ensure that the printer is set to the current time. For details, refer to
the System Administrator Guide at www.xerox.com/office/VLB405docs.
To specify the time to send your fax:
1. At the printer control panel, press the Home button.
2. Touch Fax.
3. To add a recipient fax number, use the touch screen keypad, or, to add a contact from the Address
Book, touch the Address Book icon.
4. Load original documents into the printer, then adjust the settings as needed. For details, refer to
Sending a Fax on page 101.
5. Touch Delay Send.
6. Touch Specific Time, enter the required time, then touch OK.
7. Touch Send. The fax is scanned and saved, then sent at the time that you specified.
8. If you are scanning from the document glass, when prompted, do one of the following:
− To complete the job and return to the Fax app, touch Done.
− To scan another page, load a new original document on the document glass, then touch Add
Page.
− To delete the scan and return to the Fax app, touch Cancel, then touch Delete.
Note: If you are scanning a document from the automatic document feeder, a prompt does not
appear.
9. To return to the Home screen, press the Home button.

 Loading...


