WorkCentre Pro 423/428 8-52 CHAPTER 8 ACCESSORIES
03/02 8.21 Duplex Auto Document Feeder
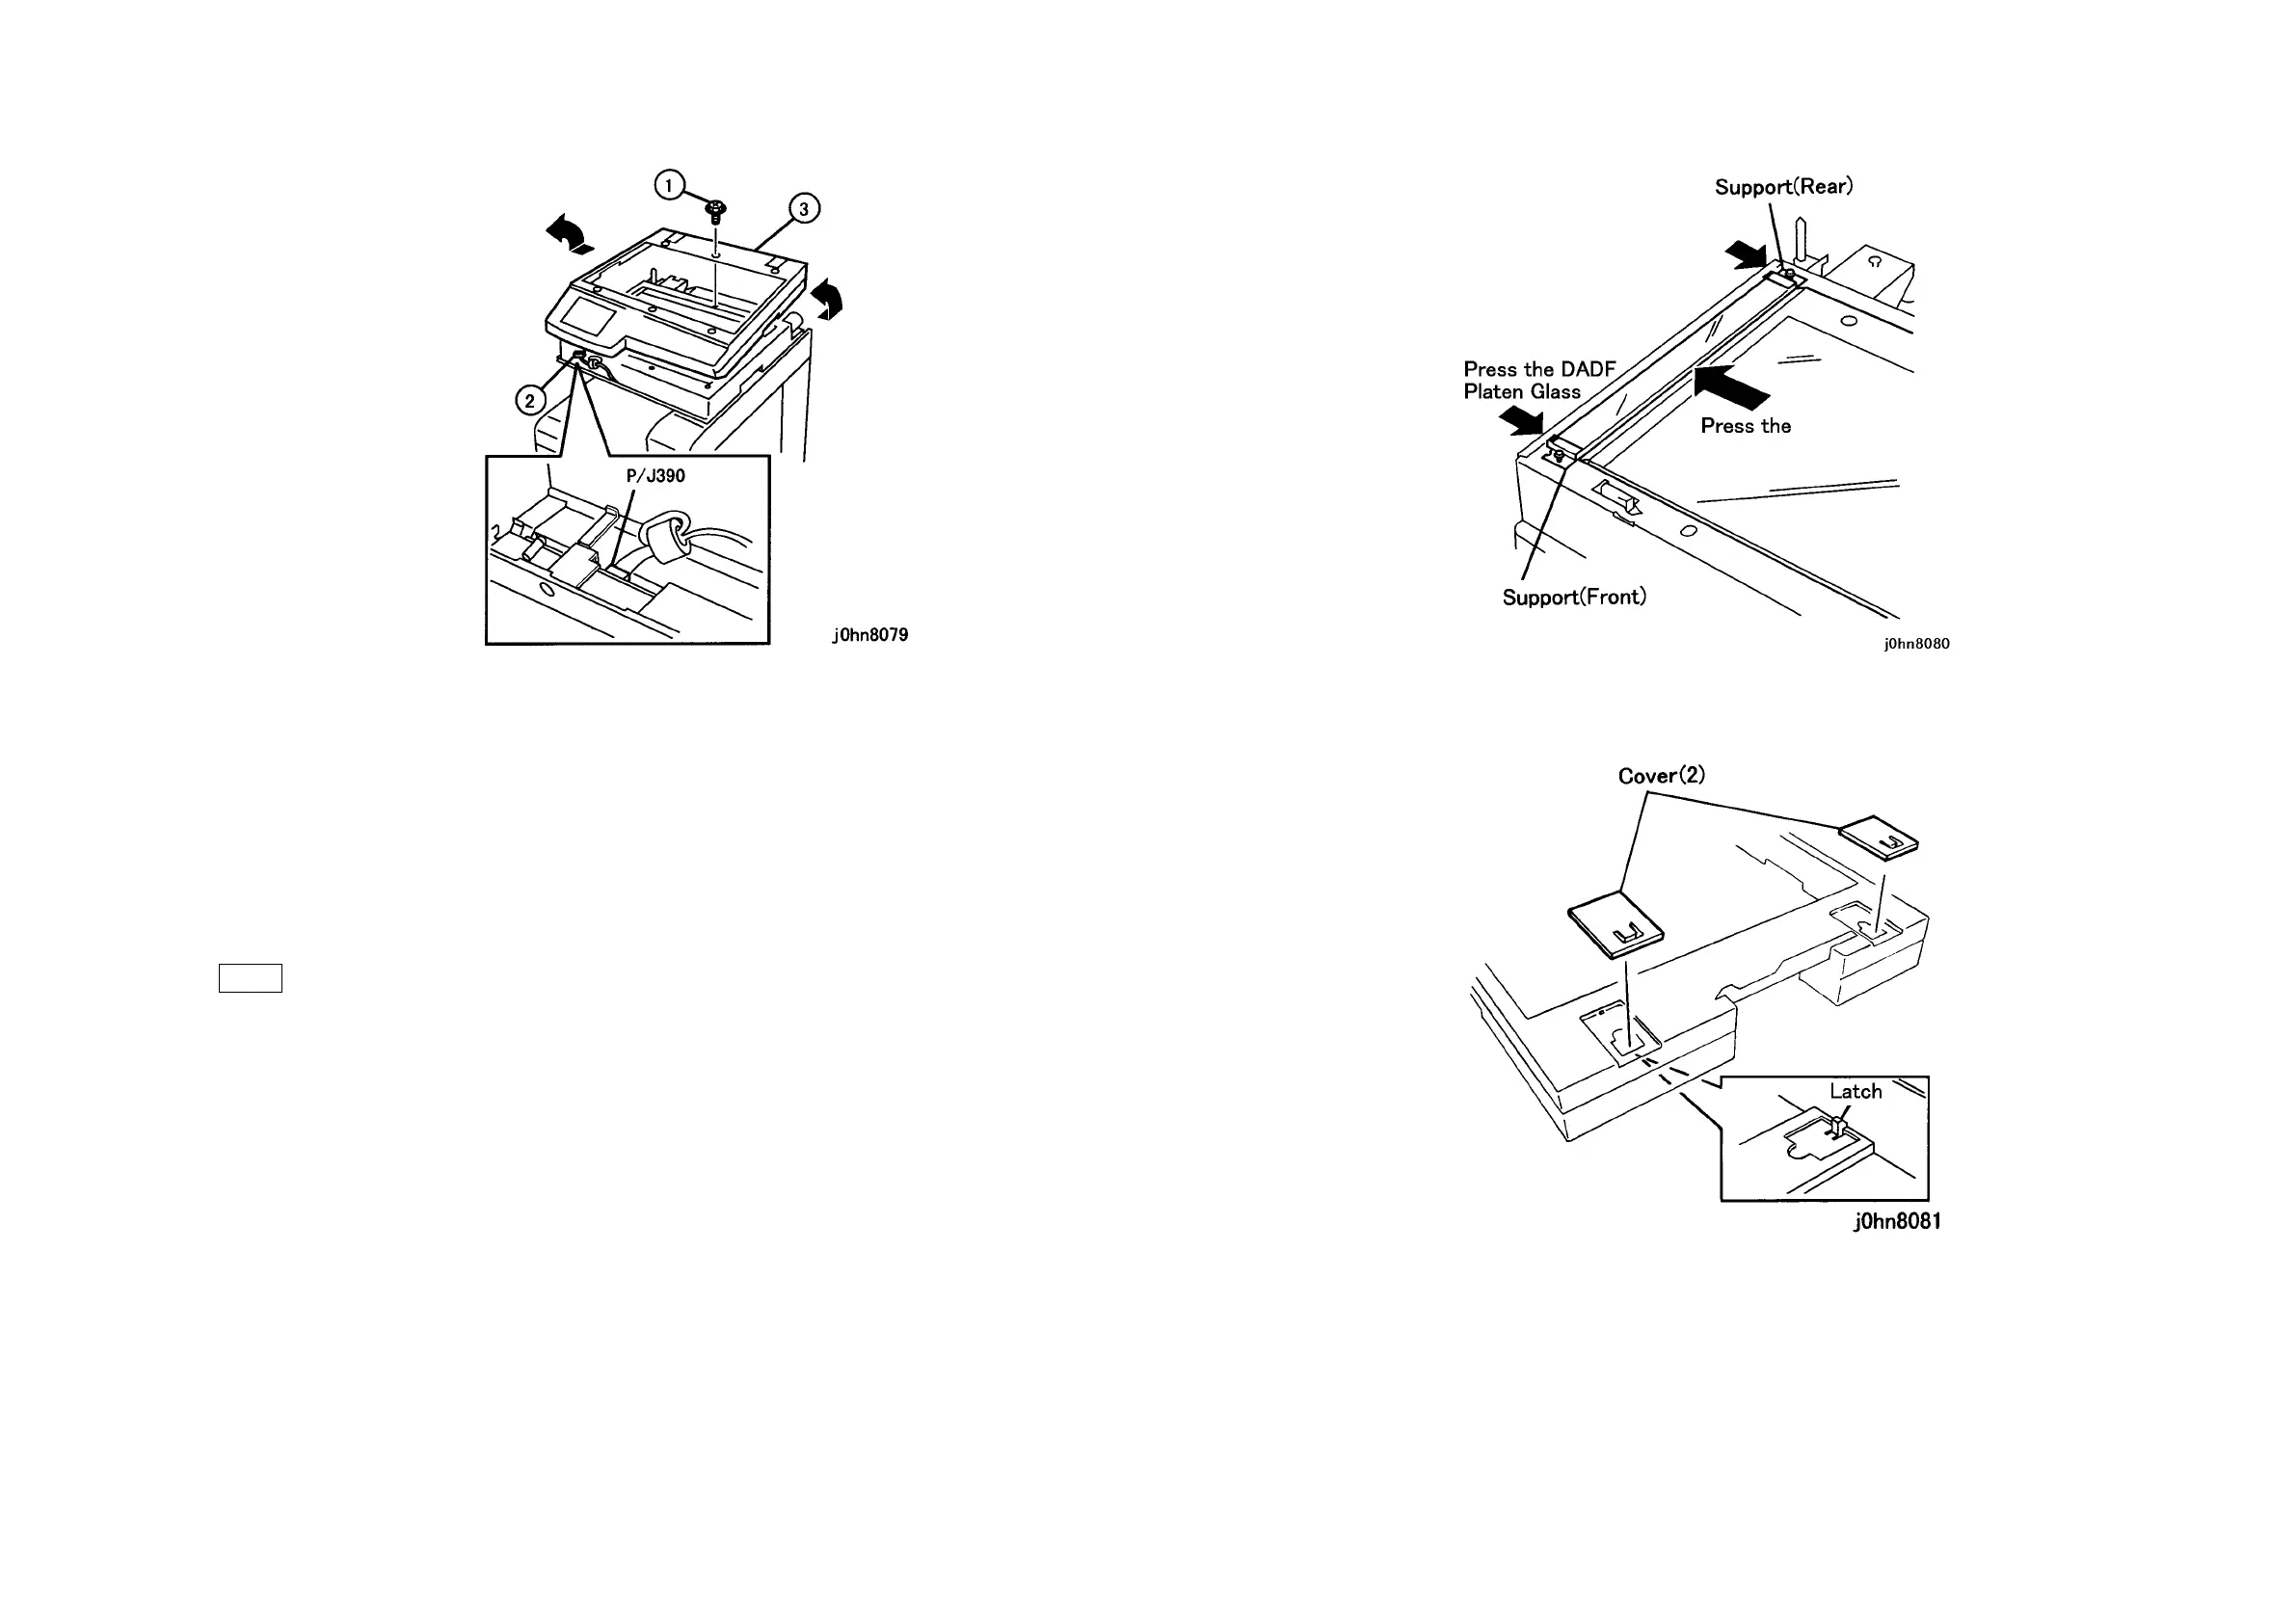
(Figure-2) j0hn8079
5. Remove the Screws (2) and remove the Left Cover from the Platen Glass.
6. Install the DADF Platen Glass. (Figure-3)
1) Temporarily secure the DADF Platen Glass with the Supports (Front and Rear) in the
kit and the Screws (2) removed in Step 5.
2) With the Platen Glass pressed against the left side, press the DADF Platen Glass
against the Platen Glass and the Supports (Front and Rear) against the DADF Platen
Glass to secure.
Note Face the white tape on the DADF Platen Glass inboard and upward.
(Figure-3) j0hn8080
7. Remove the Covers (2) from the Top Cover Assembly. (Figure-4)
(Figure-4) j0hn8081

 Loading...


