POWR
Power unit
5-19
6D81G11
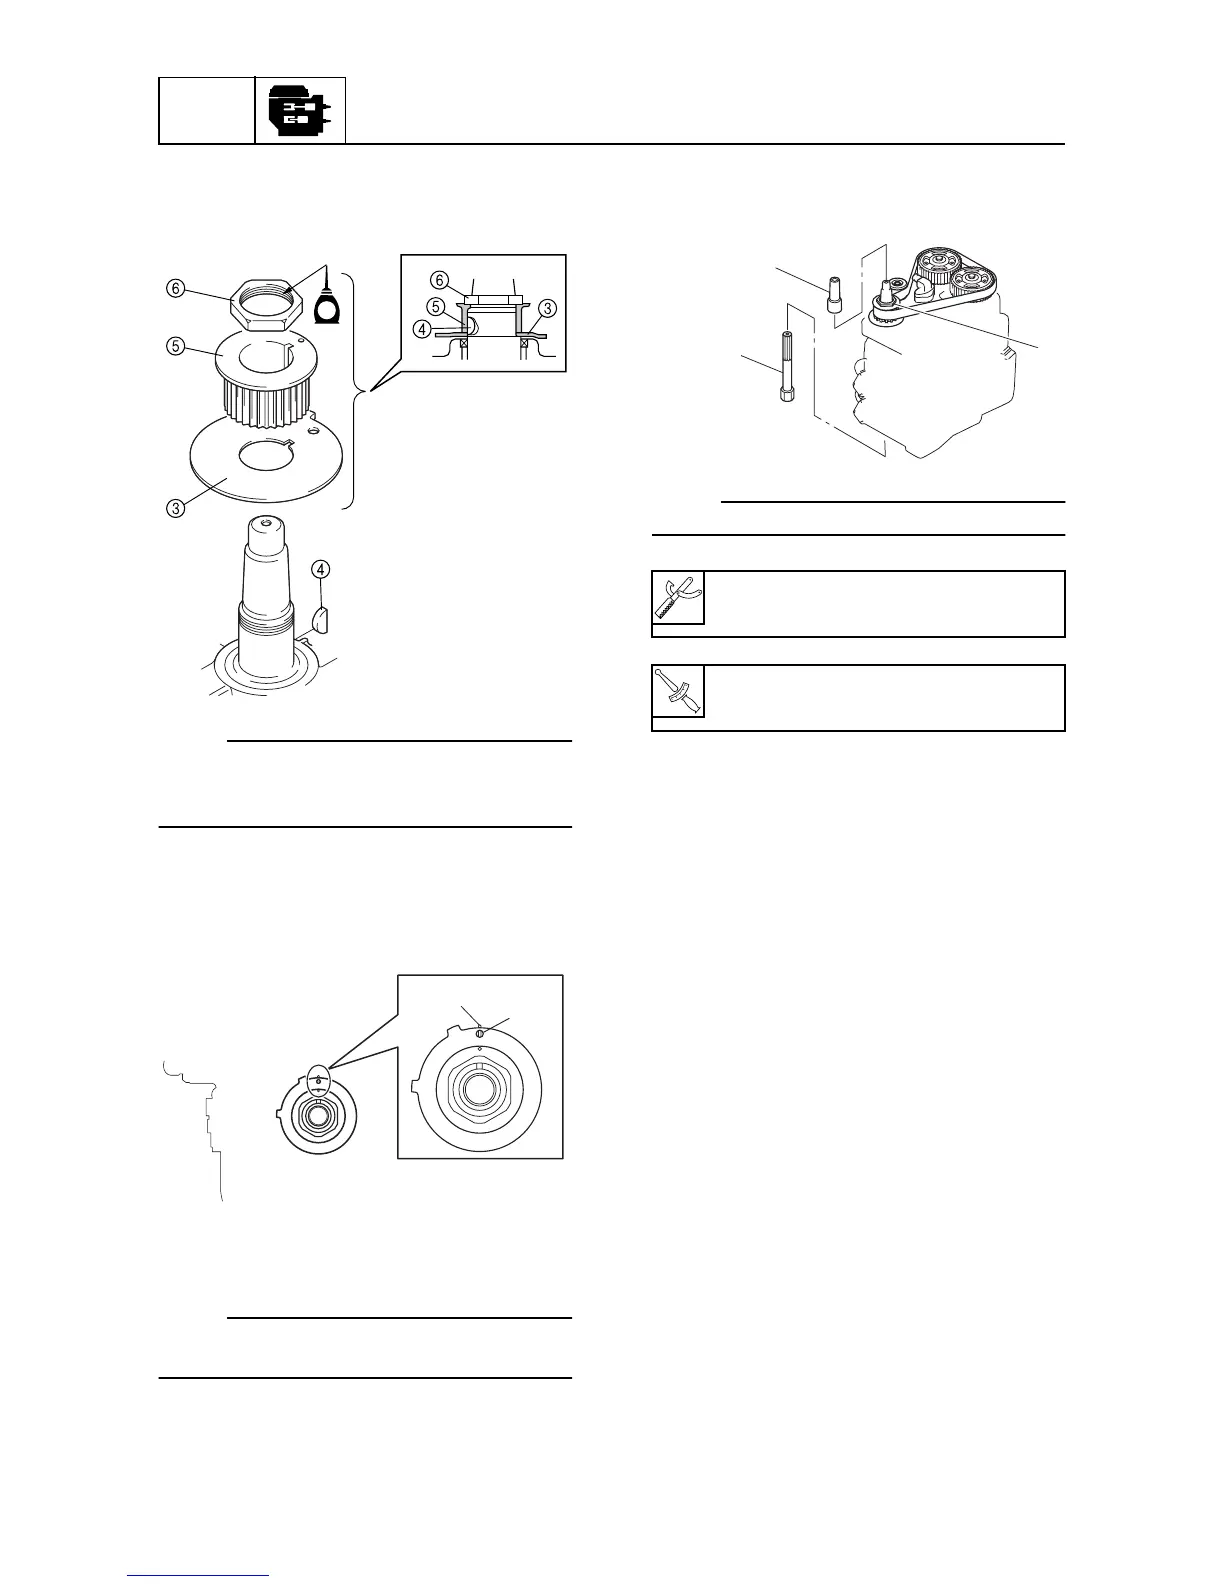
3. Install the retaining plate
3
, Woodruff
key
4
, drive sprocket
5
, and nut
6
, and
then tighten the nut.
NOTE:
• Apply engine oil to the drive sprocket nut
before installation.
• Tighten the drive sprocket nut finger tight.
4. Check that the hole
c
on the retaining
plate is aligned with the projection
d
on
the cylinder block.
5. Install the timing belt and timing belt ten-
sioner.
NOTE:
For timing belt installation procedure, see
“Replacing the timing belt.”
6. Tighten the drive sprocket nut
6
to the
specified torque.
NOTE:
Use a deep socket
7
for this procedure.
S60C5240
E
S6D85300
c
d
Crankshaft holder
8: YB-06552