6D81G11
5-38
1
2
3
4
5
6
7
8
9
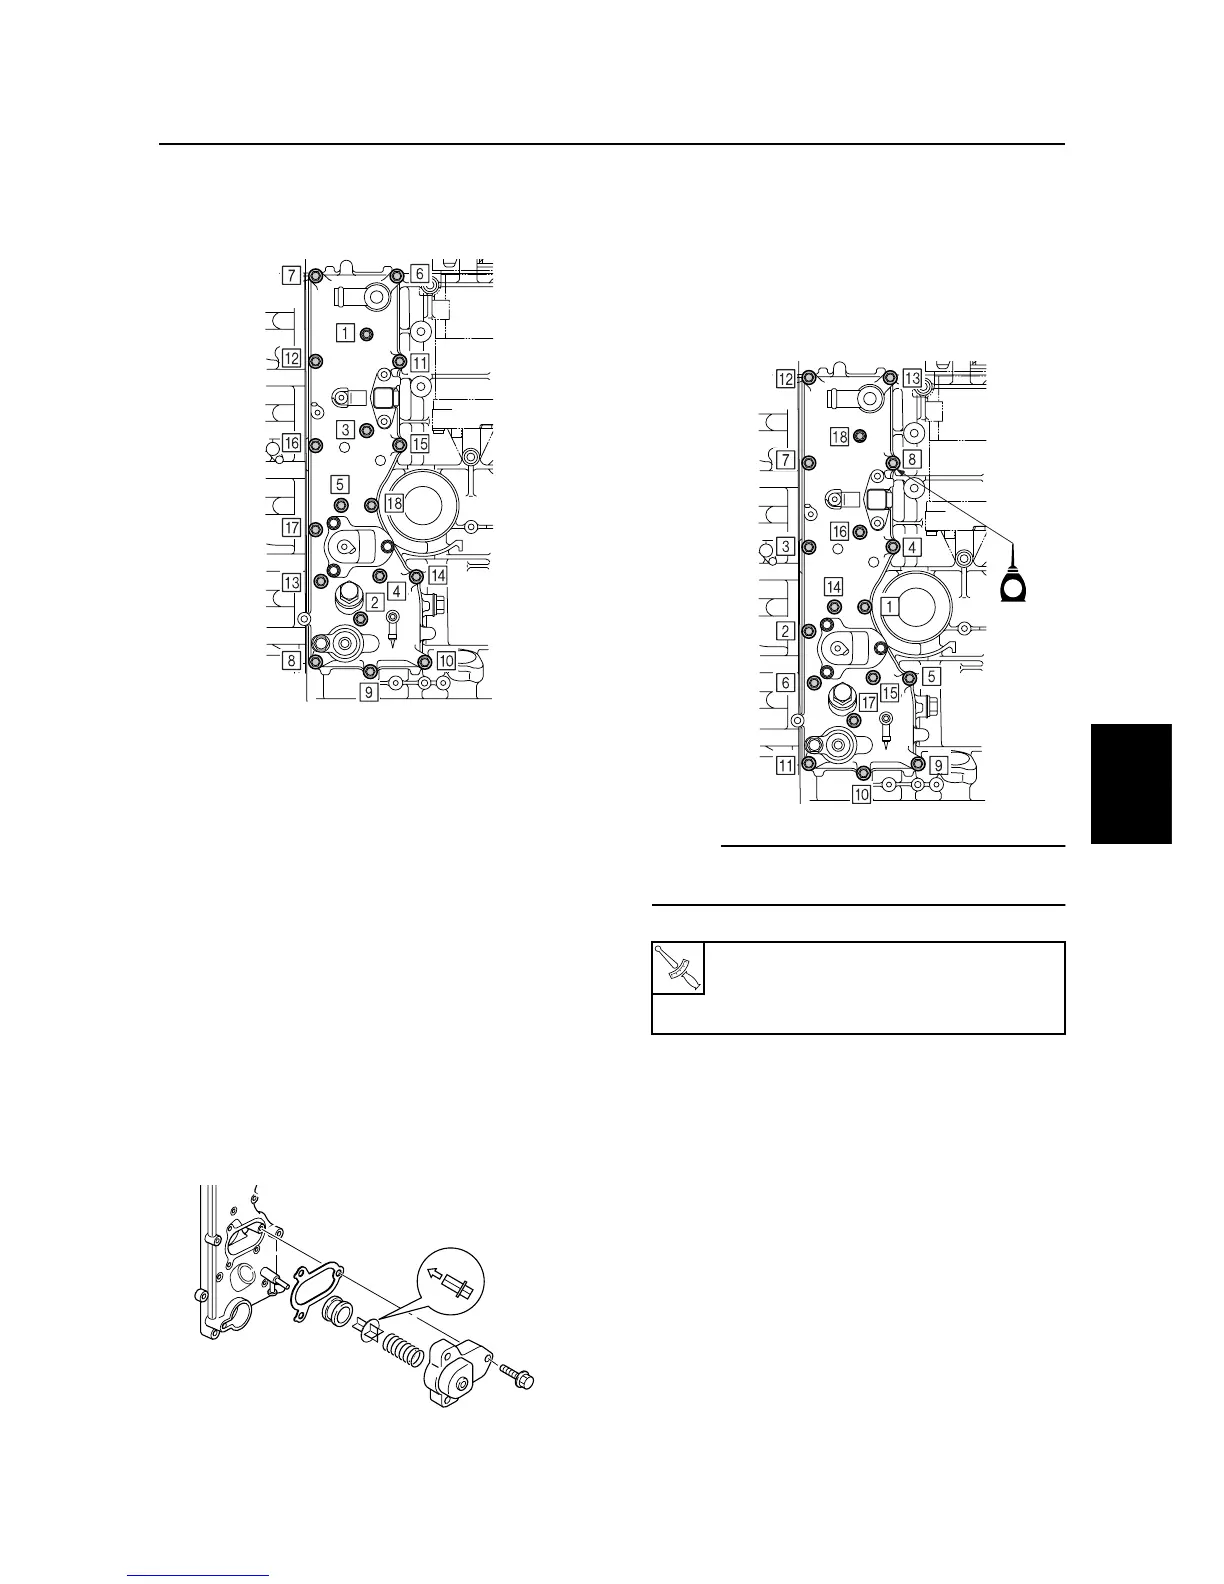
Removing the exhaust cover
1. Remove the exhaust cover bolts in the
sequence shown.
2. Remove the exhaust cover.
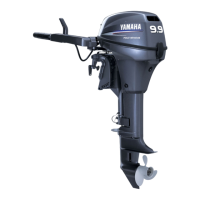
Checking the pressure control valve
1. Remove the pressure control valve.
2. Check the pressure control valve for
wear or damage. Replace if necessary.
3. Check the grommet for deformation.
Replace if necessary.
4. Check the spring for fatigue or deforma-
tion. Replace if necessary.
Installing the pressure control valve
1. Install a new gasket and the pressure
control valve, and then tighten the bolts.
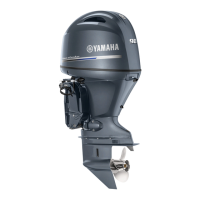
Installing the exhaust cover
1. Install a new gasket and the exhaust
cover.
2. Install the bolts, and then tighten them to
the specified torques in two stages and in
the sequence shown.
NOTE:
Apply engine oil to the exhaust cover bolts
before installation.
S6D85530
S6D85540
Exhaust cover bolt:
1st: 6 N·m (0.6 kgf·m, 4.4 ft·lb)
2nd: 12 N·m (1.2 kgf·m, 8.9 ft·lb)
S6D85550
E
Exhaust cover