POWR
Power unit
5-33
6D81G11
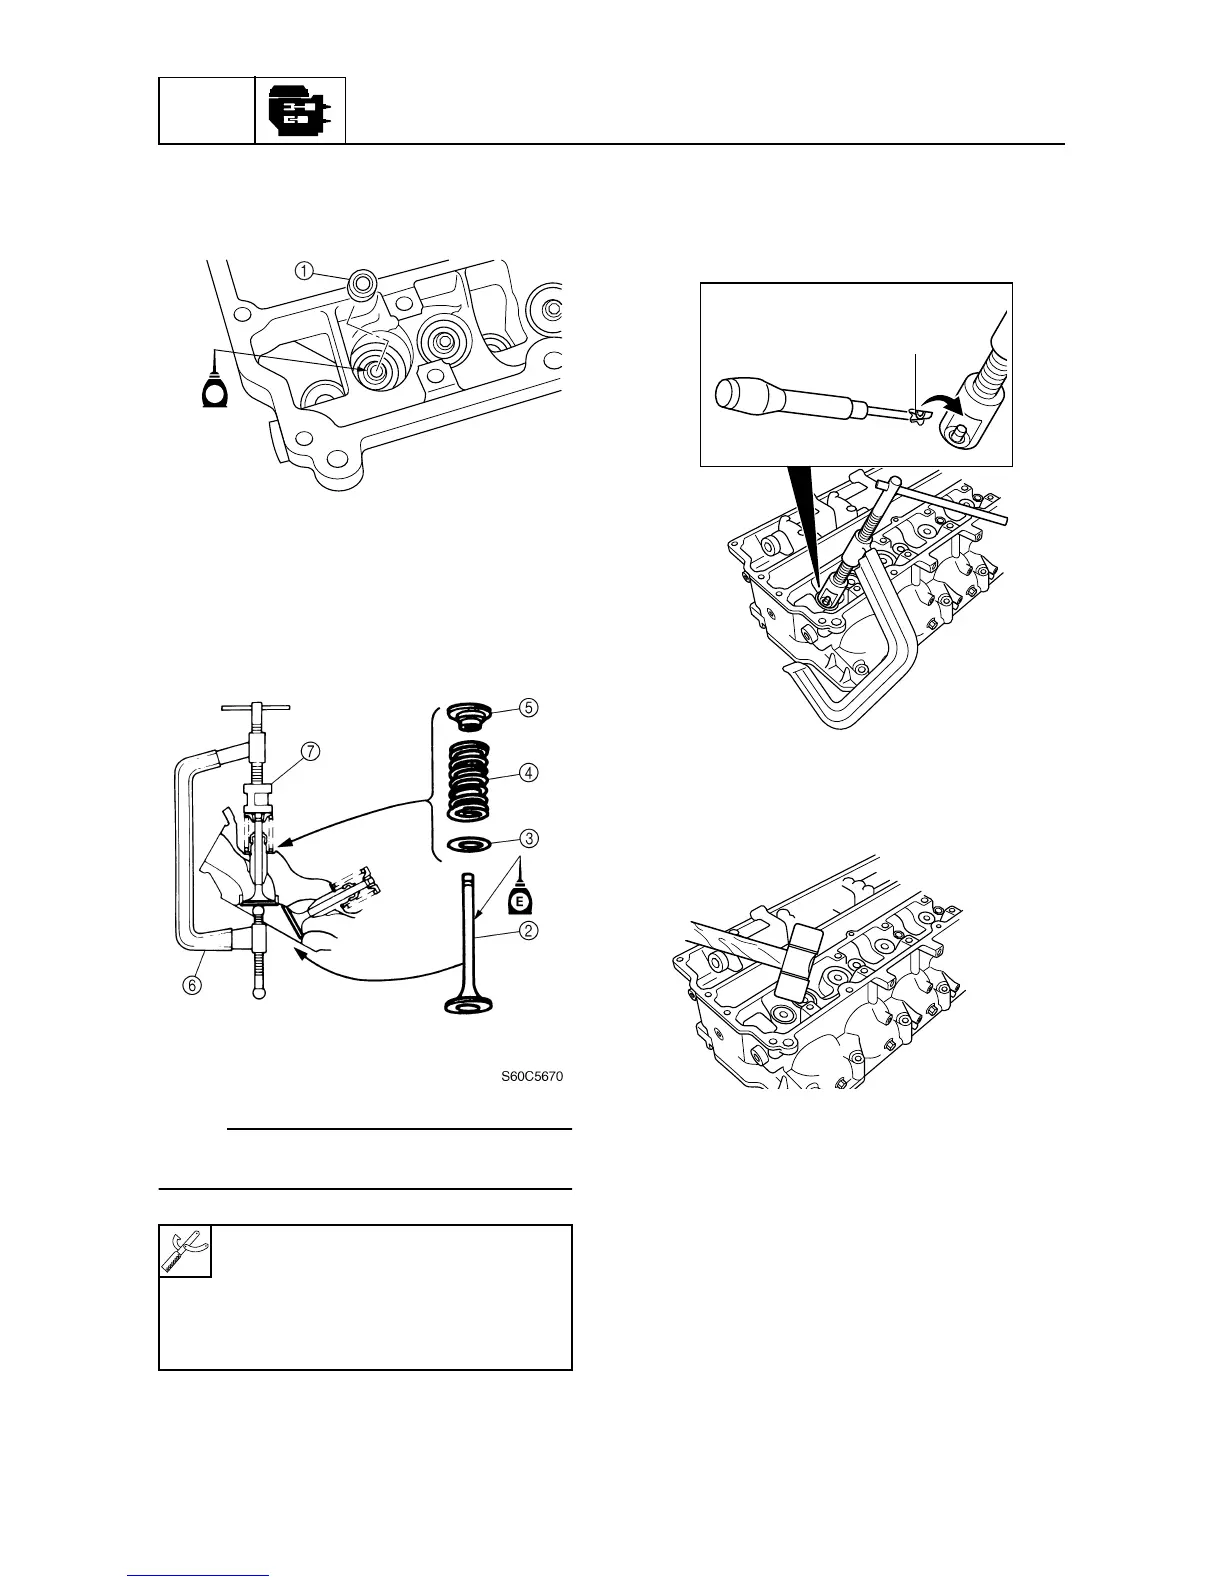
Installing the valves
1. Install a new valve seal
1
onto the valve
guide.
2. Install the valve
2
, valve spring seat
3
,
valve spring
4
, and valve spring retainer
5
in the sequence shown, and then
attach the special service tools.
NOTE:
The valve spring can be installed in any
direction.
3. Compress the valve spring, and then
install the valve cotters
8
using a thin
screwdriver with a small amount of
grease applied to it.
4. Lightly tap the valve spring retainer with
a plastic hammer to set the valve cotters
securely.
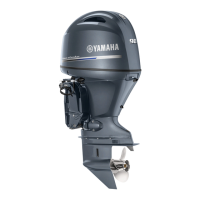
Installing the cylinder head
1. Check that the piston of cylinder #1 is at
TDC.
2. Install a new gasket and the cylinder
head, and then tighten the bolts to the
specified torques in the sequence
shown.
Valve spring compressor
6
:
YM-01253
Valve spring compressor attachment
7
:
YB-06320
S60C5660
E
S60C5680
8
S60C5690