6C13G11
5-34
1
2
3
4
5
6
7
8
9
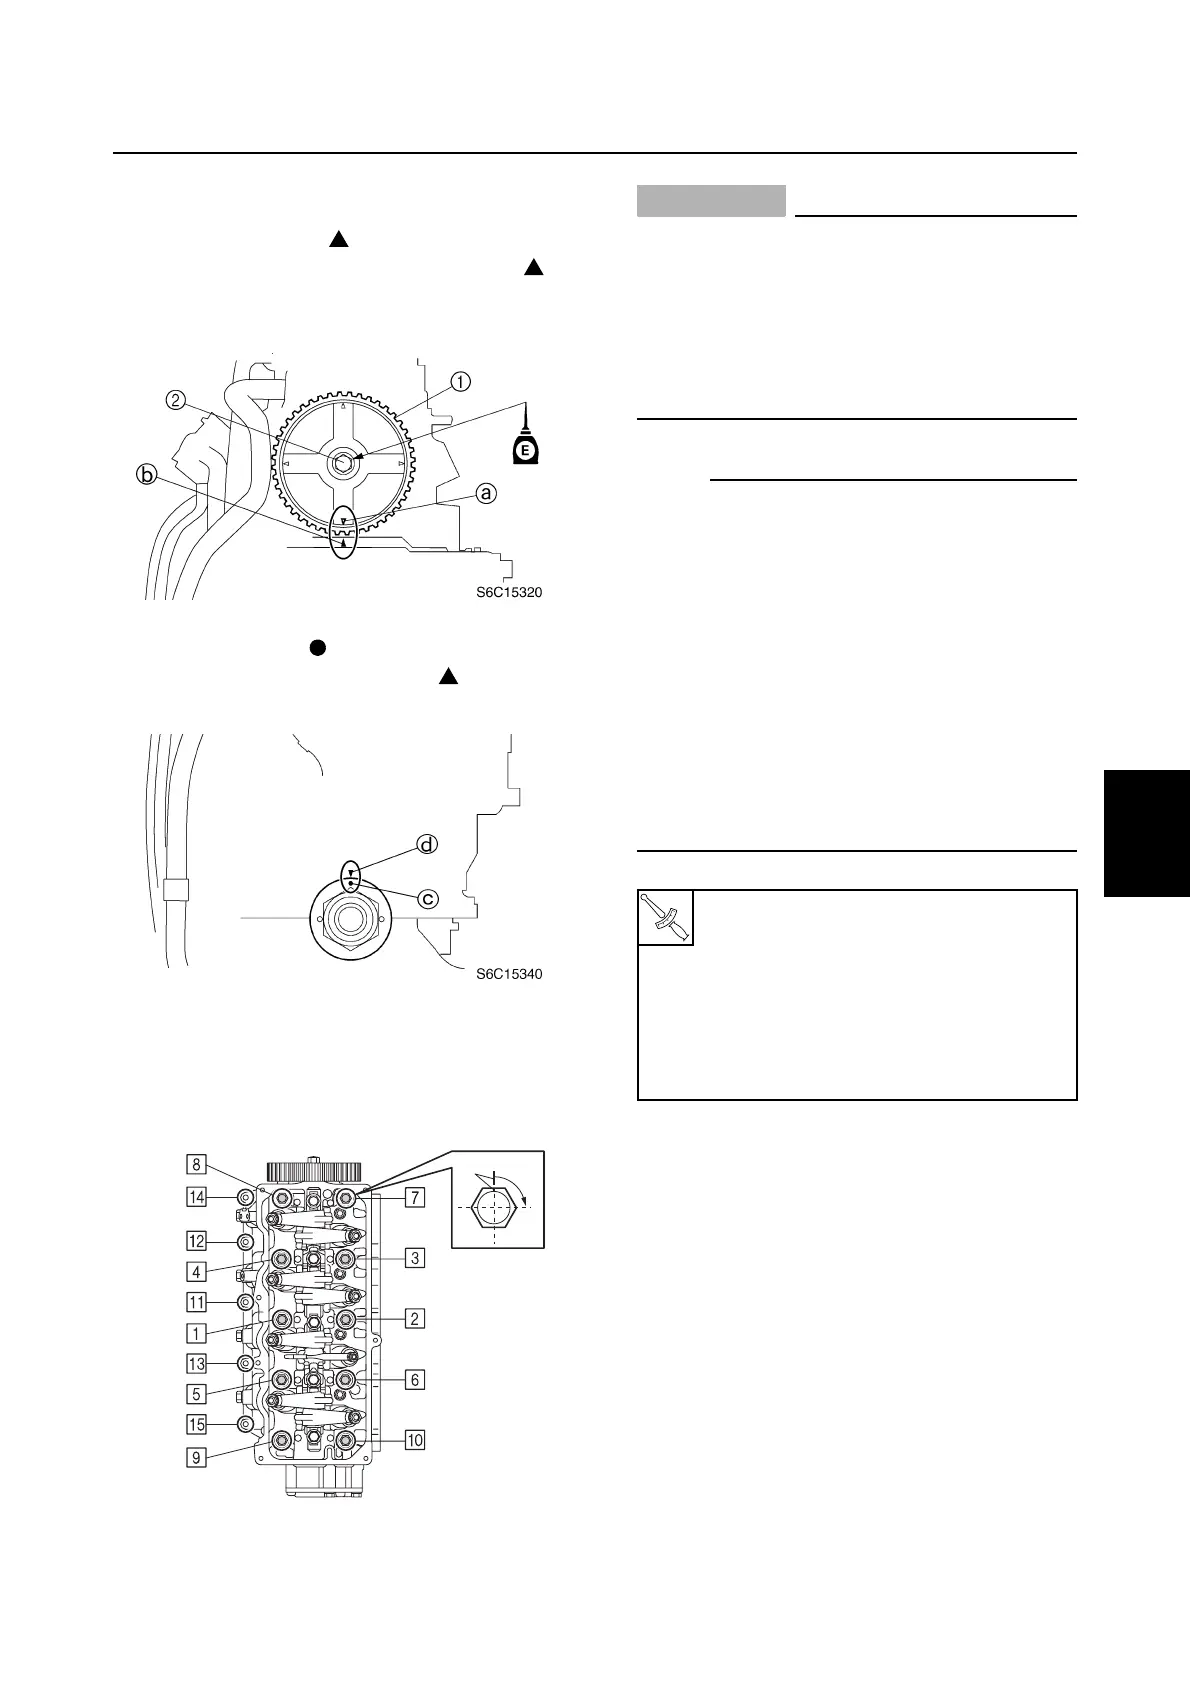
Installing the cylinder head
1. Install the driven sprocket, and then
check that the “ 1” mark
a
on the
driven sprocket
1
is aligned with the “”
mark
b
on the cylinder head, and then
tighten the bolt
2
.
2. Check that the “” mark
c
on the retain-
ing plate is aligned with the “” mark
d
on the cylinder block.
3. Install a new gasket and the cylinder
head, and then tighten the bolts to the
specified torques in two stages and in the
sequence shown.
CAUTION:
• Do not reuse the cylinder head gasket,
always replace it with a new one.
• Do not turn the drive sprocket or the
driven sprocket when the timing belt is
not installed. Otherwise the piston and
valves will interfere with each other and
be damaged.
NOTE:
• Apply engine oil to the cylinder head bolts
before installation.
• Tighten the M9 bolts to the specified
torques in two stages first, and then make a
mark
e
on the M9 bolts and the cylinder
head, and then tighten the bolts 90° from
the mark.
• Tighten the M6 bolts to the specified
torques in two stages.
• After installing the cylinder head, install the
timing belt and check the valve clearances.
See the applicable procedures in this man-
ual.
4. Install the cylinder head cover, and then
tighten the bolts.
S6C15600
90˚
e
Cylinder head bolt (M9):
1st: 12 N·m (1.2 kgf·m, 8.9 ft·lb)
2nd: 23 N·m (2.3 kgf·m, 17.0 ft·lb)
3rd: 90°
Cylinder head bolt (M6):
1st: 6 N·m (0.6 kgf·m, 4.4 ft·lb)
2nd: 12 N·m (1.2 kgf·m, 8.9 ft·lb)
Cylinder head