6C13G11
7-44
1
2
3
4
5
6
7
8
9
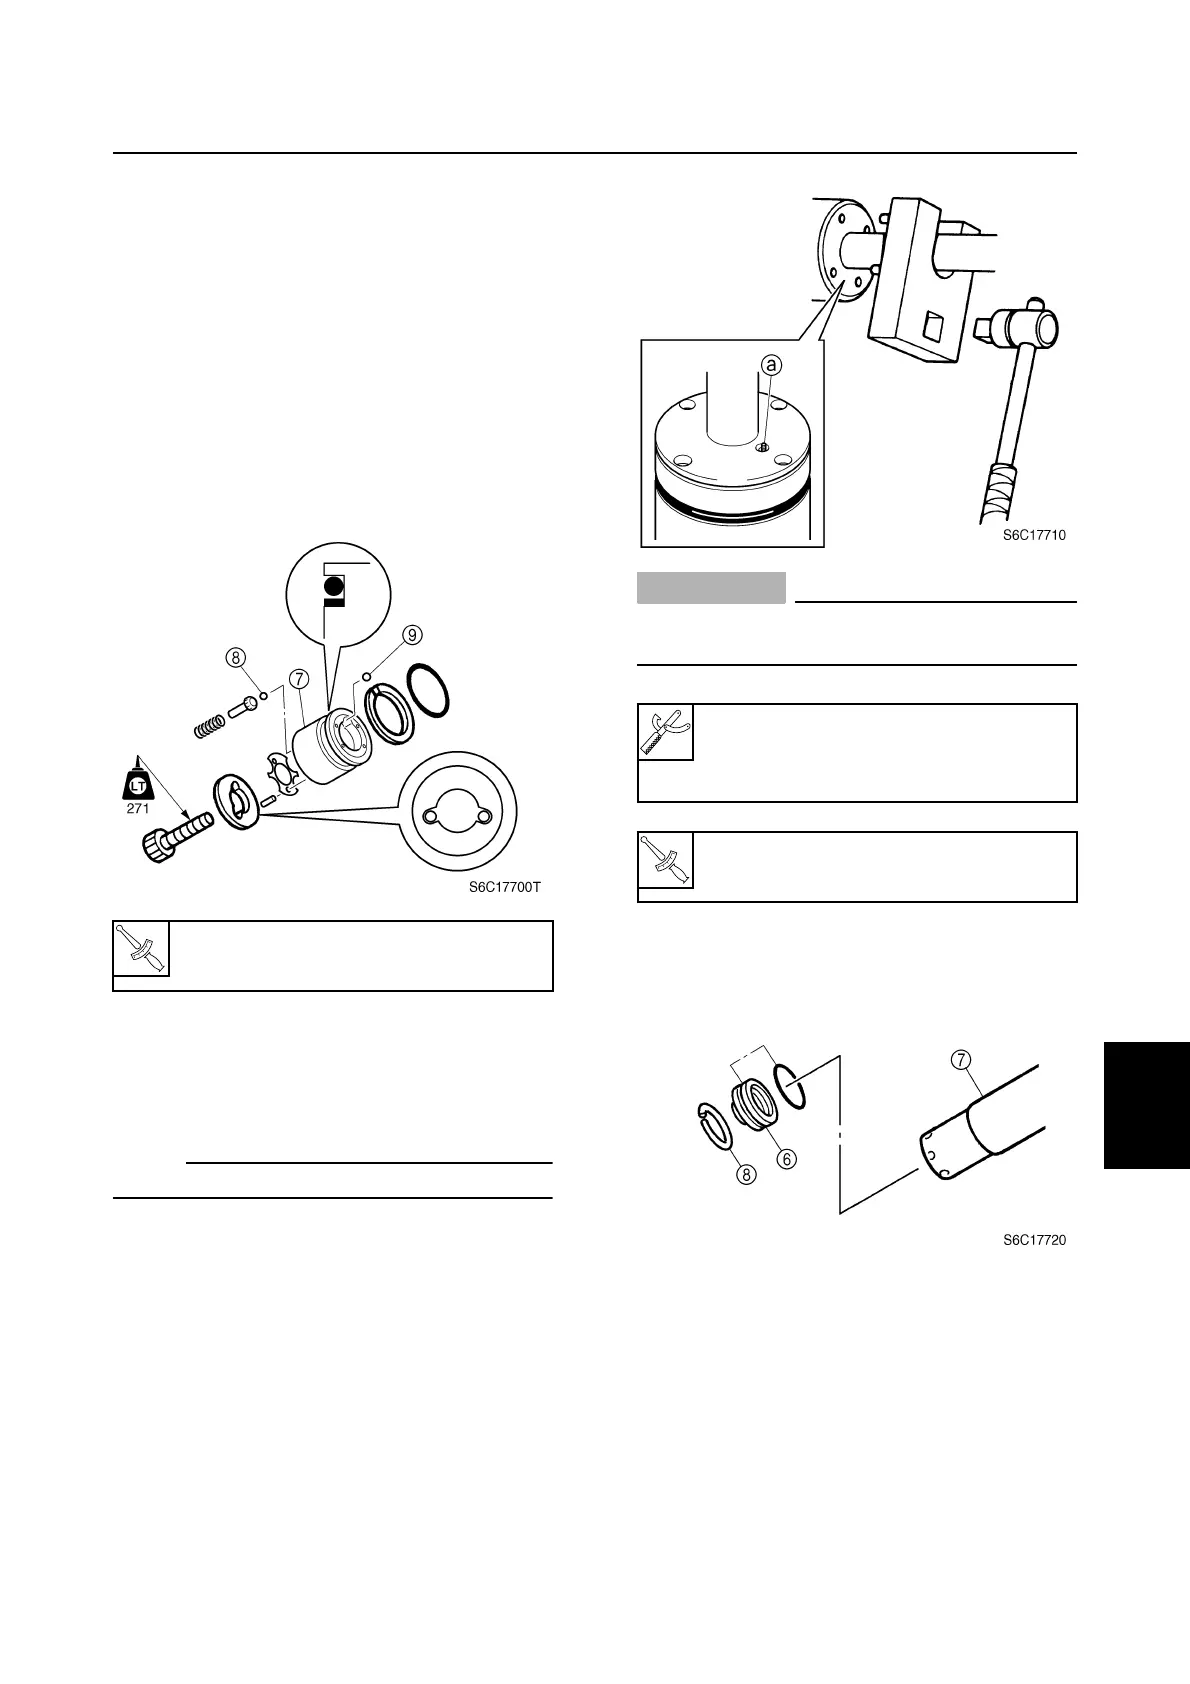
6. Install the backup ring and new O-ring
into the tilt piston
7
.
7. Install balls
8
and
9
, absorber valve
pin, spring, pins, plate, and washer into
the tilt piston.
8. Hold the tilt ram end in a vise using alu-
minum plates on both sides.
9. Install the tilt piston to the tilt ram by
installing the bolt, then tightening it to the
specified torque.
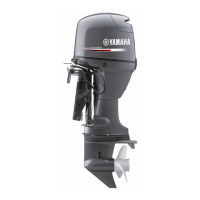
10. Install the tilt ram into the tilt cylinder.
11. Hold the tilt cylinder in a vise using alumi-
num plates on both sides.
NOTE:
Place the tilt cylinder in the vise horizontally.
12. Install the tilt cylinder end screw, and
then tighten it to the specified torque.
CAUTION:
Do not damage the check valve
a
when
tightening the end screw.
13. Install the free piston
6
into the tilt cylin-
der
7
with the circlip
8
.
14. Install the cylinder base
9
, springs
0
,
and plate
A
into the tilt cylinder with the
circlip
B
.
T
R
.
.
Tilt piston bolt:
61 N·m (6.1 kgf·m, 45.0 ft·lb)
Cylinder-end screw wrench:
New: 90890-06568
Current: 90890-06544
Tilt cylinder end screw:
80 N·m (8.0 kgf·m, 59.0 ft·lb)
Tilt cylinder and trim cylinder