Talkback and Oscillator
Reference Manual
110
2 TALKBACK ON button
Switches talkback on or off.
3 ASSIGN field
• Channel select buttons
Enable you to select a channel (bus) on which the talkback signal is sent.
• CLEAR ALL button
Press this button to clear all selections.
Using the Oscillator function
You can send a sine wave or pink noise from the internal oscillator to the desired bus.
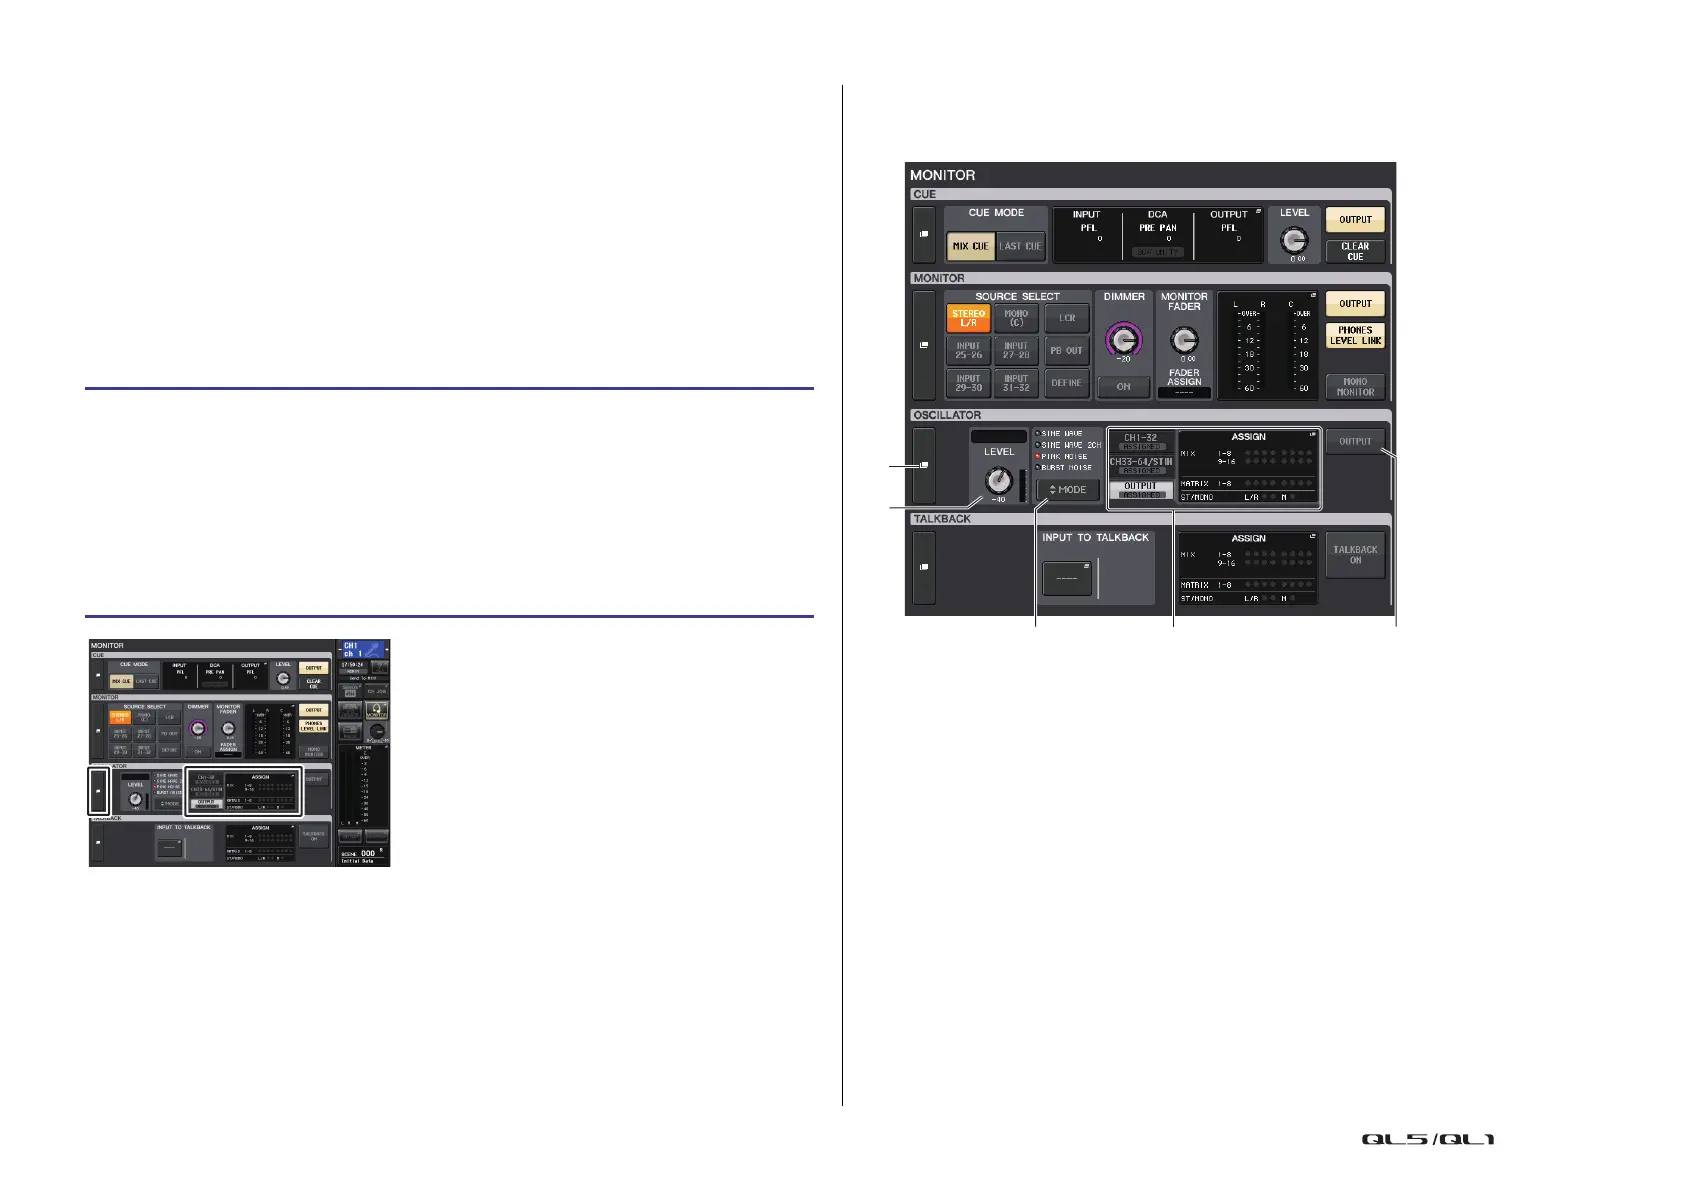
MONITOR screen
In the MONITOR screen, the OSCILLATOR field lets you check the current oscillator settings,
and turn the oscillator on or off.
1 OSCILLATOR display button
When you press this button, the OSCILLATOR screen will appear, in which you can make
detailed oscillator settings.
2 OSCILLATOR LEVEL field
This adjusts the level of the oscillator. A meter beside the LEVEL knob indicates the
output level of the oscillator. If OSCILLATOR MODE is set to SINE WAVE, the frequency
of the oscillator is shown. If you press the LEVEL knob, you can use the [TOUCH AND
TURN] knob to adjust the oscillator level.
3 OSCILLATOR MODE field
Indicates the currently-selected oscillator mode. Pressing the MODE button repeatedly
will switch modes.
4 OSCILLATOR ASSIGN field
An indicator lights to indicate the currently-selected oscillator output destination (input
channels or buses). Use the tabs on the left to select channels or buses to display.
NOTE
In the case of QL1, channels that do not exist on the model will not be shown.
STEP
1. In the Function Access Area, press the MONITOR button.
2. Press the OSCILLATOR display button or the ASSIGN field in the MONITOR screen.
3. Press a button in the OSCILLATOR MODE field in the OSCILLATOR window to select
the type of signal you want to output.
4. Use the knobs and buttons in the parameter field to adjust the oscillator parameters.
5. Press a button in the ASSIGN field to specify the input channel(s) or bus(es) to which
the oscillator signal will be sent (multiple selections are allowed).
6. Press the OUTPUT button to enable the oscillator.

 Loading...


