Monitor and Cue functions
Reference Manual
98
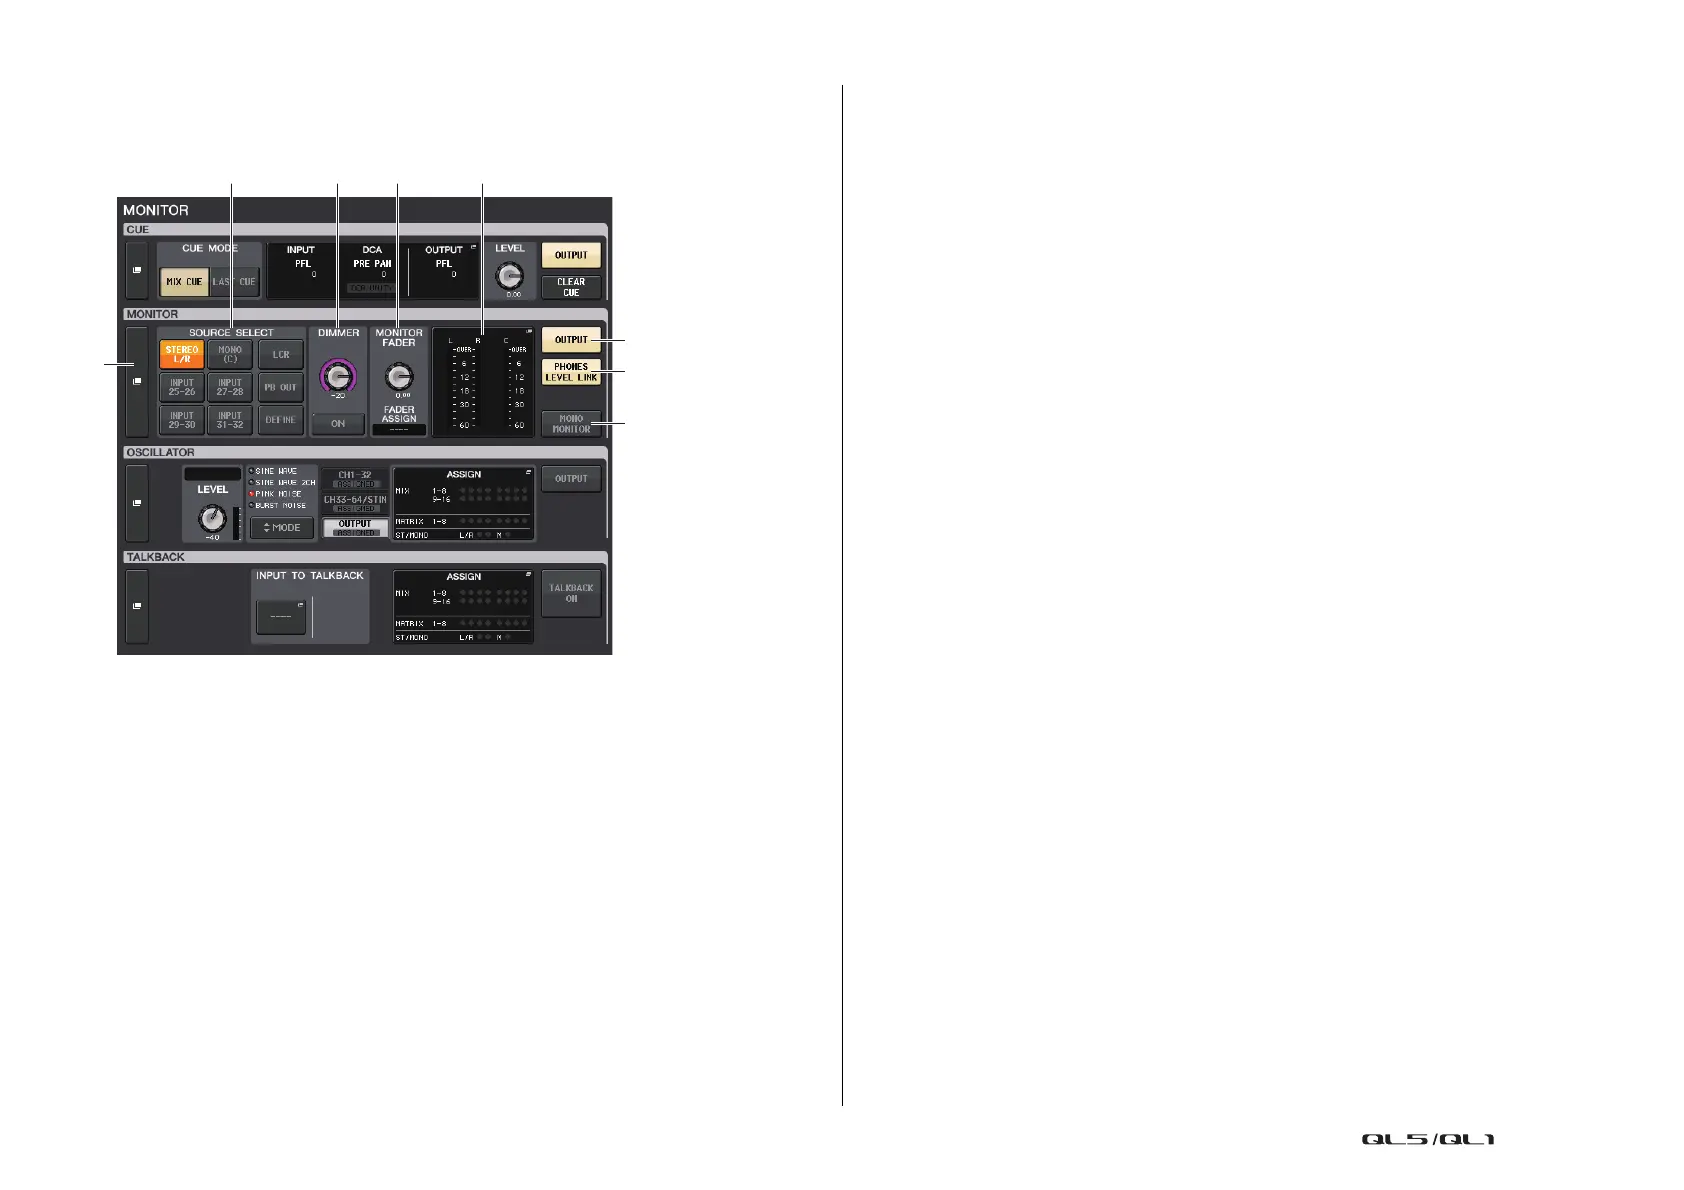
MONITOR screen
In the MONITOR screen, the MONITOR field lets you check the current monitor settings, and
turn monitoring on or off.
1 MONITOR display button
When you press this button, the MONITOR window will appear, in which you can make
detailed monitor settings.
2 SOURCE SELECT field
Selects the monitor source. If DEFINE has been selected in this field, access the
MONITOR window to specify the source channel.
3 DIMMER field
Enables you to make settings for the Dimmer function, which temporarily attenuates
monitor signals.
• DIMMER LEVEL knob
Adjusts the amount by which the monitor signals will be attenuated when the dimmer
is on.
• DIMMER ON button
Turn on this button to enable the dimmer and attenuate the monitor signal.
4 MONITOR FADER field
Enables you to set and view the monitor fader that adjusts the monitor level.
• MONITOR FADER LEVEL knob
Adjusts the monitor fader level.
• FADER ASSIGN display
This area displays the type of faders that are currently assigned to the monitor fader.
Indicator assignments are as follows.
• ---- .......................................... No assignment
• MASTER A ............................ Master A only
• MASTER A+ .......................... Master A, Master B, Custom fader bank
• MASTER B ............................ Master B only
• MASTER B+ .......................... Master B, Custom fader bank
• CUSTOM................................ A single fader in the Custom fader bank
• CUSTOMs.............................. Multiple faders in the Custom fader bank
5 Meter field
Indicates the output level of Monitor Out channels L, R, and C. Press this field to open
the MONITOR window.
6 MONITOR OUTPUT button
Switches the Monitor Output on or off.
7 PHONES LEVEL LINK button
If this is on, the MONITOR FADER LEVEL knob or MONITOR FADER will adjust the level
of signals sent to the PHONES Out jack.
8 MONO MONITOR button
Turn on this button to switch monitor signals to mono.

 Loading...


