Index
Index-1
INDEX
A
absolute encoder battery - - - - - - - - - - - - - - - - - - - - - - - - -2-7
,
5-18
absolute encoder reception sequence - - - - - - - - - - - - - - - - - - - - 8-33
absolute encoders
handling - - - - - - - - - - - - - - - - - - - - - - - - - - - - - - - - - - - - 8-28
selection - - - - - - - - - - - - - - - - - - - - - - - - - - - - - - - - - - - - 8-30
setup (initialization) - - - - - - - - - - - - - - - - - - - - - - - - - - - - 8-32
wiring - - - - - - - - - - - - - - - - - - - - - - - - - - - - - - - - - - - - - - 6-9
accumulated load rate - - - - - - - - - - - - - - - - - - - - - - - - - - - - - - 7-29
adjusting offset - - - - - - - - - - - - - - - - - - - - - - - - - - - - - - - - - - 8-40
alarm code output- - - - - - - - - - - - - - - - - - - - - - - - - - - - - - - - - 8-77
alarm display and troubleshooting- - - - - - - - - - - - - - - - - - - - - - 10-7
alarm display table - - - - - - - - - - - - - - - - - - - - - - - - - - - - - - - - 10-2
alarm reset - - - - - - - - - - - - - - - - - - - - - - - - - - - - - - - - - - - - - 8-77
alarm reset availability - - - - - - - - - - - - - - - - - - - - - - - - - - - - - 10-2
alarm traceback data
clear (Fn006)- - - - - - - - - - - - - - - - - - - - - - - - - - - - - - - - - 7-11
display (Fn000) - - - - - - - - - - - - - - - - - - - - - - - - - - - - - - - - 7-8
alignment - - - - - - - - - - - - - - - - - - - - - - - - - - - - - - - - - - - - - - - 3-9
allocating input signals - - - - - - - - - - - - - - - - - - - - - - - - - - - - - 7-26
allocating output signals - - - - - - - - - - - - - - - - - - - - - - - - - - - - 7-28
allowable radial loads - - - - - - - - - - - - - - - - - - - - - - - - - - - - - - 3-13
allowable thrust loads - - - - - - - - - - - - - - - - - - - - - - - - - - - - - - 3-13
ALM - - - - - - - - - - - - - - - - - - - - - - - - - - - - - - - - - - - - - 6-13
,
8-77
ALM-RST - - - - - - - - - - - - - - - - - - - - - - - - - - - - - - - - - - - - - 6-12
ALO 1 to 3 - - - - - - - - - - - - - - - - - - - - - - - - - - - - - - - - - - - - - 6-13
analog monitor- - - - - - - - - - - - - - - - - - - - - - - - - - - - - - - - - - - 9-20
analog monitor cable- - - - - - - - - - - - - - - - - - - - - - - - - - - -2-7
,
5-15
analog monitor output
manual gain adjustment (Fn00D) - - - - - - - - - - - - - - - - - - - 7-12
manual zero adjustment (Fn00C) - - - - - - - - - - - - - - - - - - - 7-12
applicable standards - - - - - - - - - - - - - - - - - - - - - - - - - - - - - - - - 1-5
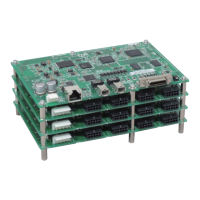
application module - - - - - - - - - - - - - - - - - - - - - - - - - - - - - - - - - 2-7
alarm display table when the application module is used - - - 10-5
detection results clear (Fn014) - - - - - - - - - - - - - - - - - - - - - 7-20
warning display table when the application module is used - - 10-6
automatic gain switching function- - - - - - - - - - - - - - - - - - - - - - 9-15
automatic gain switching timer - - - - - - - - - - - - - - - - - - - - - - - - 9-16
automatic gain switching width - - - - - - - - - - - - - - - - - - - - - - - 9-16
B
ball screw - - - - - - - - - - - - - - - - - - - - - - - - - - - - - - - - - - - - - - 8-53
BAT - - - - - - - - - - - - - - - - - - - - - - - - - - - - - - - - - - - - - - - - - - 6-12
batteries - - - - - - - - - - - - - - - - - - - - - - - - - - - - - - - - - - - -2-7
,
5-18
handling - - - - - - - - - - - - - - - - - - - - - - - - - - - - - - - - - - - - 8-30
replacing- - - - - - - - - - - - - - - - - - - - - - - - - - - - - - - - - - - - 8-31
belt and pulley - - - - - - - - - - - - - - - - - - - - - - - - - - - - - - - - - - - 8-53
bias setting - - - - - - - - - - - - - - - - - - - - - - - - - - - - - - - - - - - - - - 4-3
BK- - - - - - - - - - - - - - - - - - - - - - - - - - - - - - - - - - - - - - - - - - - 6-13
brake power supply unit - - - - - - - - - - - - - - - - - - - - - - - - - - - - 5-17
selection - - - - - - - - - - - - - - - - - - - - - - - - - - - - - - - - - - - - - 2-9
built-in open collector power supply - - - - - - - - - - - - - - - - - - - - - 4-3
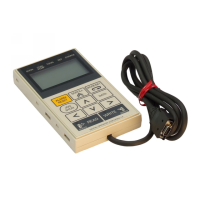
built-in panel operator- - - - - - - - - - - - - - - - - - - - - - - - - - - - - - - 7-2
C
cable selection - - - - - - - - - - - - - - - - - - - - - - - - - - - - - - - - - - - - 2-5
cables for connecting personal computers- - - - - - - - - - - - - -2-7
,
5-13
checking products - - - - - - - - - - - - - - - - - - - - - - - - - - - - - - - - - 1-2
circuit time constant - - - - - - - - - - - - - - - - - - - - - - - - - - - - - - - - 4-3
clear signal form selection - - - - - - - - - - - - - - - - - - - - - - - - - - - 8-50
CLR - - - - - - - - - - - - - - - - - - - - - - - - - - - - - - - - - - - - - - - - - 6-12
CLT- - - - - - - - - - - - - - - - - - - - - - - - - - - - - - - - - - - - - - - - - - 6-13
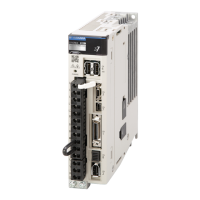
CN1terminal layout - - - - - - - - - - - - - - - - - - - - - - - - - - - - - - - 6-11
CN2 terminal layout- - - - - - - - - - - - - - - - - - - - - - - - - - - - - - - - 6-9
COIN- - - - - - - - - - - - - - - - - - - - - - - - - - - - - - - - - - - - - - - - - 6-13
connecting the servomotor power lines - - - - - - - - - - - - - - - - - - 3-11
connection cable for digital operator - - - - - - - - - - - - - - - - - - - - - 2-7
connection to host controller - - - - - - - - - - - - - - - - - - - - - - - - - 11-7
connector terminal block converter unit- - - - - - - - - - - - - - - - - - 5-16
connectors and cables for encoder signals - - - - - - - - - - - - - - - - - 5-8
control method - - - - - - - - - - - - - - - - - - - - - - - - - - - - - - - - - - - 4-3
control mode selection - - - - - - - - - - - - - - - - - - - - - - - - - - - - - 8-17
control mode switching- - - - - - - - - - - - - - - - - - - - - - - - - - - - - 8-76
crimped terminals (UL standard compliant) - - - - - - - - - - - - - - - - 5-2
D
DATA/ENTER key - - - - - - - - - - - - - - - - - - - - - - - - - - - - - - - - 7-3
DATA/SHIFT key - - - - - - - - - - - - - - - - - - - - - - - - - - - - - - - - - 7-3
deceleration ratio - - - - - - - - - - - - - - - - - - - - - - - - - - - - - - - - - 8-52
designing a power ON sequence- - - - - - - - - - - - - - - - - - - - - - - - 6-7
DeviceNet application module - - - - - - - - - - - - - - - - - - - - - - - - 5-42
digital operator - - - - - - - - - - - - - - - - - - - - - - - - - - - - - - - 2-7
,
5-14
connection - - - - - - - - - - - - - - - - - - - - - - - - - - - - - - - - - - - 7-2
key names and functions - - - - - - - - - - - - - - - - - - - - - - - - - - 7-3
status display - - - - - - - - - - - - - - - - - - - - - - - - - - - - - - - - - 7-5
disc table - - - - - - - - - - - - - - - - - - - - - - - - - - - - - - - - - - - - - - 8-53
dividing ratio setting error - - - - - - - - - - - - - - - - - - - - - - - - - - - 8-46
DOWN key - - - - - - - - - - - - - - - - - - - - - - - - - - - - - - - - - - - - - 7-3
DSPL/SET key - - - - - - - - - - - - - - - - - - - - - - - - - - - - - - - - - - - 7-3
dynamic brake (DB) function - - - - - - - - - - - - - - - - - - - - - - - - - 4-4
dynamic brake unit - - - - - - - - - - - - - - - - - - - - - - - - - - - - - - - 5-29
E
electronic gear- - - - - - - - - - - - - - - - - - - - - - - - - - - - - - - - - - - - 4-4
electronic gear ratio equation- - - - - - - - - - - - - - - - - - - - - - - - - 8-53
emergency stop torque - - - - - - - - - - - - - - - - - - - - - - - - - - - - - 8-21
enabling reference pulse input multiplication switching function - 8-61
encoder cables- - - - - - - - - - - - - - - - - - - - - - - - - - - - - - - - - - - - 5-6
encoder connector (CN2) terminal layout - - - - - - - - - - - - - - - - - 6-9
encoder pulse dividing ratio setting- - - - - - - - - - - - - - - - - - - - - 8-46
encoder signal converter unit - - - - - - - - - - - - - - - - - - - - - - - - - 5-40
encoder signal output - - - - - - - - - - - - - - - - - - - - - - - - - - - - - - 8-45
encoder-end connector specifications - - - - - - - - - - - - - - - - - - - 3-12
extending encoder cables - - - - - - - - - - - - - - - - - - - - - - - - - - - 6-24
external torque limit - - - - - - - - - - - - - - - - - - - - - - - - - - - - - - - 8-72
F
feed forward compensation - - - - - - - - - - - - - - - - - - - - - - - - - - - 4-3
feed-forward reference - - - - - - - - - - - - - - - - - - - - - - - - - - - - - - 9-7
forward rotation prohibited - - - - - - - - - - - - - - - - - - - - - - - - - - 8-20
forward torque limit - - - - - - - - - - - - - - - - - - - - - - - - - - - - - - - 8-71
frequency characteristics- - - - - - - - - - - - - - - - - - - - - - - - - - - - - 4-3
fully-closed application module - - - - - - - - - - - - - - - - - - - - - - - 5-44
fuse capacity - - - - - - - - - - - - - - - - - - - - - - - - - - - - - - - - - - - - - 2-8
G
grounding - - - - - - - - - - - - - - - - - - - - - - - - - - - - - - - - - - - - - - 6-19
H
handling oil and water - - - - - - - - - - - - - - - - - - - - - - - - - - - - - 3-10
hot start - - - - - - - - - - - - - - - - - - - - - - - - - - - - - - - - - - - - - - - 4-12
I
I/O signal (CN1)
connection example - - - - - - - - - - - - - - - - - - - - - - - - - - - - 6-10
names and functions- - - - - - - - - - - - - - - - - - - - - - - - - - - - 6-12
Artisan Technology Group - Quality Instrumentation ... Guaranteed | (888) 88-SOURCE | www.artisantg.com
 Loading...