2.4 2-Speed Testing
2.4.1 2nd Gear Disengaged
A Ensure power is removed from the Processor.
B Disconnect the Clutch/2-Speed Harness from the number 3 Processor connector/pigtail.
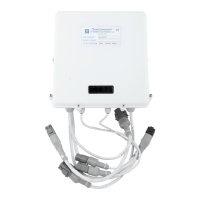
C Insert the Break-out Box between the number 3 Processor connector/pigtail and the Clutch/
2-Speed Harness as shown in Figure MM13927-14: 2-Speed Connections.1653
Figure MM13927-14: 2-Speed Connections
D Set up the Multimeter to measure DC Volts and connect the black lead to the socket labeled
“CLUTCH - “ and the red lead to the socket labeled “TROLL ON/OFF” as shown in Figure
MM13927-14: 2-Speed Connections.
E Turn power ‘On’ to the Processor and take command at any Remote Station.
F The voltage measurement should be approximate 0 VDC.
2.4.2 2nd Gear Engaged
A Leave the Break-out Box and Multimeter in the same position as left in Section 2.4.1: 2nd
Gear Disengaged.
B Start the engine(s).
C Depress the Transfer Button while moving the lever(s) into the Ahead detent (red LED should
be blinking, indicating Warm-up Mode).
D Continue to move both Control Head lever(s) forward until the RPM programmed for
Function Code U1 has been reached.
E The voltage measurement at the Multimeter should now be 12 or 24 VDC, depending on the
Solenoid’s rating.
F Return the Control Head levers to the Neutral/Idle position and shut down the engines.
G Turn power Off to the Processor(s).
H Unplug the Break-out Box from the Pigtail and Harness plugs and reconnect the Harness to
the Pigtail.