Figure 4-20: Clutch Cable Heat Shrink in Processor ............................................................................................... 69
Figure 4-21: Clutch Cable Plug Termination Connections.......................................................................................70
Figure 4-22: Clutch/Troll Cable Heat Shrink in Processor .......................................................................................70
Figure 4-23: Clutch Cable Plug Termination Connections....................................................................................... 71
Figure 4-24: Clutch Cable Heat Shrink in Processor ............................................................................................... 72
Figure 4-25: Clutch Cable Plug Termination Connections.......................................................................................72
Figure 4-26: Engine Shield ....................................................................................................................................73
Figure 4-27: Processor Cable Clamp Rotation........................................................................................................ 74
Figure 4-28: Push-Pull Cable Interior Connection ................................................................................................... 74
Figure 4-29: Throttle Push-Pull Idle Orientation to Selector Lever........................................................................... 75
Figure 4-30: Shift Push-Pull Cable Neutral Connection at Transmission.................................................................. 75
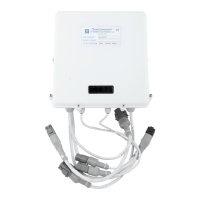
Figure 5-1: Typical Processor Cover....................................................................................................................... 77
Figure 5-2: Processor Shield Push Button and Display LED Locations .................................................................... 78
Figure 5-3: Display LED at Normal Operation......................................................................................................... 78
Figure 5-4: Display LED Designations .................................................................................................................... 78
Figure 5-5: Circuit Board Push Buttons .................................................................................................................. 79
Figure 5-6: Display LED Error Menu Example......................................................................................................... 79
Figure 5-7: Display LED Four Digit Value................................................................................................................ 79
Figure 5-8: Service Field Test Unit and Multimeter................................................................................................. 85
Figure 5-9: E1, E2, E3, E4, E6, L4 Processor, Test Unit, and Multimeter Connections ............................................ 86
Figure 5-10: L2, L3, C6, and C7 Processor, Test Unit, and Multimeter Connections ...............................................86
Figure 5-11: Display LED Function A0 Set Up Activated......................................................................................... 87
Figure 5-12: Display LED Function A1 Set Up Activated......................................................................................... 88
Figure 5-13: Display LED Function A2 Set Up Activated......................................................................................... 88
Figure 5-14: Display LED Function A3 Set Up Activated......................................................................................... 89
Figure 5-15: Display LED Function A4 Set Up Activated......................................................................................... 89
Figure 5-16: Display LED Function E5 Set Up Activated......................................................................................... 90
Figure 5-17: Display LED Function E6 Set Up Activated.........................................................................................90
Figure 5-18: Display LED Function E1 Set Up Activated......................................................................................... 91
Figure 5-19: Display LED Function E4 Set Up Activated......................................................................................... 91
Figure 5-20: Display LED Function E7 Set Up Activated.........................................................................................92
Figure 5-21: Throttle Push-Pull Cable Orientation................................................................................................... 92
Figure 5-22: Example: Throttle Push-Pull Cable Fully Retracted Position for Idle..................................................... 93
Figure 5-23: Display LED Function E0 Set Up Activated.........................................................................................93
Figure 5-24: Display LED Function E2 Set Up Activated......................................................................................... 93
Figure 5-25: Throttle Push-Pull Cable Full Throttle Position .................................................................................... 94
Figure 5-26: Display LED Function E3 Set Up Activated.........................................................................................94
Figure 5-27: Display LED Function E0 Set Up Activated.........................................................................................95
Figure 5-28: Display LED Function E2 Set Up Activated......................................................................................... 95
Figure 5-29: Display LED Function E3 Set Up Activated.........................................................................................96
Figure 5-30: Display LED Function C0 Set Up Activated......................................................................................... 96
Figure 5-31: Display LED Function C1 Set Up Activated......................................................................................... 97