List of Figures
Figure 1-1: Basic 9120 or 9122 ClearCommand System Diagram .......................................................................... 22
Figure 1-2: Basic 9121 ClearCommand System Diagram ....................................................................................... 23
Figure 1-3: Basic 9210 ClearCommand System Diagram ....................................................................................... 24
Figure 1-4: Basic 9211 ClearCommand System Diagram ....................................................................................... 25
Figure 1-5: Basic 9221 ClearCommand System Diagram ....................................................................................... 26
Figure 2-1: Station taking Command .....................................................................................................................27
Figure 2-2: Control Head Detents .......................................................................................................................... 28
Figure 2-3: Control Head 20 Degree Troll Range - Type 1 ...................................................................................... 29
Figure 2-4: Control Head 35 Degree Troll Range - Type 2 ...................................................................................... 29
Figure 2-5: Control Head 45 Degree Troll Range - Type 3 ......................................................................................29
Figure 2-6: Control Head 55 Degree Troll Range - Type 4 ......................................................................................29
Figure 2-7: Remote Stations Before Transfer of Command..................................................................................... 30
Figure 2-8: Remote Station Transfer after Transfer of Command ............................................................................30
Figure 2-9: Control Head Warm-Up Mode ............................................................................................................. 31
Figure 2-10: Control Head Normal Operating Mode...............................................................................................31
Figure 2-11: High/Low Idle Mode Selection........................................................................................................... 32
Figure 2-12: Step A) One Lever Operation Mode ................................................................................................... 33
Figure 2-13: Step B) One Lever Operation Mode ................................................................................................... 34
Figure 2-14: Circuit Board Shield Layout................................................................................................................ 41
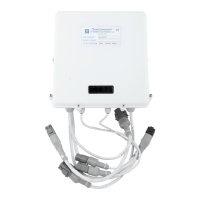
Figure 2-15: Standard Processor Pluggable Connections View .............................................................................. 42
Figure 3-1: Processor Dimensions.......................................................................................................................... 45
Figure 4-1: Harness Plug Keying............................................................................................................................53
Figure 4-2: Start Interlock Connections..................................................................................................................54
Figure 4-3: Twin Screw Serial Harness Connections ..............................................................................................56
Figure 4-4: Liquid Tight Installation........................................................................................................................ 58
Figure 4-5: Standard Enclosure Cable Holes ..........................................................................................................58
Figure 4-6: Standard Circuit Board Hard-Wired Termination Points........................................................................ 59
Figure 4-7: 9120 and 9121 Enclosure Cable Holes ................................................................................................ 60
Figure 4-8: 9122 Enclosure Cable Holes ................................................................................................................ 61
Figure 4-9: 9210 and 9211 Enclosure Cable Holes ................................................................................................ 62
Figure 4-10: 9221 Enclosure Cable Holes ..............................................................................................................63
Figure 4-11: 9000 Series Circuit Board Hard-Wired Termination Points ................................................................. 64
Figure 4-12: Seven-Conductor Control Head Cable Shield Wire and Heat-Shrink................................................... 65
Figure 4-13: Clamp Views .....................................................................................................................................65
Figure 4-14: Terminal Strip Cable Connections ......................................................................................................65
Figure 4-15: Two-Conductor Start Interlock Cable ................................................................................................. 66
Figure 4-16: Two-Conductor Power Cable ............................................................................................................. 67
Figure 4-17: Four-Conductor Serial Communication Cable.....................................................................................67
Figure 4-18: AC Type Tachometer Cable ............................................................................................................... 68
Figure 4-19: Open Collector Tachometer Cable ..................................................................................................... 69
 Loading...