EasyManuals Logo

2N Helios IP User Manual

2N Helios IP
119 pages
To Next Page IconTo Next Page
To Previous Page IconTo Previous Page
Page #25 background imageLoading...
Page #25 background image
Mounting Mechanical Installation
2.2
25
Figure 2.7 Cabling
Figure 2.8 Name Plate Removing
Figure 2.9 Insert Removing
Figure 2.10 Label Inserting
Outdoor installation rules
Always connect button backlighting it is used for heating.
The joint between the roof module and the wall must be filled with a
waterproof cement to prevent water in-leak (see Figure 2.5).
Water must not leak in along or around the cables.
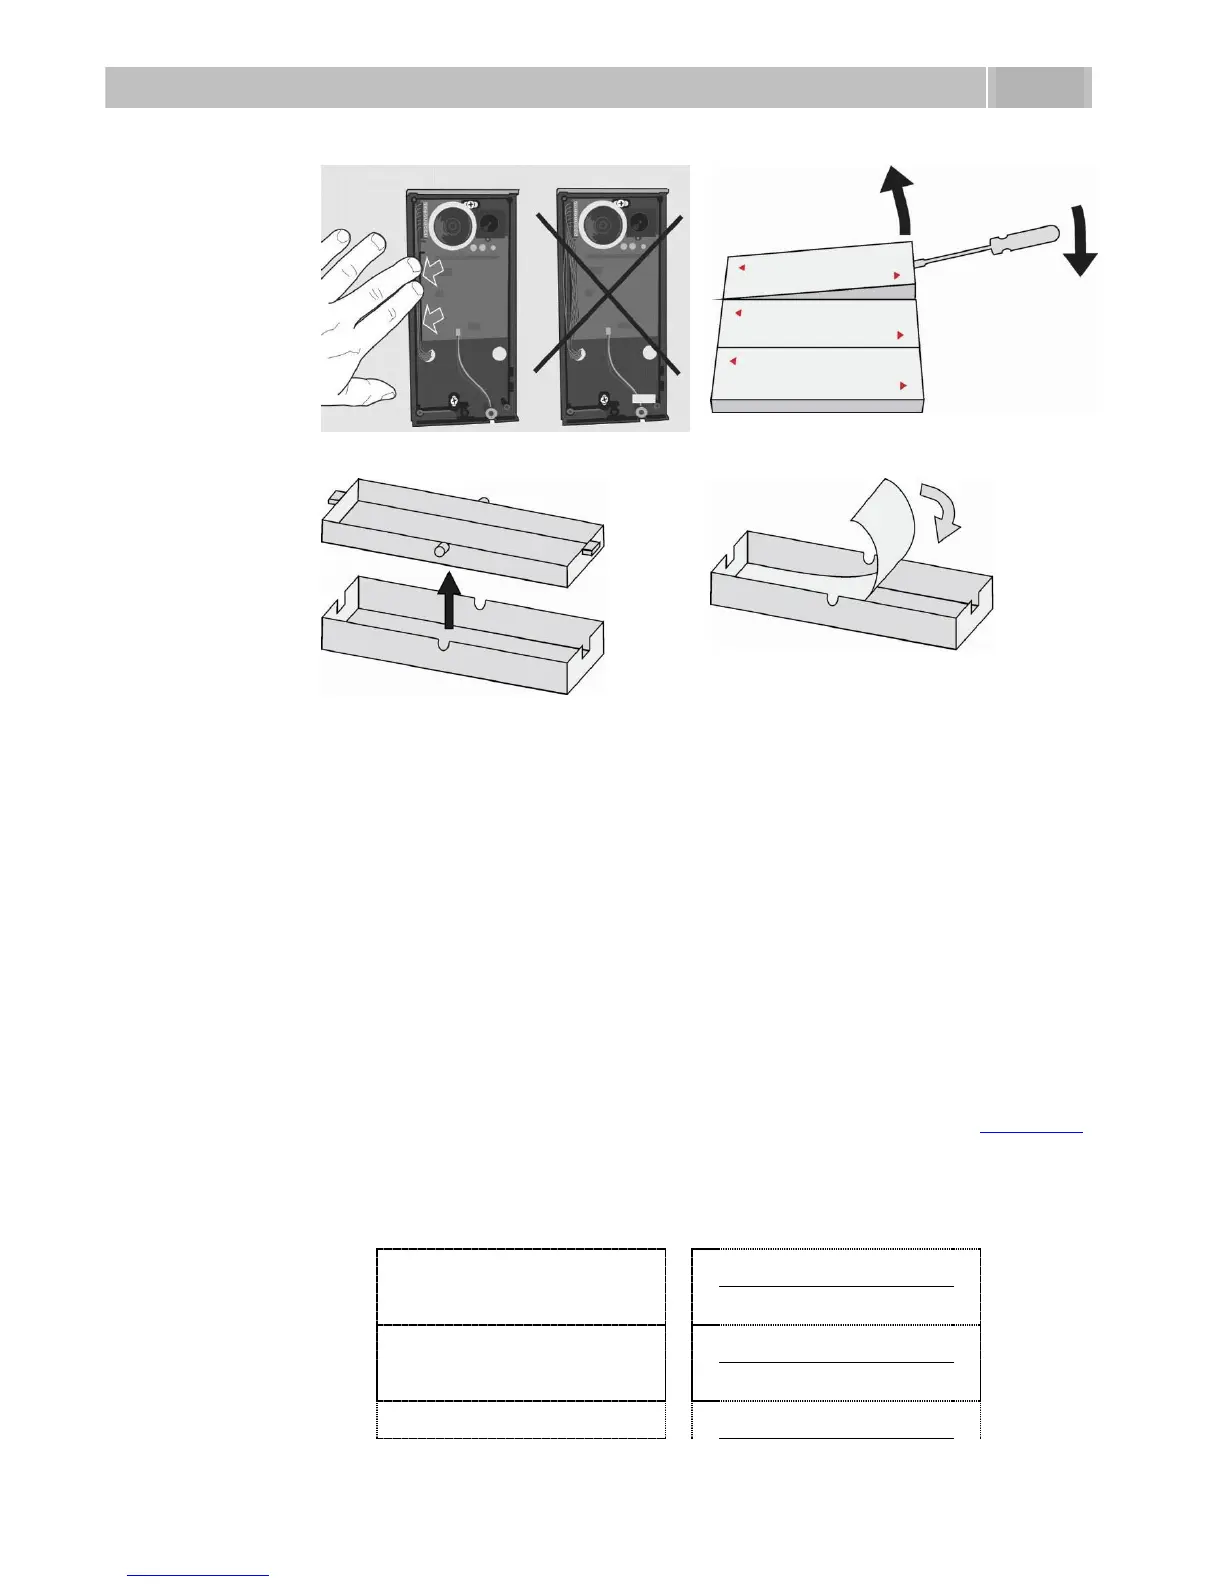
Name tag material and printing
Each 2N
®
Helios IP package includes a sheet of transparent foil for laser printing. Cut
the printed foil into pieces and insert the labels in the name plates. Do not use paper
to avoid water in-leak and paper damage.
Red arrows are printed on the name plate. Make sure that the text and the arrow do
not overlap. We recommend you to use a template (MS Word) available at www.2n.cz
for printing.
Single button
(whole)
Double button
(horizontally divided)
Name 01
Name 01
Name 04
Name 02
Name 02
Name 05
Name 03
Name 03

Table of Contents

Other manuals for 2N Helios IP

Questions and Answers:

Question and Answer IconNeed help?

Do you have a question about the 2N Helios IP and is the answer not in the manual?

2N Helios IP Specifications

General IconGeneral
TypeIP Intercom
ConnectivityEthernet
Tamper SwitchYes
AudioFull duplex
MicrophoneBuilt-in
SpeakerBuilt-in
CameraYes
Power SupplyPoE
Operating Temperature+60°C
Ingress ProtectionIP54
ProtocolsSIP, RTSP, ONVIF
Audio CodecG.711, G.722
InstallationSurface mount, flush mount (depending on model)

Related product manuals