433D SYSTEMS, INC.
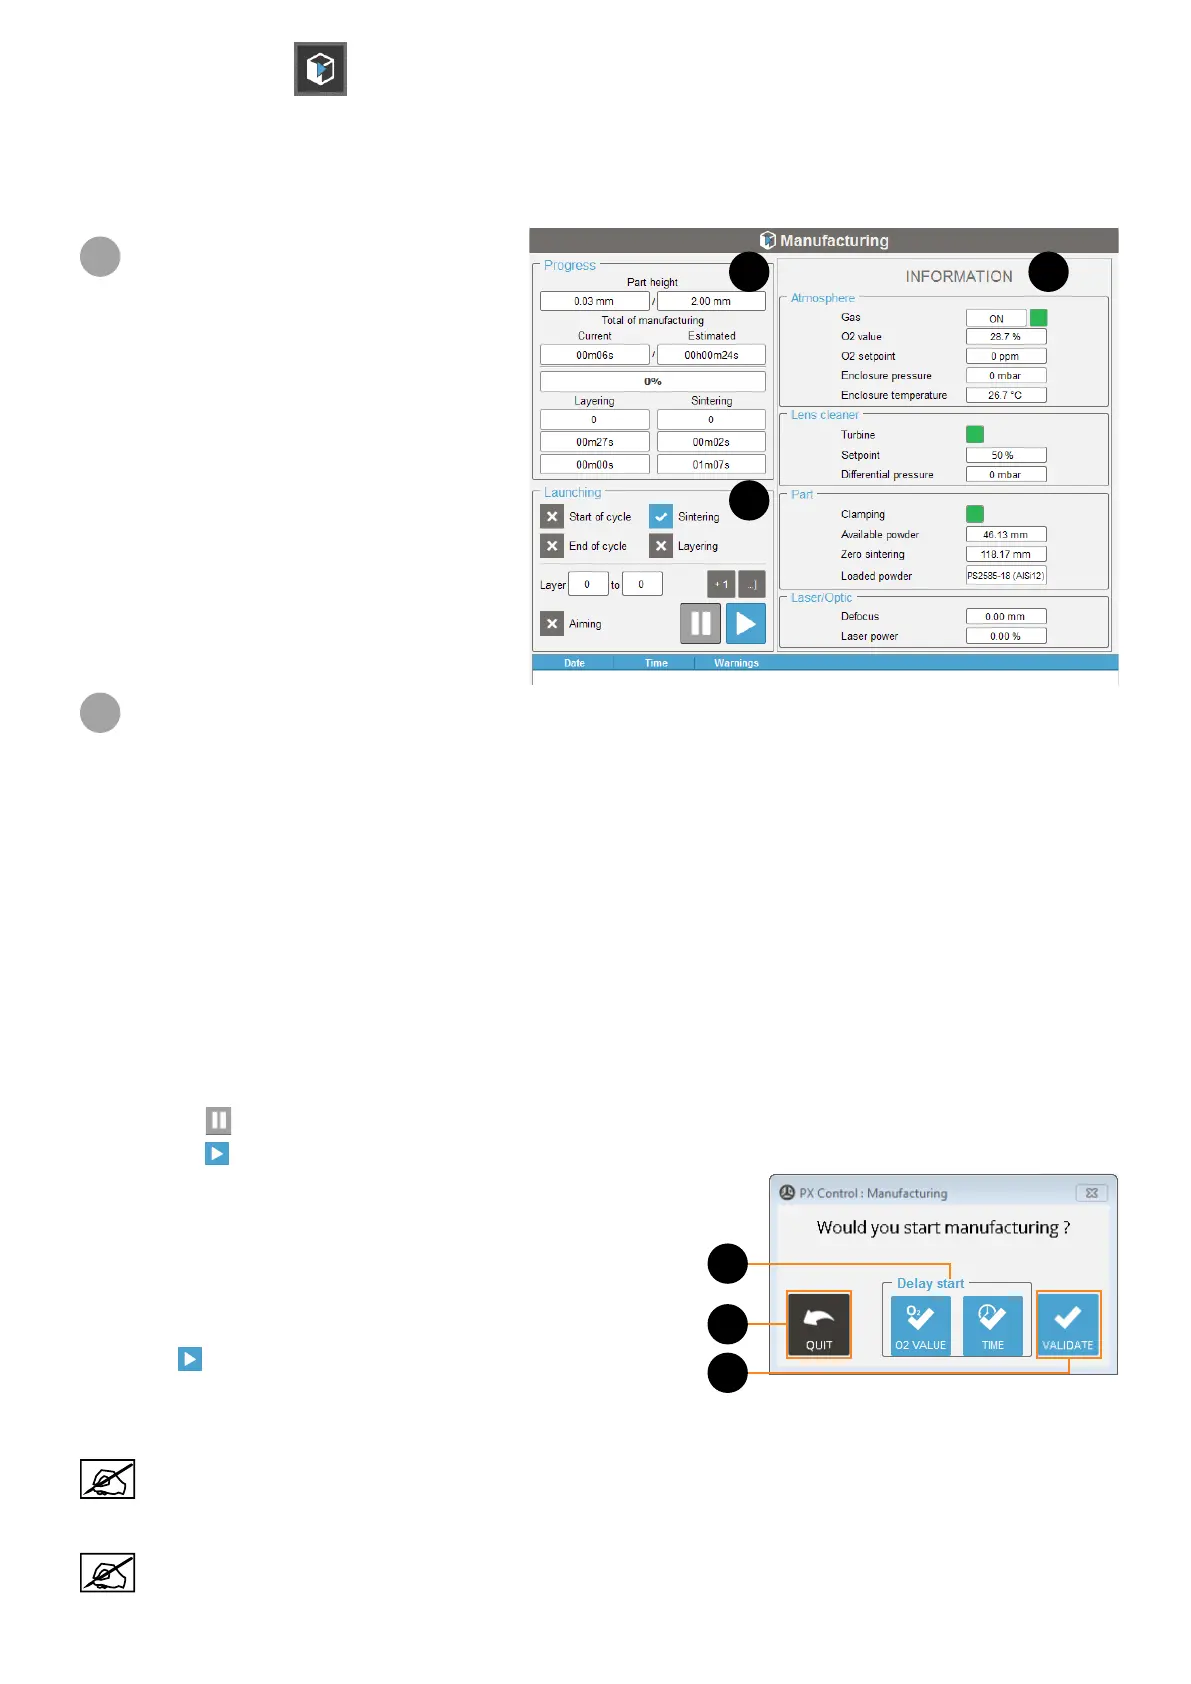
Manufacturing menu
This menu allows the user to start the manufacturing process (layering and sintering), and also to see the progress. It
consists of three parts.
Consult the section "Start a manufacturing process" on page 64 for details on basic rules of starting a job.
2
Launching area
• Selection of the Start/End cycles:
• Start of cycle: if selected, executes actions of the Start cycle sequence (i.e gas ON...) when starting a job.
• End of cycle: if selected, executes actions of the End cycle sequence (i.e plate unclamping...) when job is nished.
• Selection of the Layering/Sintering process:
• Sintering: if selected, enables the sintering process, when starting a job.
• Layering: if selected, enables layering, when starting a job.
• Selection of the layers:
• Layer “_start_“ to “_end_“: the numbers of the rst and last layer must be indicated. Click on the corresponding
eld to complete individually them (a numeric keypad will be displayed).
• Optional: the button “+1” increases the _start_ layer by one and duplicate this value for the _end_ layer (useful
when producing the rst layers step-by-step). The button “ …]” increases the _start_ layer by one, and automatically
lls the _end_ layer with the last layer value.
• The button “Aiming” sets the laser in no-power mode : the laser will sinter (without power) with a red beam.
• The button
allows to pause the job (see section "Interrupt a job" on page 45).
• The button allows to start the job (according to the selections Start/End cycles and Layering/Sintering process).
When activated, the conrmation window appears :
To start a job, proceed as following:
1. Select and congure the settings on the Launching area,
2. Click on .
3. Click on either Validate (A) to conrm, or on one of the Delay start
functions (B) or on Quit (C) to cancel. Refer to the next paragraph for the delay start functions detail.
If some warning conditions occure, the conrmation window will differ (see section Manufacturing launch
warnings on page 45).
To overcome O2 level variation around the fume safety setting, the job will start only if the oxygen level is
lower than 90% of the fume safety setting.
1
2
3
C
A
B
1
Progress area
• Current / Project part height (mm)
• Current / Estimated manufacturing time (hours),
• Manufacturing progress in %,
• Layering : the current number, the duration of
the current layering, and the total layering time,
• Sintering : the current number, the duration of
the current sintering, and the total sintering time.