973D SYSTEMS, INC.
21. Ship the following to 3D Systems Customer Support:
• Calibration plate: use a shock-resistant package that protects the plate from damage. Make sure to indicate the
serial number of the corresponding printer on a paper labelled on the back of the calibration plate.
• Current correction le: send an email to hotline.phenix@3dsystems.com by attaching the correction le and
indicating the serial number of the corresponding printer.
22. 3D Systems Customer Support will then give the result of the measurement:
• If the result of the calibration is not correct, 3D Systems Customer Support will supply a new correction le (xml
format); proceed then to the next section.
• If it is correct, the printer calibration is validated.
Import a new correction le
The following steps must be performed as long as the calibration has not been validated.
1. Store the new correction le (xml format) supplied by 3D Systems Customer Support on a USB key.
2. Install the USB key on the USB port (see "D. Screen control panel and external control panel" on page 27).
3. Make sure to access to the control software by using the Adjuster level (see "User level selection" on page 47).
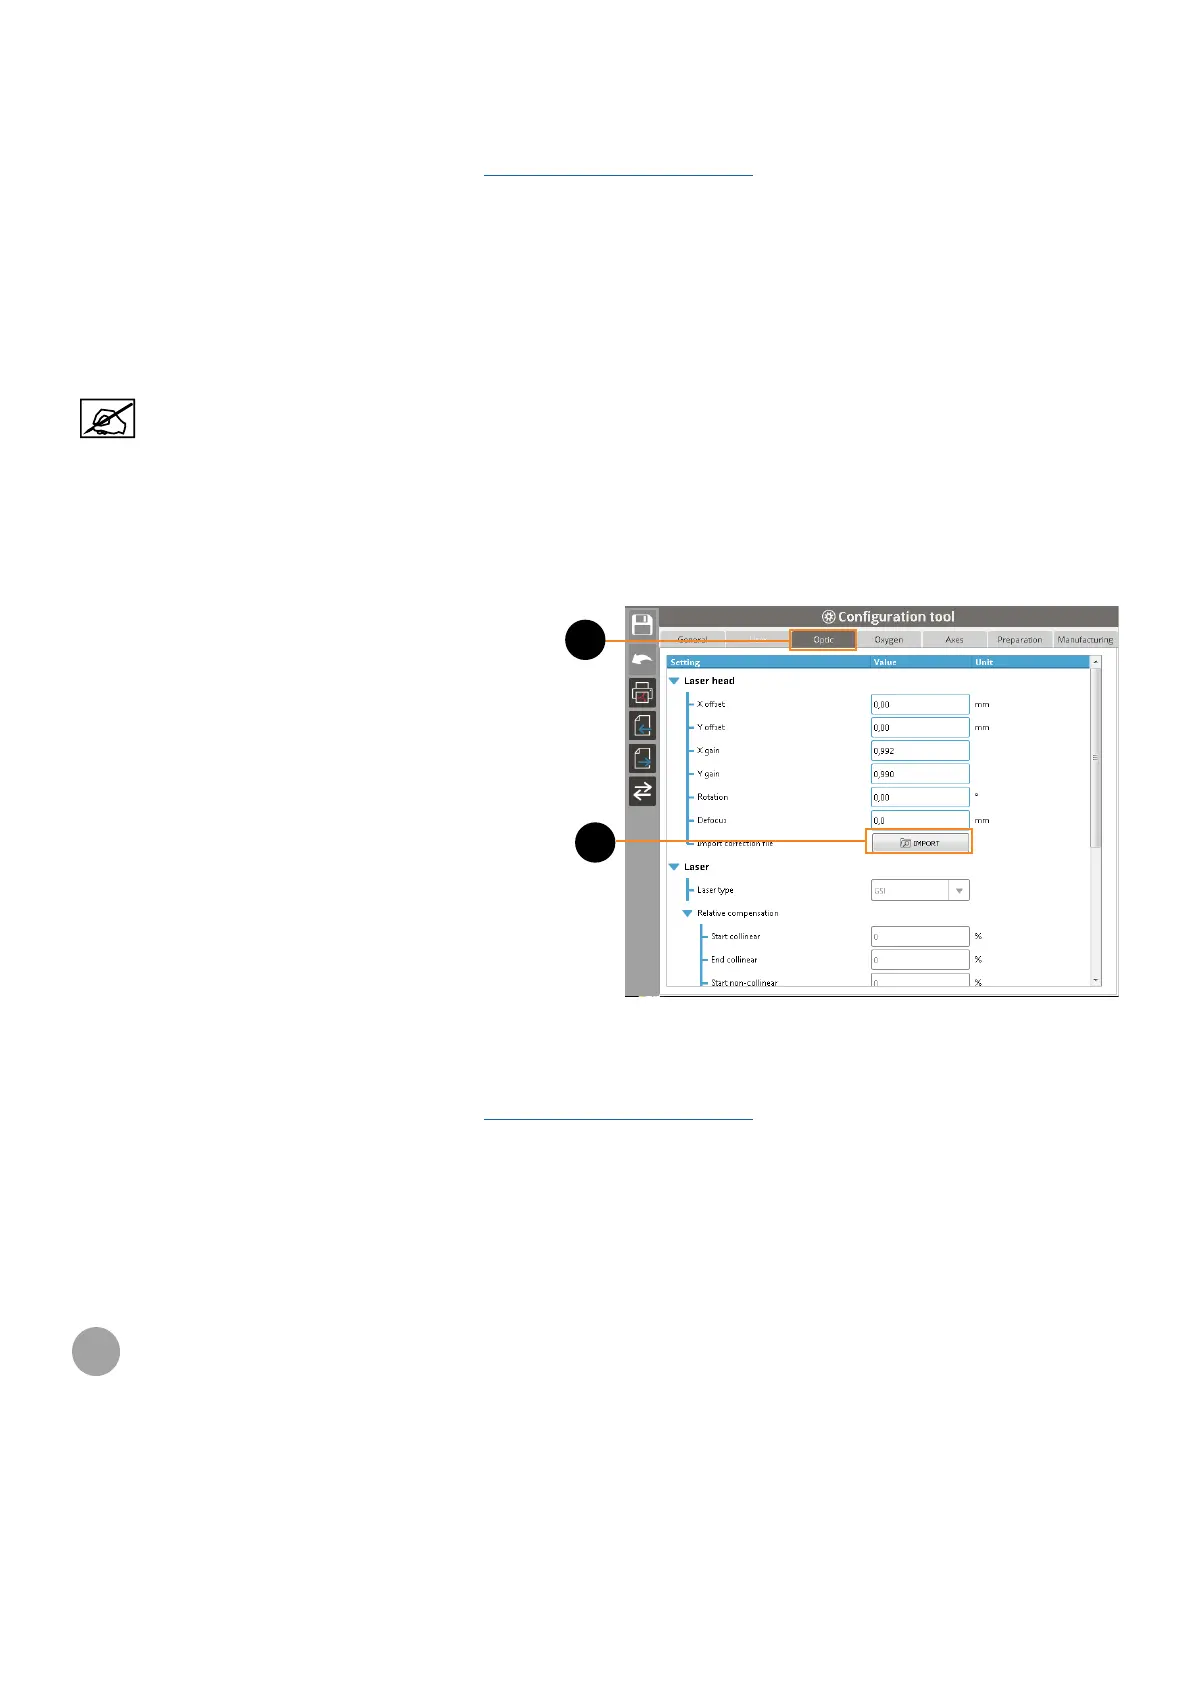
4. Access to the Conguration tool.
5. Go to the Optic menu (1).
6. Click on the Import button (2).
7. Select the new correction le, then validate. The new
correction will replace the previous one (conrm the
overwriting message if displayed).
8. Draw a new calibration plate (see page 95).
9. To control and validate the new calibration, ship the following to 3D Systems Customer Support:
• Calibration plate: use a shock-resistant package that protects the plate from damage. Make sure to indicate the
serial number of the corresponding printer on a paper labelled on the back of the calibration plate.
• Current correction le: send an email to hotline.phenix@3dsystems.com by attaching the correction le and
indicating the serial number of the corresponding printer.
10. 3D Systems Customer Support will then give the result of the measurement:
• If the result of the calibration is not correct, 3D Systems Customer Support will supply a new correction le (xml
format); repeat steps from 1 to 10.
• If it is correct, the printer calibration is validated.
7
COPYRIGHT AND TRADEMARK NOTICE
Copyright © 2016 3D Systems, Inc. All rights reserved. Subject to change without notice. This document is copyrighted and
contains proprietary information that is the property of 3D Systems, Inc. 3D Systems, the 3D Systems logo, and ProX are
trademarks of 3D Systems, Inc.
2
1