35
using the fade out time that was saved with the scene. To change pages use the
page up or down buttons in the upper right of the screen or use the page buttons
on the Link.
As you can see in the example some buttons have images while some show a
solid color. You can configure the button appearance and button label when you
save the scene.
Create a Scene
When creating a new scene it’s usually a good idea to first clear all channels.
Next, select fixtures for programming and then change channel values by either
moving a fader or wheel on the Link or by using the color picker or pan/tilt
controls on the screen. Only channels that have been changed since the last clear
action will be included in the scene. Included channel values are displayed in
green while those not included are gray when displayed above each channel fader
on the screen.
Another way to include channels into a new scene is to first turn on some other
scenes that are already saved. When you save the new scene, the other scenes
will automatically be merged together into a new scene.
Saving Scenes
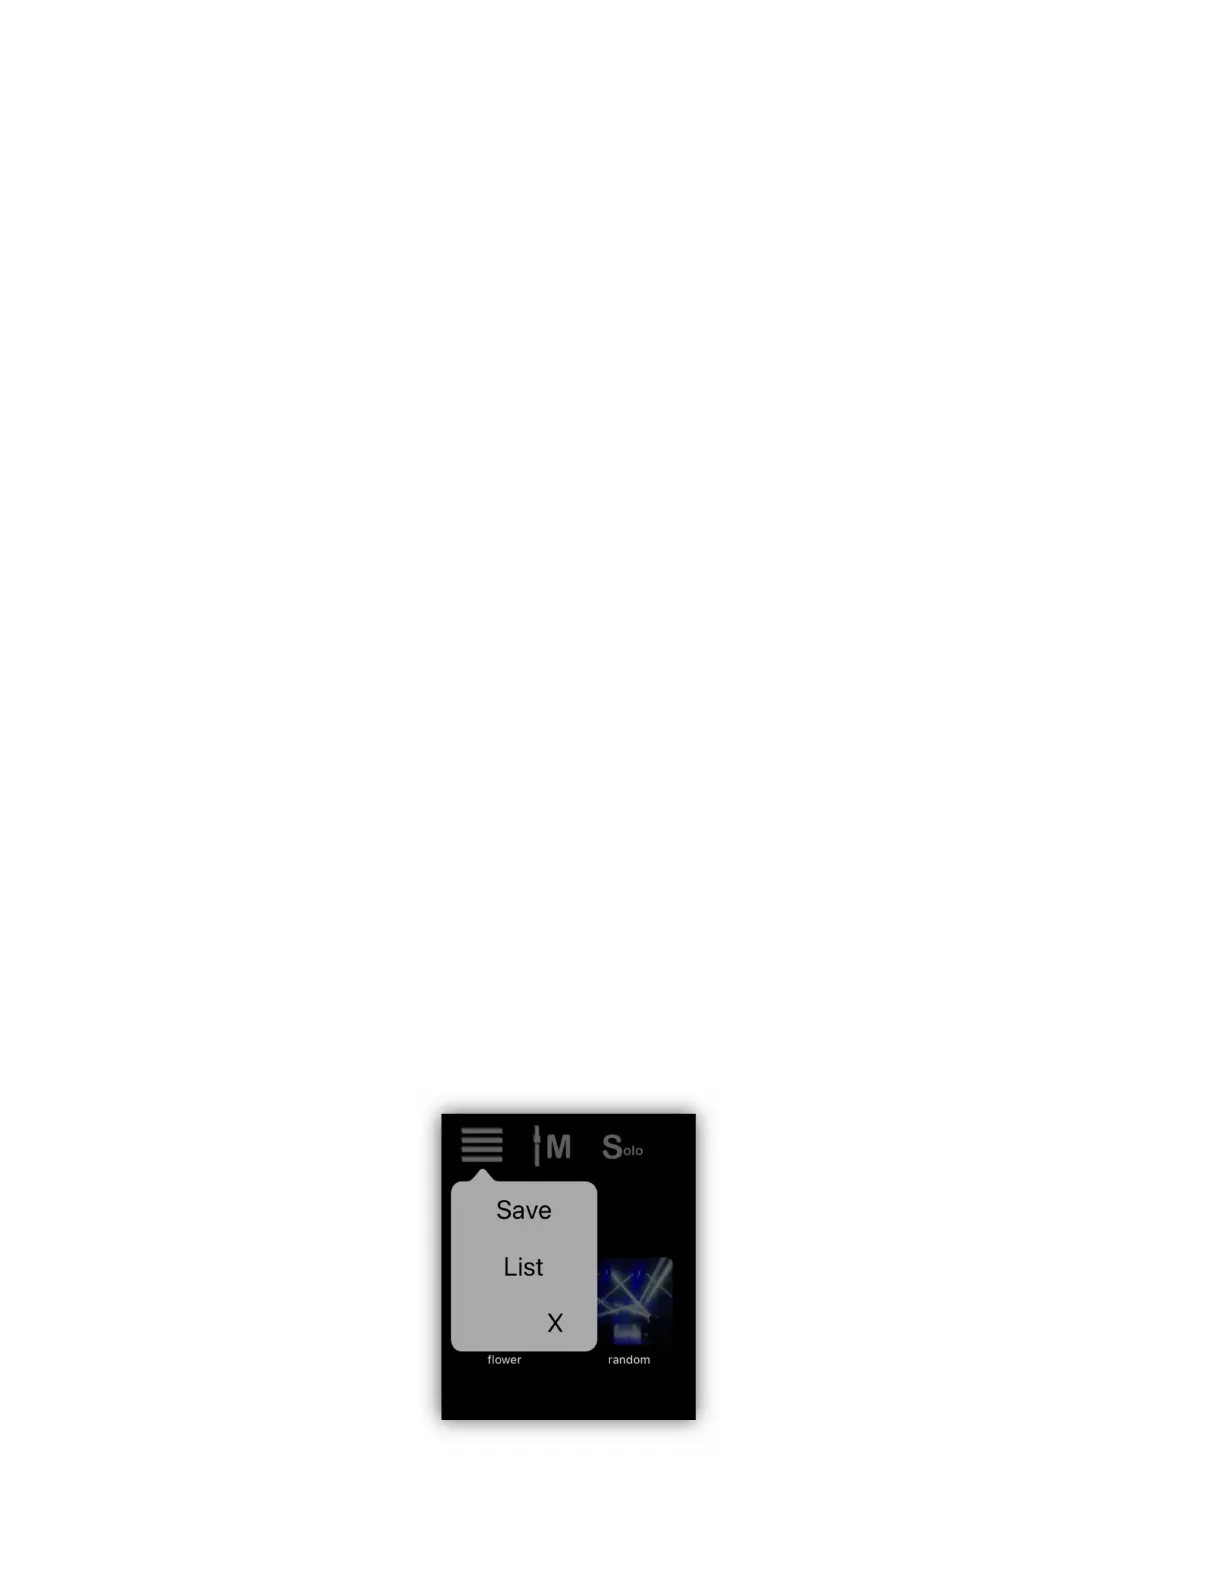
Once you have set channel levels for a scene you can then save it by tapping one
of the “save” buttons, either in the menu from the scenes view as shown in the
example below, in the upper right of the channels view or on the Link controller.
This will show the list of scene button assignments. You will notice in the scenes
menu popup as shown in the example below there are two choices, “Save” and
“List”. Use “Save” when you want to save a scene to one of the buttons. Use
“List” when you only want to view or edit the scene button assignments list
without saving a new scene.
 Loading...