120
REPLACEMENT OF MAIN COMPONENTS
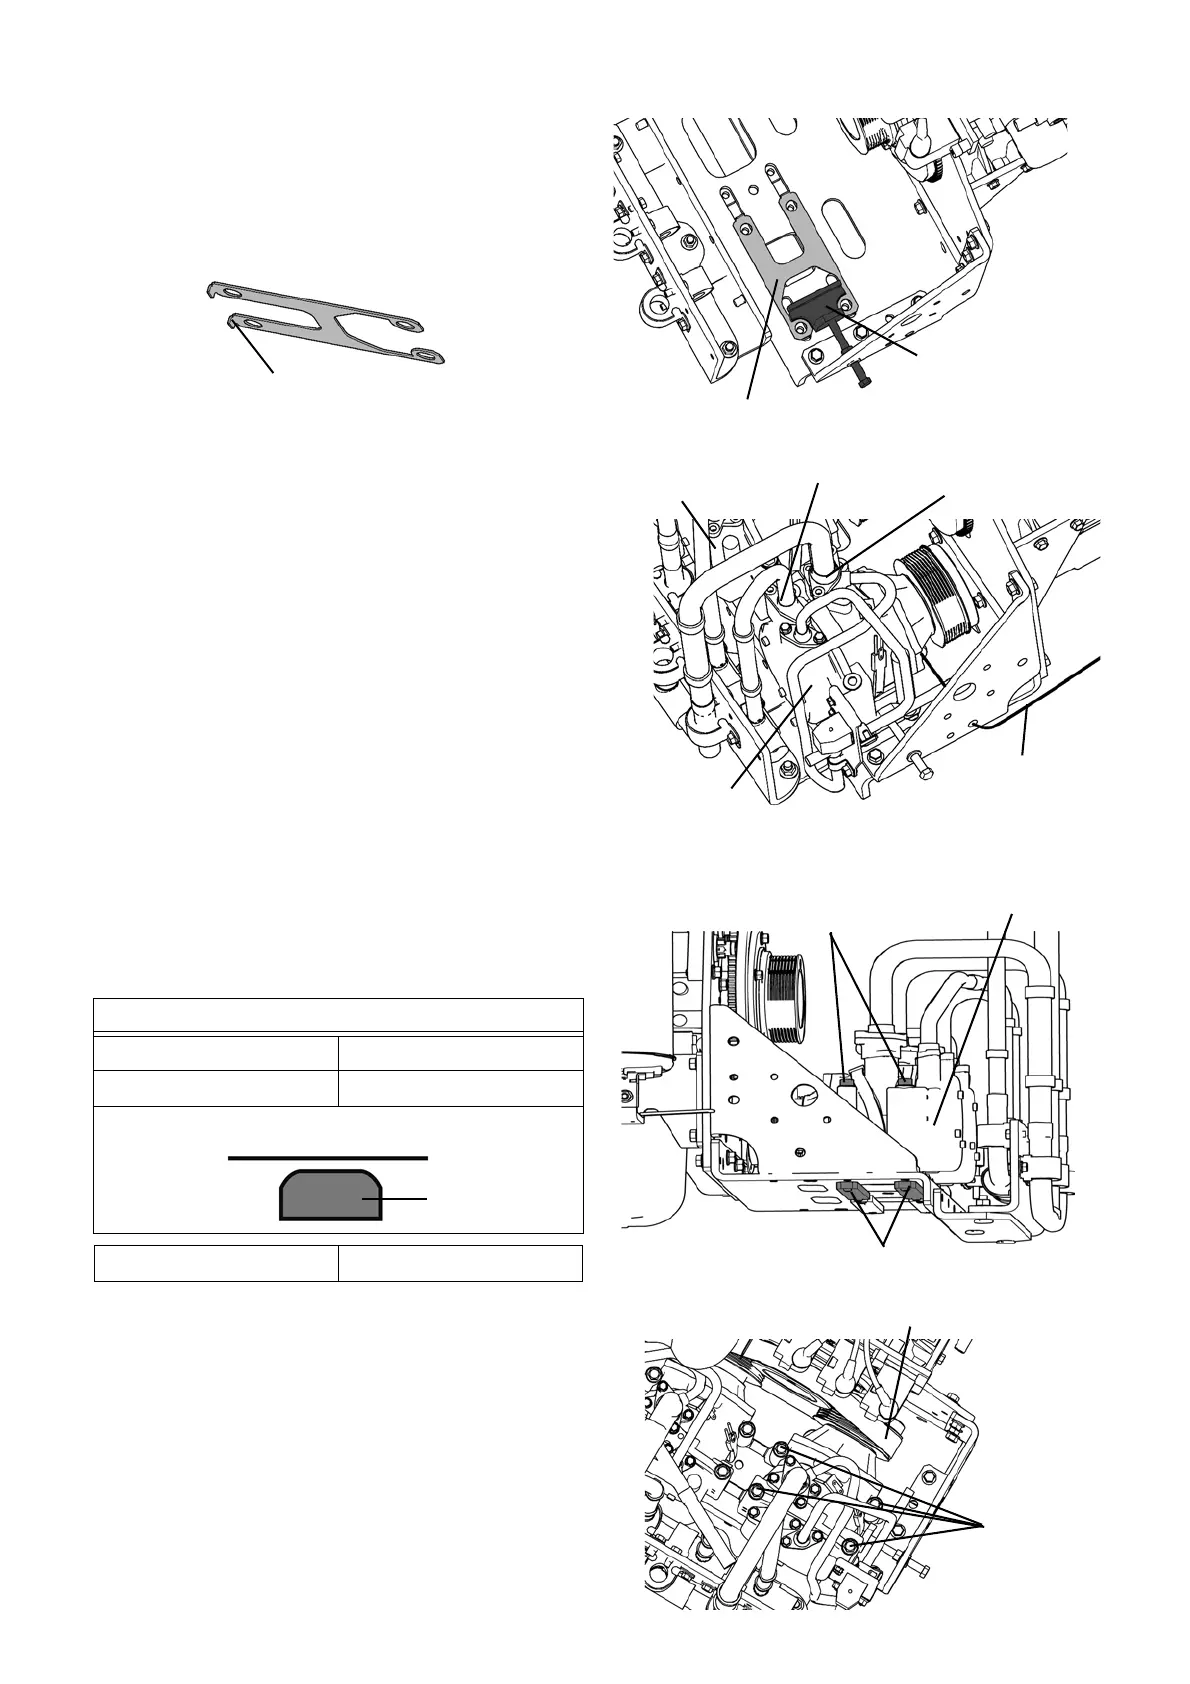
5. Check that the steel plate and the bracket under the
compressor main unit are in the correct position
(see right).
NOTE) Mount the steel plate so that the bent portion
faces down.
6. Mount the compressor on the compressor bracket.
1) To prevent pinching or hooking, move the wire har-
nesses of the compressor discharge pipe tempera-
ture sensor and refrigerant high pressure switch
above the discharge pipe (No. 1 compressor) or
between the discharge pipe and intake pipe (No. 2
compressor).
2) Connect the oil tube to the compressor. Mount the
No. 2 compressor and No. 1 compressor on the
compressor bracket in order.
NOTE) Insert the oil tube until it hits a dead end.
NOTE) Take care so that the flanges (o-ring contact
surfaces) of each port are not damaged.
3) Hold the 2 stays (plate-shaped) at No. 2 compres-
sor side under the bracket with your hand paying
attention to the direction.Holding the stays, tighten
4 bolts firmly of No. 2 compressor.
4) Attach the compressor belt to the compressor.
Bracket
Iron plate
Bent portion
Intake port
Discharge port
Oil tube
No.2
No.1
Bolts (4 pieces)
Stays
No.2
Stay mounting position
Rounded corner Bracket side
Sharp corner Base plate side
Tightening torque 31.0 lb·ft (42 N·m)
Stay
Bracket side
Compressor belt
Bolts
 Loading...