45
PERIODIC INSPECTION
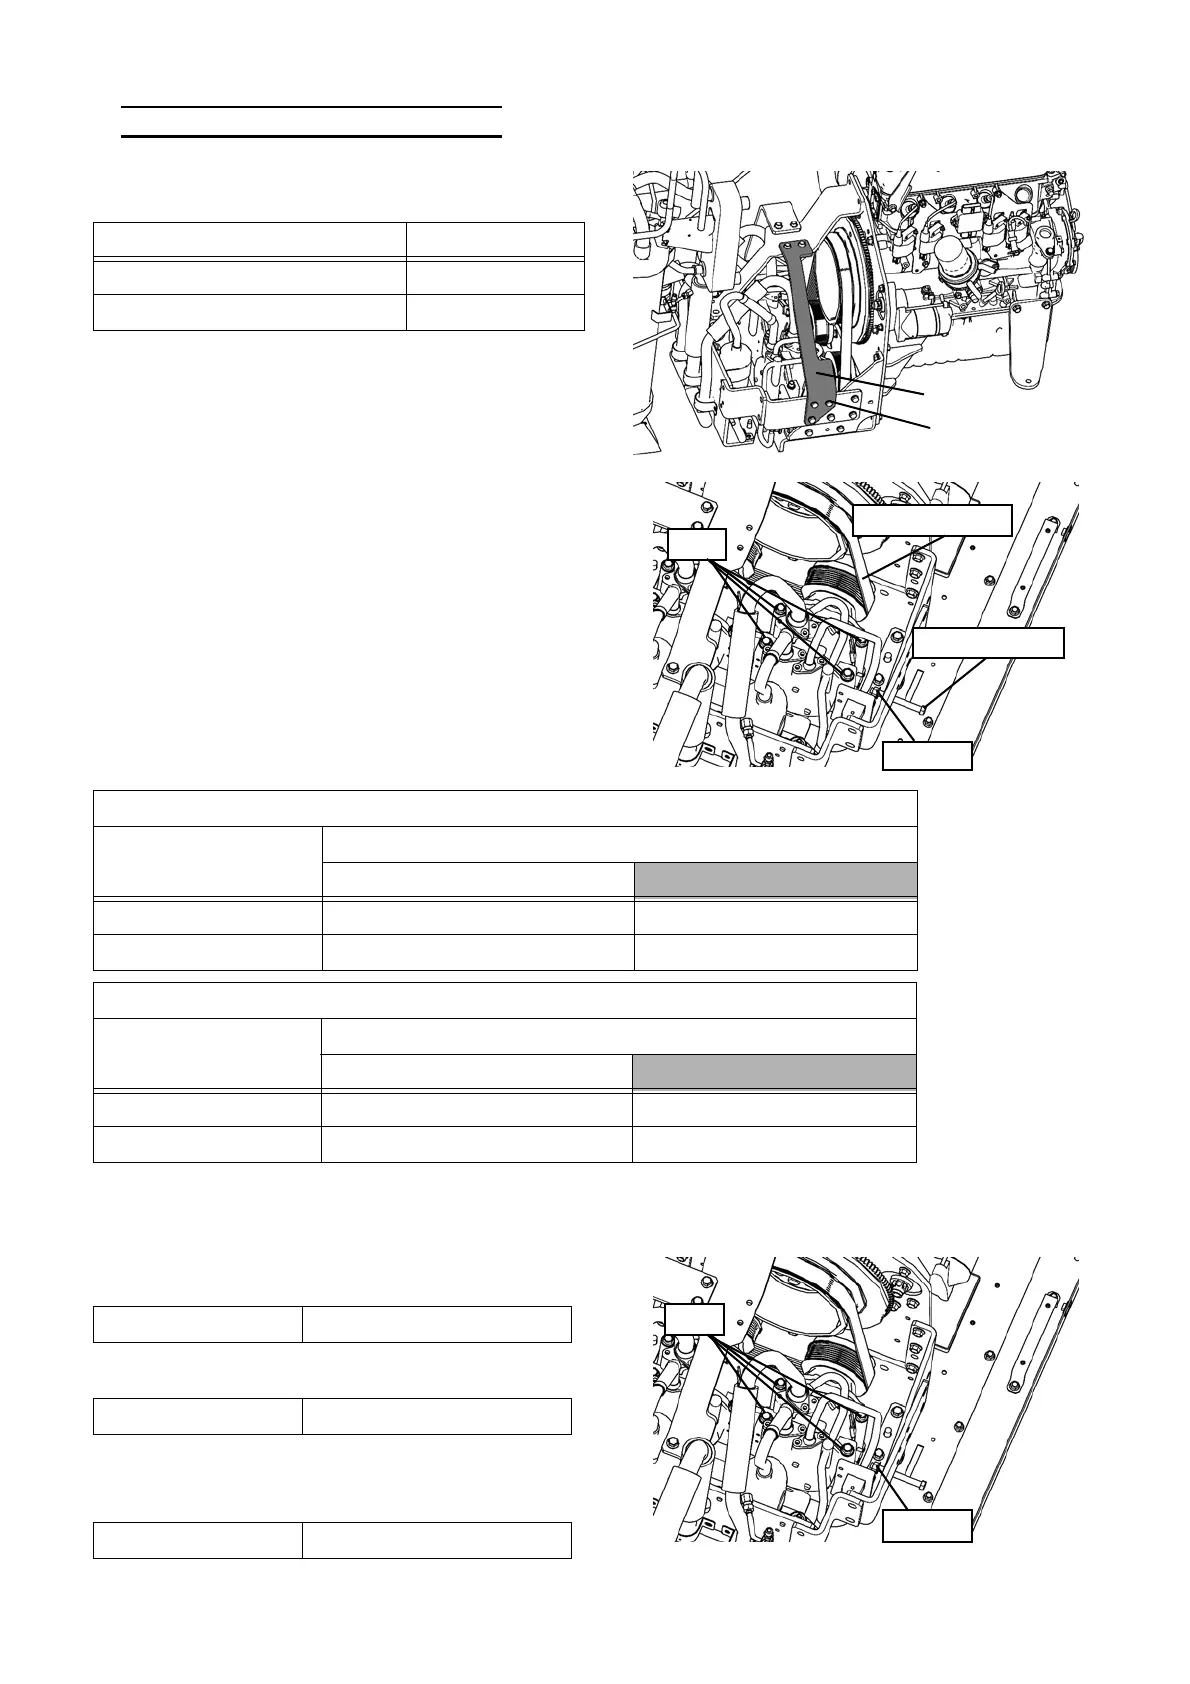
5) Compressor Belt Replacement
1. [ 15 TON only ]
Unscrew 5 bolts to remove the front side stay.
2. Loosen a locknut and an adjustment bolt adequately.
3. Loosen 4 bolts in the front of the outdoor unit, and
remove the compressor belt.
4. Install the new belt and lightly tighten 4 bolts.
5. Adjust the belt tension with the adjustment bolt.
※
Measure the belt tension with a sonic belt tension gauge. Tension values for a mechanical belt tension gauge on the
chart are reference values.
6. After adjusting the belt tension, tighten the locknut to
fix the compressor.
7. Tighten up 4 bolts.
8. Run the engine for 10~20 minutes and measure to
adjust the belt tension again.
Bolts (5 pieces)
Stay
Outdoor unit capacity Stay
8 TON Without
15 TON With
Bolts
Compressor belt
Adjustment bolt
Locknut
Belt tension adjustment standard (Replacement)
Outdoor unit capacity
Belt tension※
Sonic
Mechanical (Reference value)
8 TON 225 ~ 270 lbf (1,000 ~ 1,200 N) 155 lbf (690 N)
15 TON 301 ~ 346 lbf (1,340 ~ 1,540 N) 202 lbf (900 N)
Belt tension adjustment standard (Inspection)
Outdoor unit capacity
Belt tension※
Sonic
Mechanical (Reference value)
8 TON 180 ~ 216 lbf (800 ~ 960 N) 124 lbf (550 N)
15 TON 241 ~ 277 lbf (1,070 ~ 1,230 N) 162 lbf (720 N)
Bolts
Locknut
Tightening torque 7.4 ~ 11.1 lb·ft (10 ~ 15 N·m)
Tightening torque 31.0 lb·ft (42.0 N·m)
Replacement interval Every 3 years (10,000 hours)
 Loading...