224
TROUBLESHOOTING
41) Inspect Indoor Fan Motor
Check the motor coil resistance and output voltage at the indoor fan motor connector.
42) Inspect for Blockage in the Indoor Electronic Expansion Valve
Make judgment by checking if the temperature difference of the pipes at each end of the electronic expansion
valve is normal.
43) Check Environmental Conditions (Low Intake Air Temperature)
Check if the intake air temperature of the outdoor heat exchanger is abnormally low due to a short circuit or influ-
ence of other equipment.
1. Select "Outside air temperature (code No. 4d)" in the monitor mode of the board maintenance functions to check
intake air temperature.
44) Inspect Strainer
45) Inspection Check Valve (Refrigerant Pressure Drop)
46) Inspect Refrigerant Low Pressure Sensor
1. Check for contact failure of connectors on the main PCB
1) Turn ON the electric leakage breaker.
2) Select "Refrigerant low pressure 1 (code No. 40)" in the monitor mode of the board maintenance functions.
3) Disconnect and connect the refrigerant low pressure sensor connector of CN4 on the main PCB, and check if
the pressure is displayed again.
4) If there is contact failure, repair it.
Temperature limit for operation (outdoor heat exchanger intake air temperature) 14 ℉ (-10 ℃ )
If the strainer just before the electronic expansion valve is fully or
partially blocked, the refrigerant pressure becomes low.
1. Measure the temperature of the pipes at each end of the strainer,
and check for extreme temperature difference (9℉(5℃) or more).
2. If the temperature difference between these positions is large,
the strainer is blocked. Replace the strainer.
NOTE) When replacing the refrigerant system parts, Refer to
P221, [Technical Data When Replacing the Refriger-
ant System Parts].
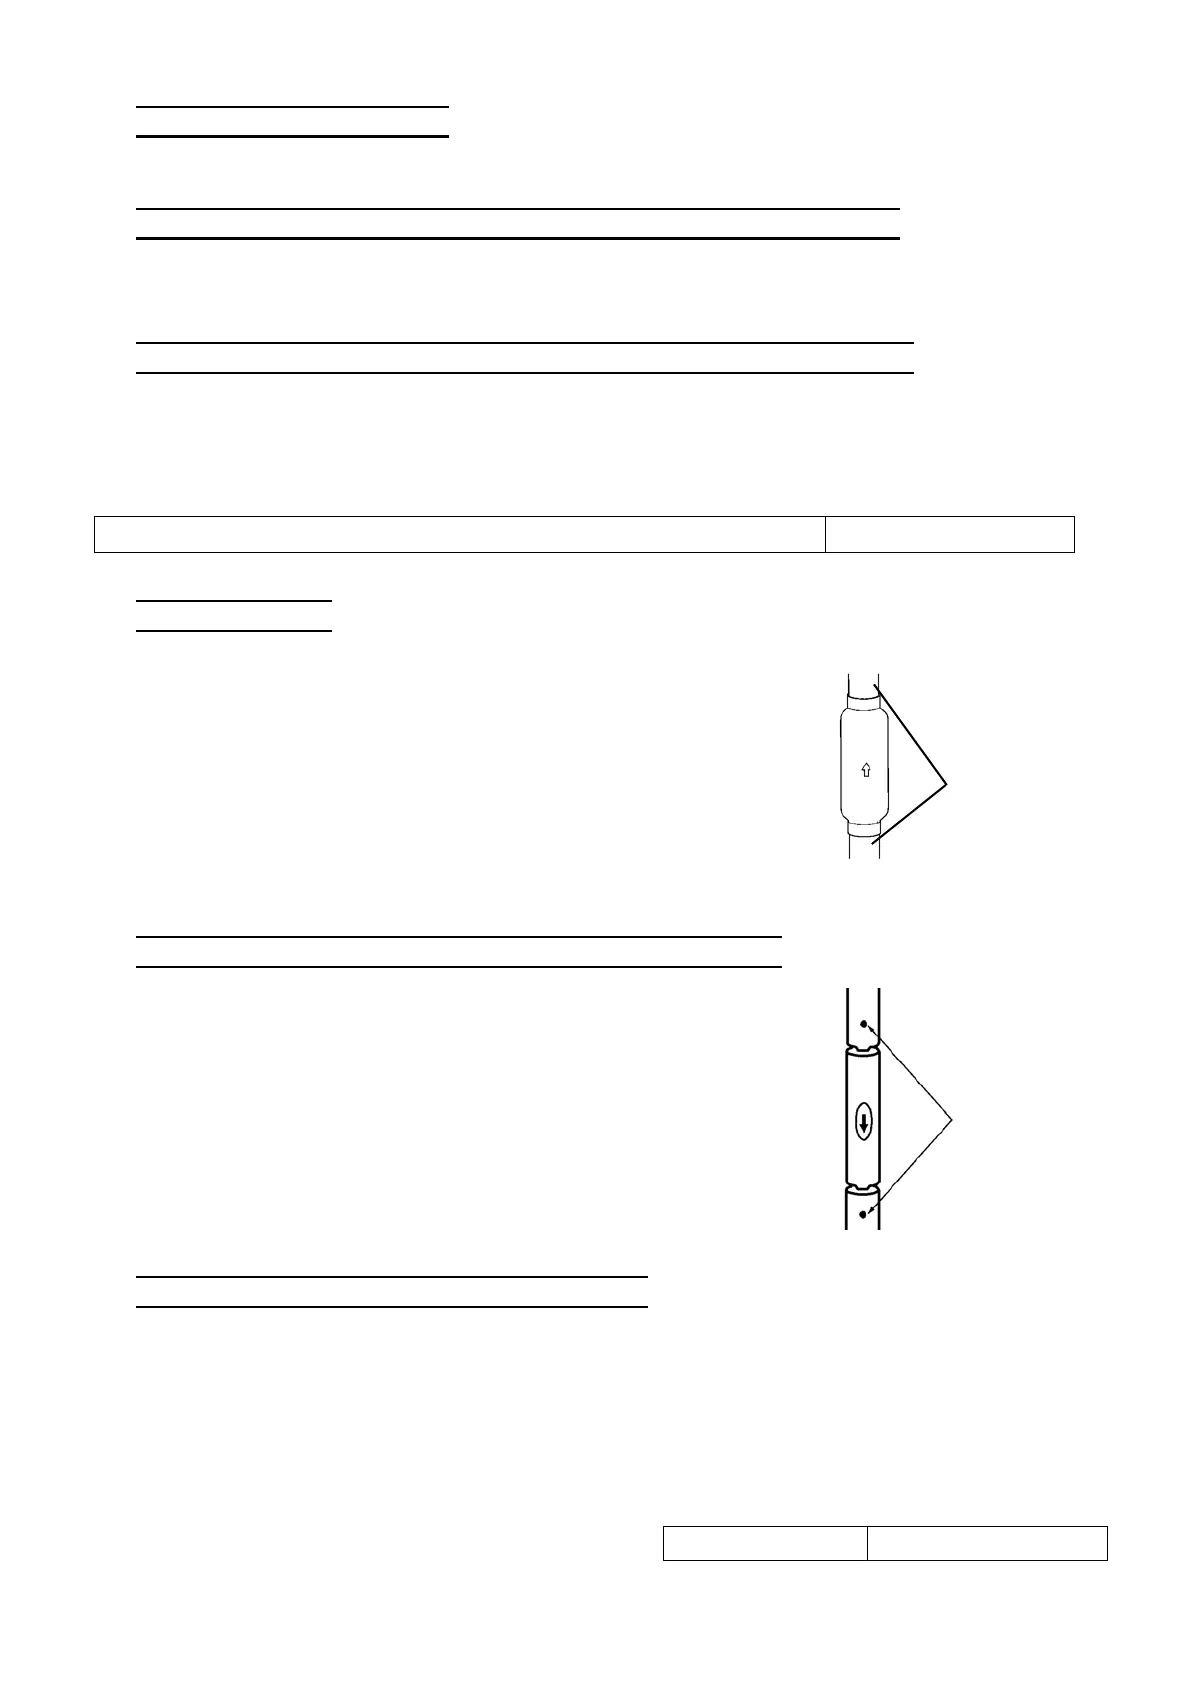
Strainer
Temperature
difference
If the check valve is blocked, the refrigerant pressure drops.
1. Measure the temperature of the pipes at each end of the check
valve, and check for extreme temperature difference (9℉(5℃) or
more).
2. If the temperature difference between these positions is large,
the check valve is blocked. Replace the check valve.
NOTE) When replacing the refrigerant system parts, Refer to
P221, [Technical Data When Replacing the Refriger-
ant System Parts].
Check valve
Temperature
difference
2. Check power supply voltage of the refrigerant low
pressure sensor
Check power supply voltage of the refrigerant low
pressure sensor at CN4[34]-[12] on the main PCB.
Standard voltage Within 5 ± 0.25 V DC
 Loading...