48
PERIODIC INSPECTION
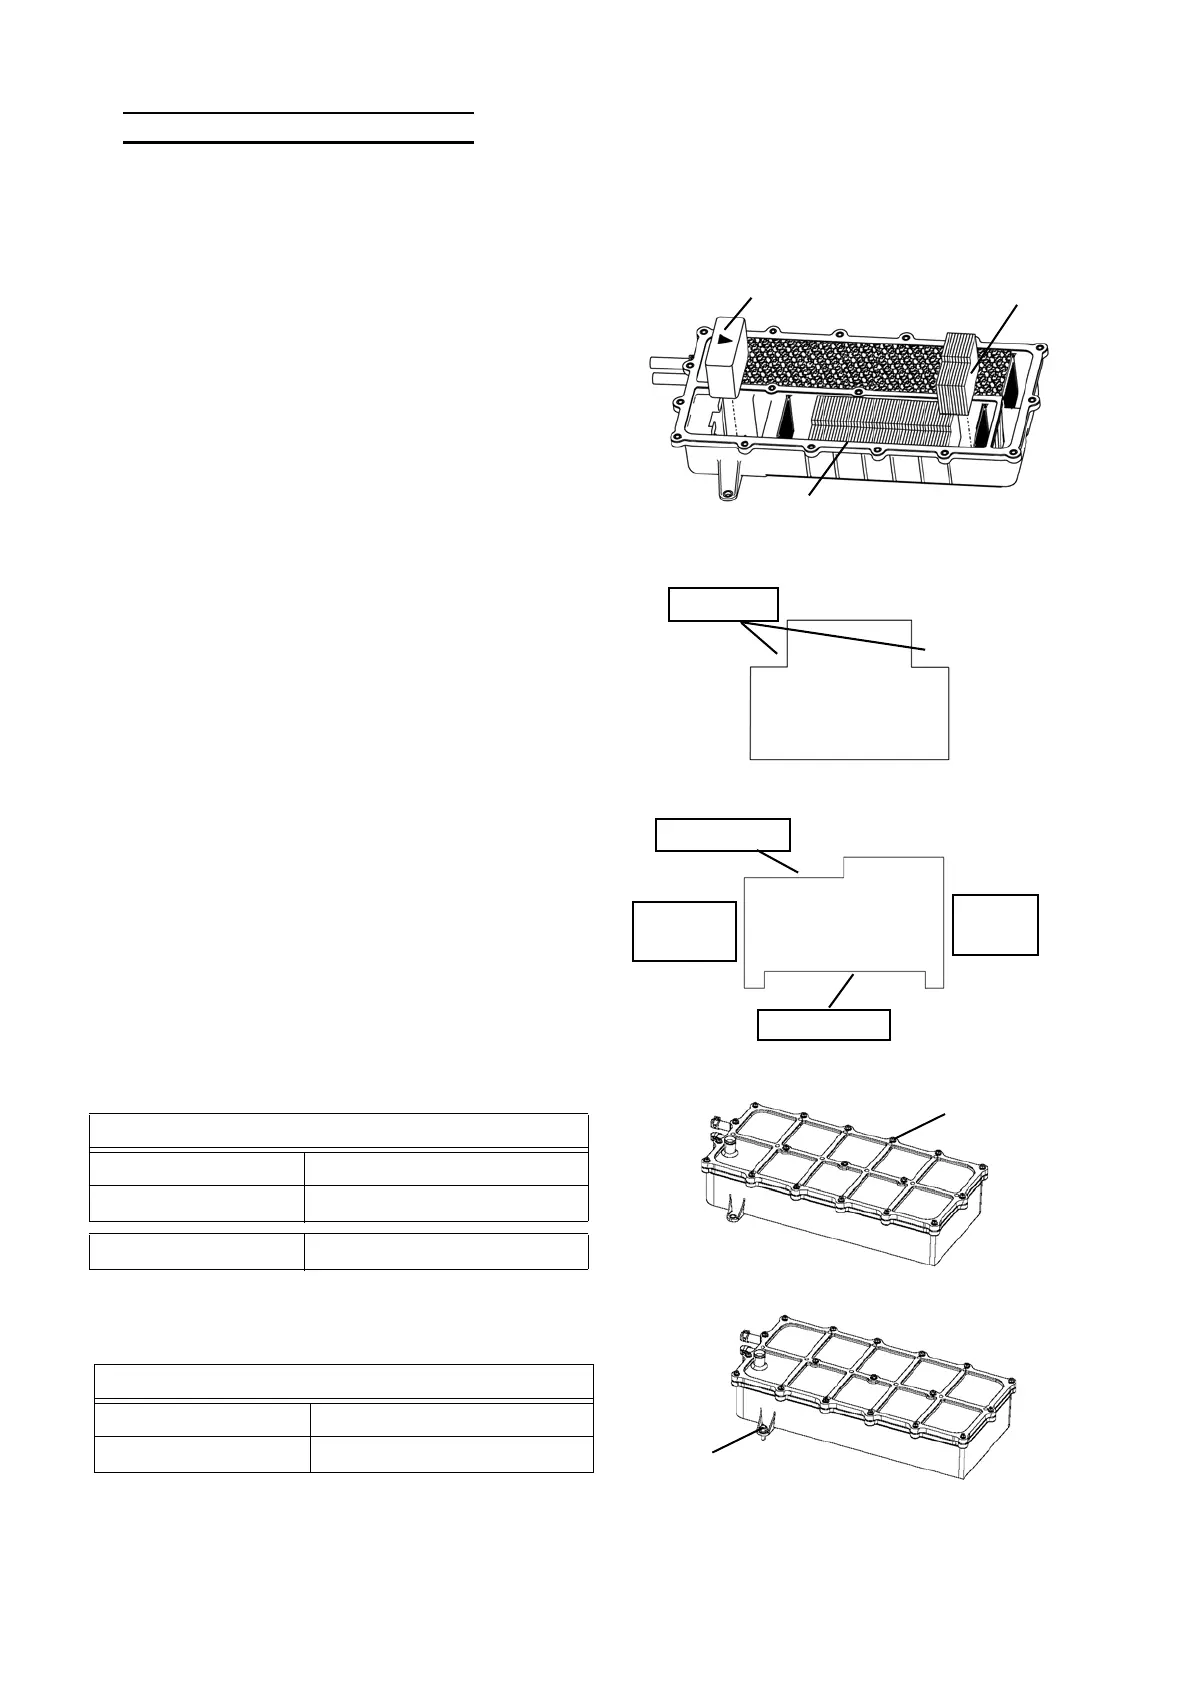
7) Drain Oil Filter Replacement
?Do this work following " Exhaust Water Drain Filter Inspection / Refilling".
1. Remove the drain oil filter No.1 (for separation), No.2
(for absorption) and the gasket.
2. Clean the inside of the box. Clean the portion holding
the drain oil filters in particular.
3. Replace the new drain oil filter No.1 (for separation),
No.2 (for absorption) and the new gasket.
NOTE)
Filter No.1 (separation)
Insert the oil filter No.1 (for separation) keeping the
arrow on the filter side up and point to the oil filter No.
2 (for absorption) to the box.
Filter No.2 (for absorption) : 8 TON
Insert the oil filter No. 2 (for absorption) keeping the
cutout side top of the box.
Filter No.2 (for absorption) : 15 TON
Insert the oil filter No. 2 (for absorption) keeping the
upper cutout facing outside of the box.
※ All the filters provided are already oriented to the
same direction to be inserted as it is. Be sure not
to replace it.
4. Tighten all bolts to install the lid.
5. Install the box on the outdoor unit. Tighten the bolt
(2 bolts for 8 TON).
Filter No.1
Gasket
Filter No.2
Cutout
Upper cutout
Inside of
the box
Outside of
the box
Lower cutout
Bolts
Number of bolts
8 TON 18 pieces
15 TON 19 pieces
Tightening torque 2.2 ± 0.7 lb·ft (3.0 ± 0.9 N·m)
Bolts
Tightening torque
8 TON 14.8 lb·ft (20.0 N·m)
15 TON 8.9 ± 2.7 lb·ft (12.0 ± 3.6 N·m)
 Loading...