203
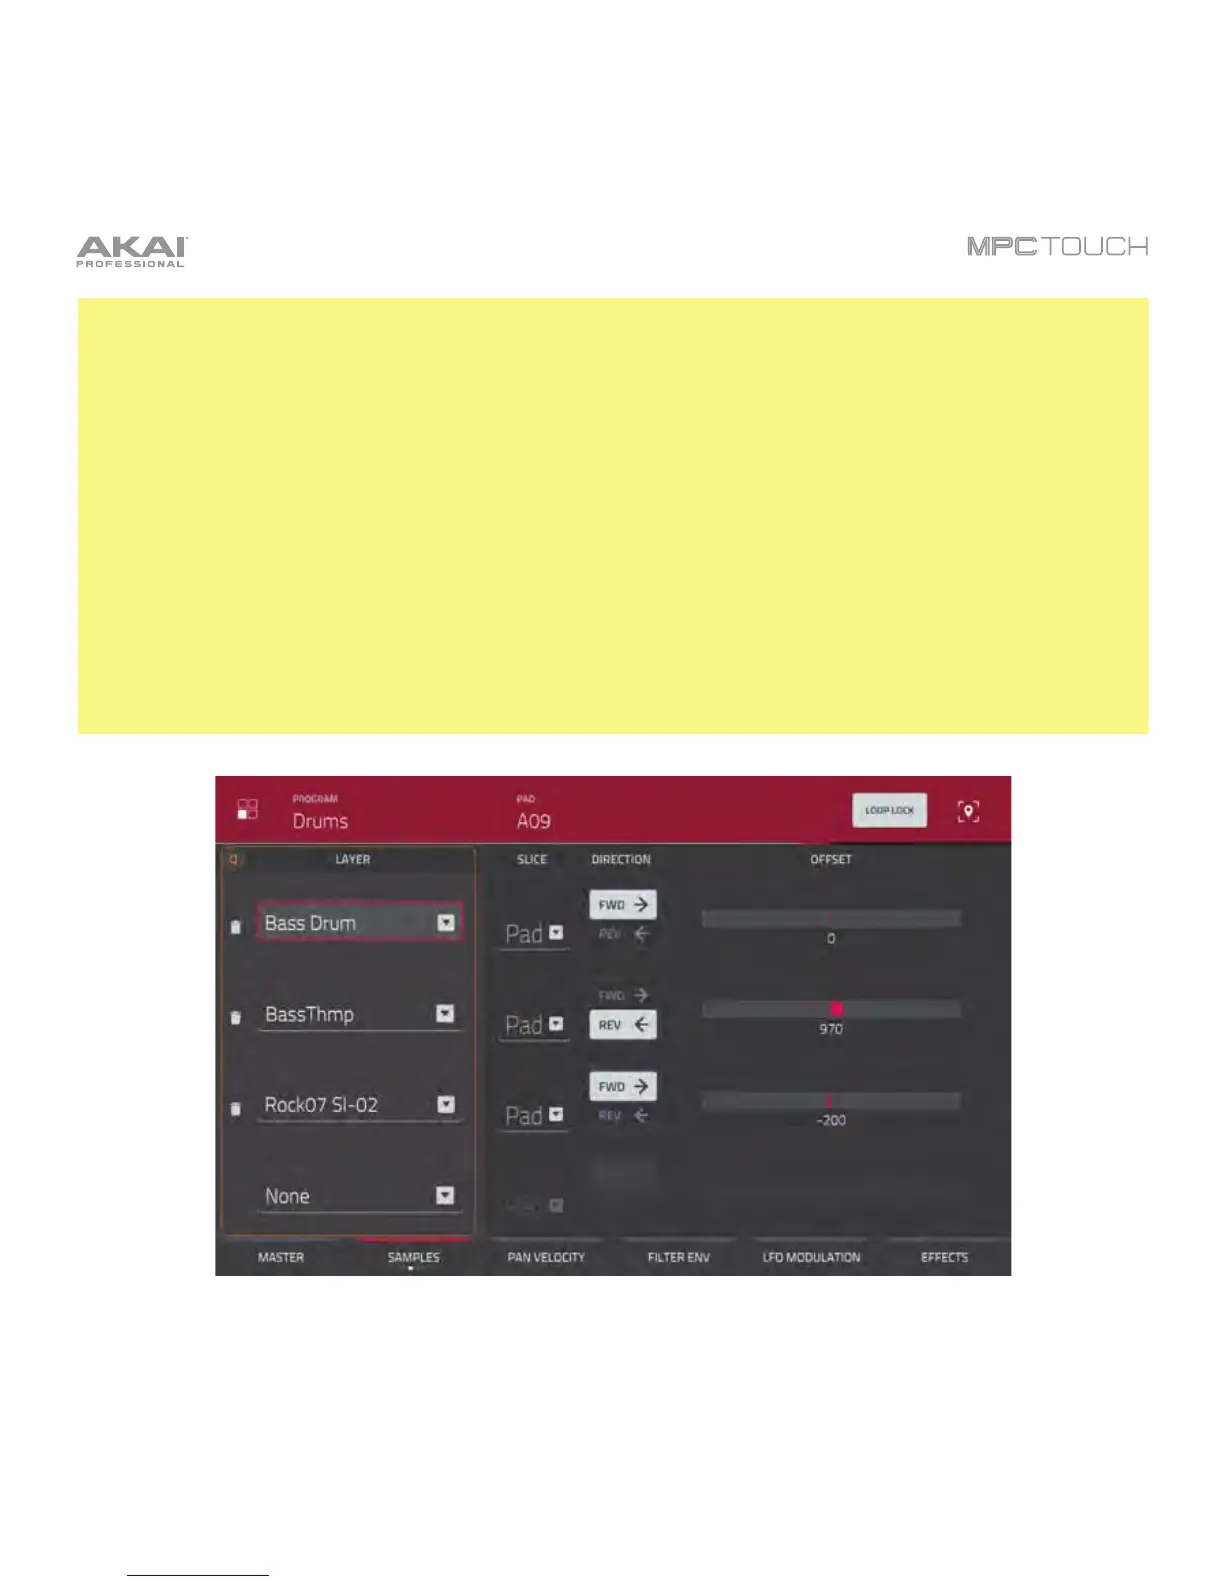
Important: The parameters on the second, third, and fourth Samples tabs work in conjunction with
Chop Mode (in Sample Edit Mode). Here’s how it works:
When working in Sample Edit Mode and using Chop Mode to divide a sample into slices for your pads,
you can convert a slice using Non-Destructive Slice or Pad Parameters.
A Non-Destructive Slice will let its pad to refer to that slice when you press it; the original sample
remains intact and each slice marker is like a “bookmark” for a pad. In Program Edit Mode, you’ll see
that the pad/layer to which it’s assigned has its Slice drop-down menu set to the corresponding slice
number in the original sample. Playing that pad will cause it to refer to that slice marker like a
“bookmark” instead of creating an entirely new sample of that slice. This means that you no longer have
to clutter your Project with a new sample for every slice (though you can still use this earlier method, if
you prefer).
A slice converted using Pad Parameters is very similar to a non-destructive slice described above. The
difference is that in Program Edit Mode, the pads/layers they’re assigned to have their Slice drop-down
menus set to Pad (instead of the slice number), and the Pad Start and Pad End points will correspond
to the slice markers in the original sample.
The second Samples tab for a drum program.