ADAV4601 System Design Document Confidential Information
Rev.1 August 2009 Analog Devices Page 29
Note: The green status bar only indicates if the audio flow has compiled properly, this is not an indication that the
flow has downloaded properly to the ADAV4601, therefore it is important to read back from the registers when
powering up the ADAV4601 to ensure that SigmaStudio is communicating properly with the USB adaptor board.
The graphical blocks in your flow can now be used to control the audio processing in real time. Sound should also
appear at the output of the device depending on the setup of the Audio flow i.e. provided the input mux is set
correctly and none of the outputs are muted.
Note: if you change the order of the blocks, or rewire any part of the audio flow, then you must recompile and
download the flow. There is no need to recompile if you simply adjust parameters. If you make any changes that
require a recompile, the status bar will turn blue again.
CREATING A NEW AUDIO FLOW
The previous section explains how to evaluate the ADAV4601 evaluation board with SigmaStudio using the
provided Sample Audio Flow. However if the user wants to create a new audio flow from scratch the procedure is as
follows;
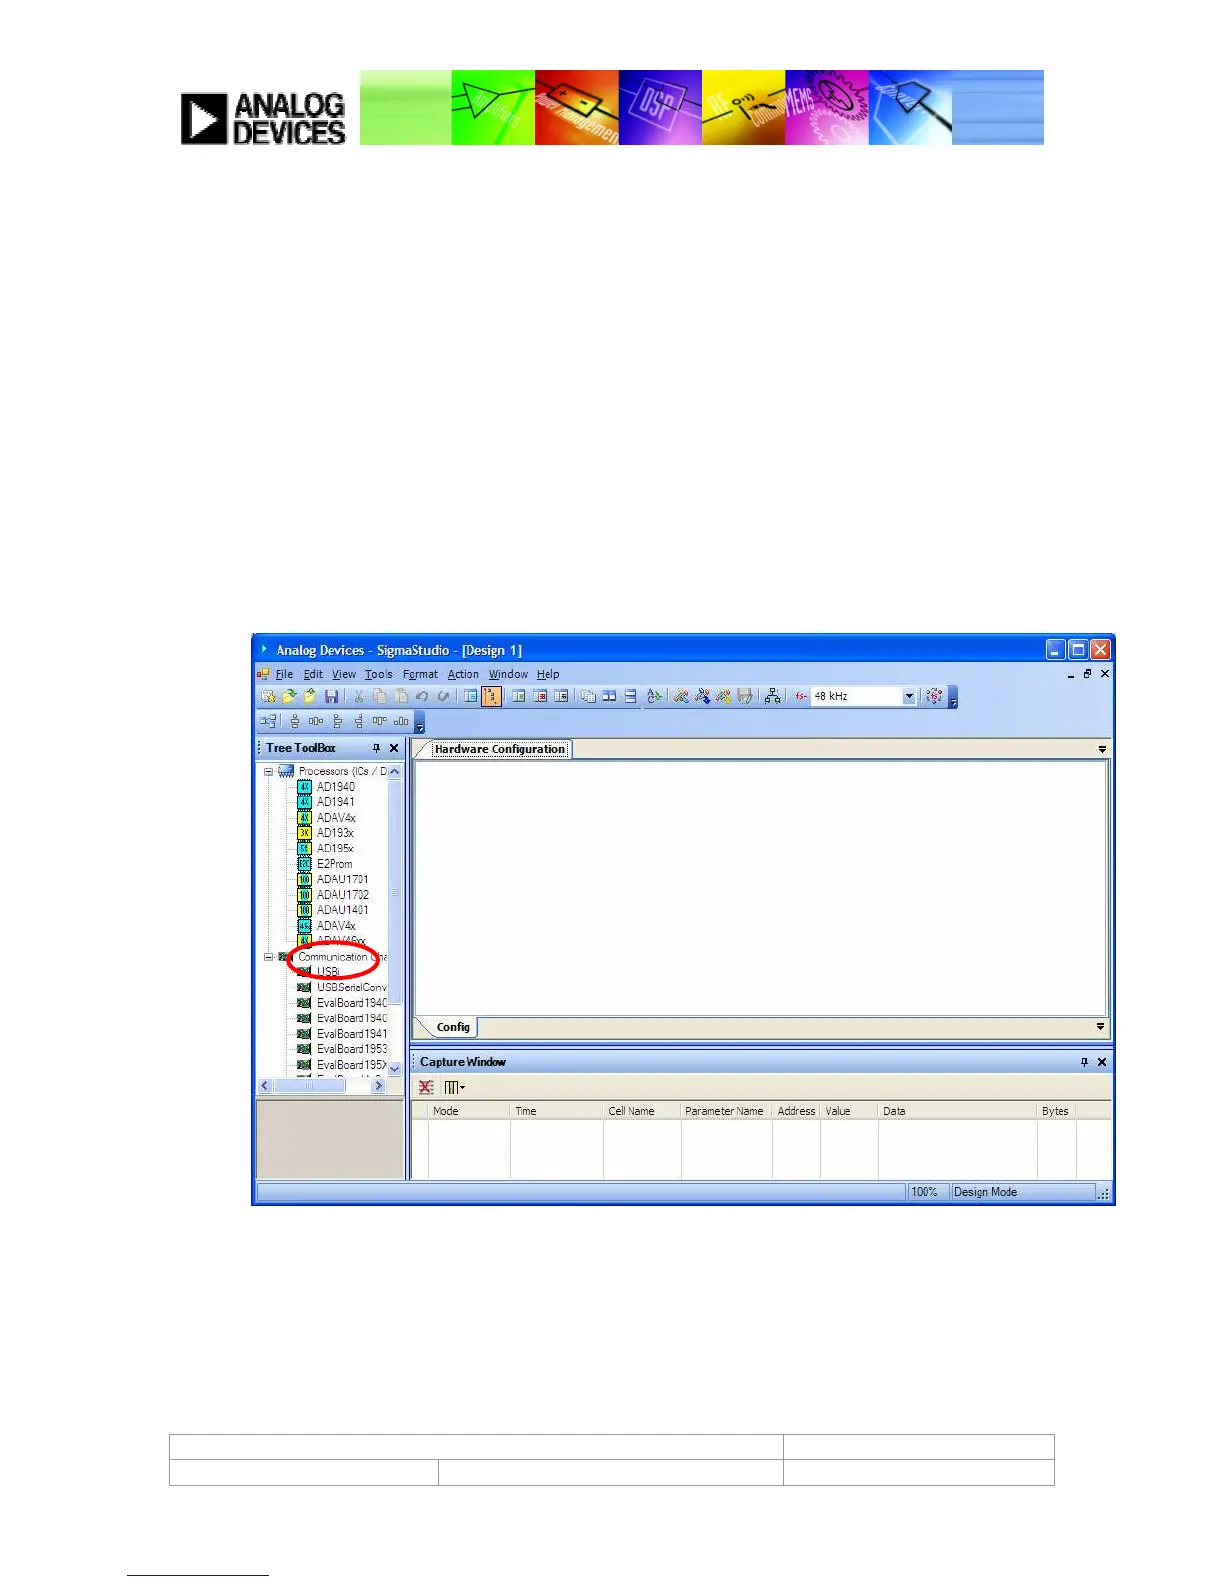
1.
In SigmaStudio create a new flow by clicking on File -> New Project. You should be presented with the
following window.
Figure 23: Selecting the Processor
2.
First, select the Correct Processor from the Processors (ICs/DSPs) List. Drag the icon labeled ADAV46xx
from the window on the left into the Hardware Configuration window on the right. This tells SigmaStudio
which processor you are using.
3.
Next you must select the correct hardware for communicating with the evaluation board. Click on the
Communications Channel tab and drag the icon labeled EvalBoard46xx into the main window.
4.
Connect the EvalBoard46xx block by clicking on the blue output pin to the green input pin on the
ADAV46xx block, as shown.
 Loading...