Chapter 2. Setup
NR xCell 46116A User Guide 9
Copyright © 2023, All Rights Reserved.
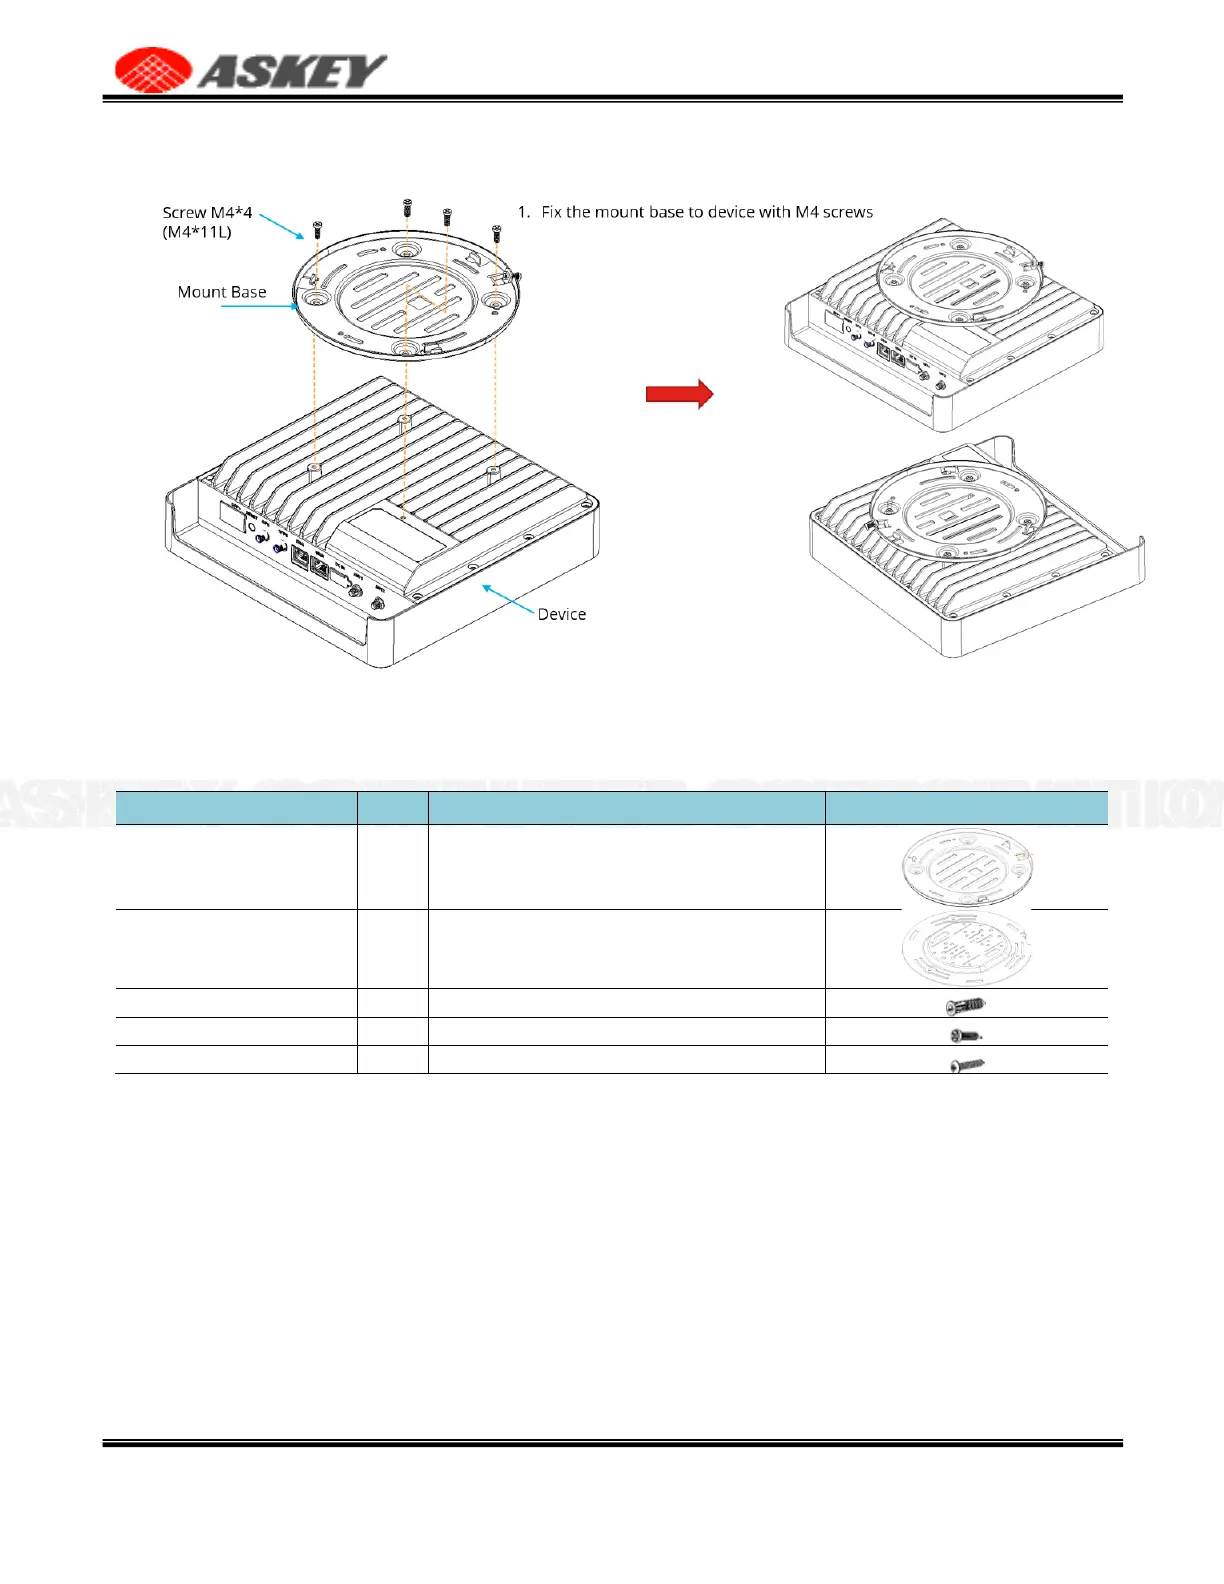
Figure 5. Fix the Mount Base to NR xCell 46116A
2.4.2 Wall Mount
Table 5. List of Items for Wall Mount
Fix the mount base to NR xCell 46116A with M4 screw*4
Fixed to the wall, used with the mount base to fix the NR
xCell 46116A
To fix the screws (STP3.5-20)
To fix the mount base to NR xCell 46116A
To fix the mount bracket to the wall
Installation steps,
1.
Place the mount bracket on the wall. Mark and drill 2 screw holes on the wall.
2.
Use a tool to insert 2 screw anchors into the drilled holes on the wall.
3.
Align the inserted screw anchors and the screw holes of the bracket. Fix the bracket to the wall by
fastening 2 screws(STP3.5-20).
4.
End.