Chapter 2. Setup
NR xCell 46116A User Guide 11
Copyright © 2023, All Rights Reserved.
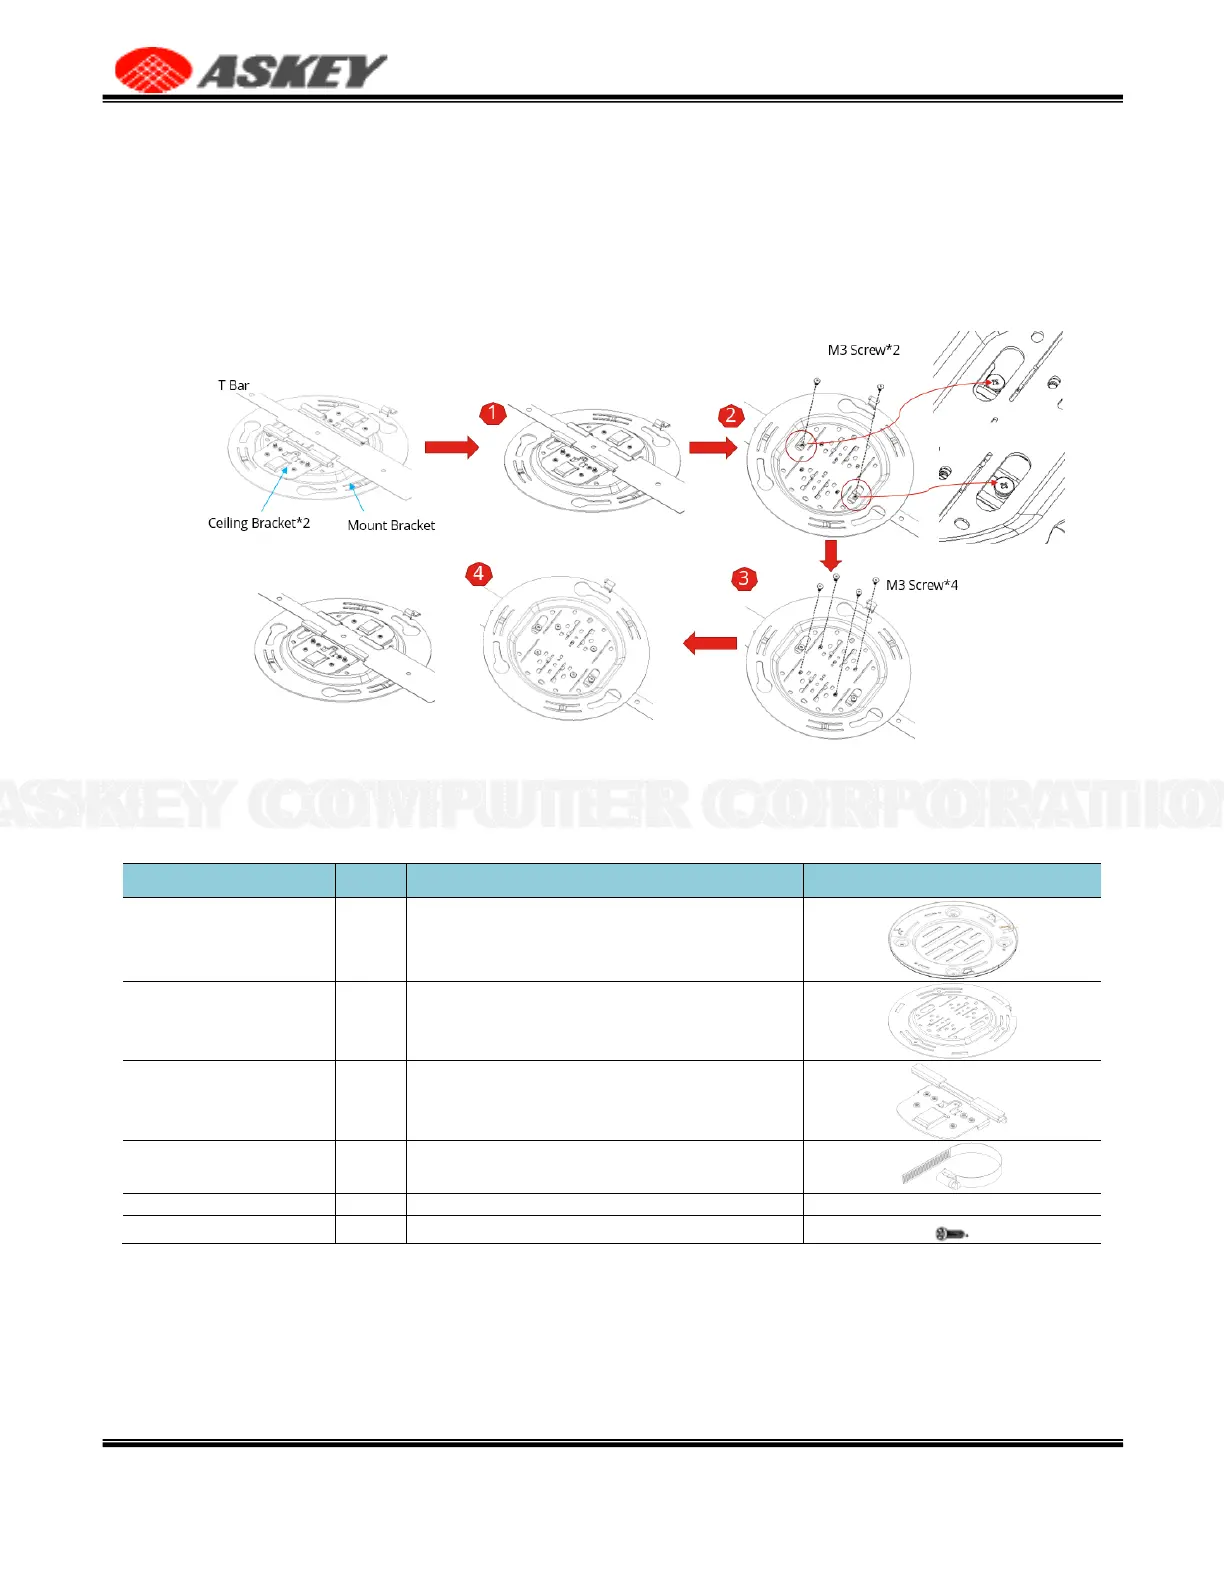
Installation steps,
1.
Adjust the Ceiling Bracket*2 to fit the width of the T Bar.
2.
Fastening M3 screws*2 to fix the Ceiling Bracket on the T Bar.
3.
Fastening M3 screws*4 to fix the Ceiling Bracket to the Mount Bracket.
4.
End.
Figure 8. Ceiling Mount Overview
2.4.4 Pole Mount
Table 7. List of Items for Pole Mount
Fix the mount base to NR xCell 46116A with M4 screw*4
Used with the mount base to fix the NR xCell 46116A
To fix mount bracket & lashing ring
To fix the ceiling bracket to the mount bracket
To fix the mount base to NR xCell 46116A
Installation steps,
1.
Fastening M3 screws*4 to fix the Ceiling Bracket on the Mount Bracket.
2.
Pass the lashing ring *2 through the Ceiling Bracket.
3.
The lashing ring wraps around the pole and please lock the lashing ring.
4.
End.